The workflow editor enables users to create new workflows and modify existing workflows.
Understanding the Workflows Table #

We can observe that each record represents a workflow.
Each workflow contains the following:
- Name– The name of the workflow.
- Type– There are 3 types of workflows.
- Instant – A workflow that starts with the Engini “button” trigger. There is no external or scheduled trigger.
- Scheduled – Scheduled workflow. It’s a workflow that starts with the “Schedule” trigger of Engini. This trigger enables the user to define specific time intervals in which the workflow starts to run.
- Automated -A workflow that is triggered by external triggers.
- Created Date– The date and time when the workflow was created.
- Created by– The user who created the workflow.
- Last run– The last date and time when the workflow ran.
- Connections-If there are connections within the workflow, you will see them listed here. For instance, in the workflow “Salesforce Won->Priority,” you can see that there are two connections: one for priority and one for Salesforce.
- Status– Here you can see if the workflow is activated. If active, the color will be green; otherwise, it will be red.
Edit Workflow page #
There are three ways to open the workflow editor:
First way #
- On the sidebar, click on the “WorkFlows” option.
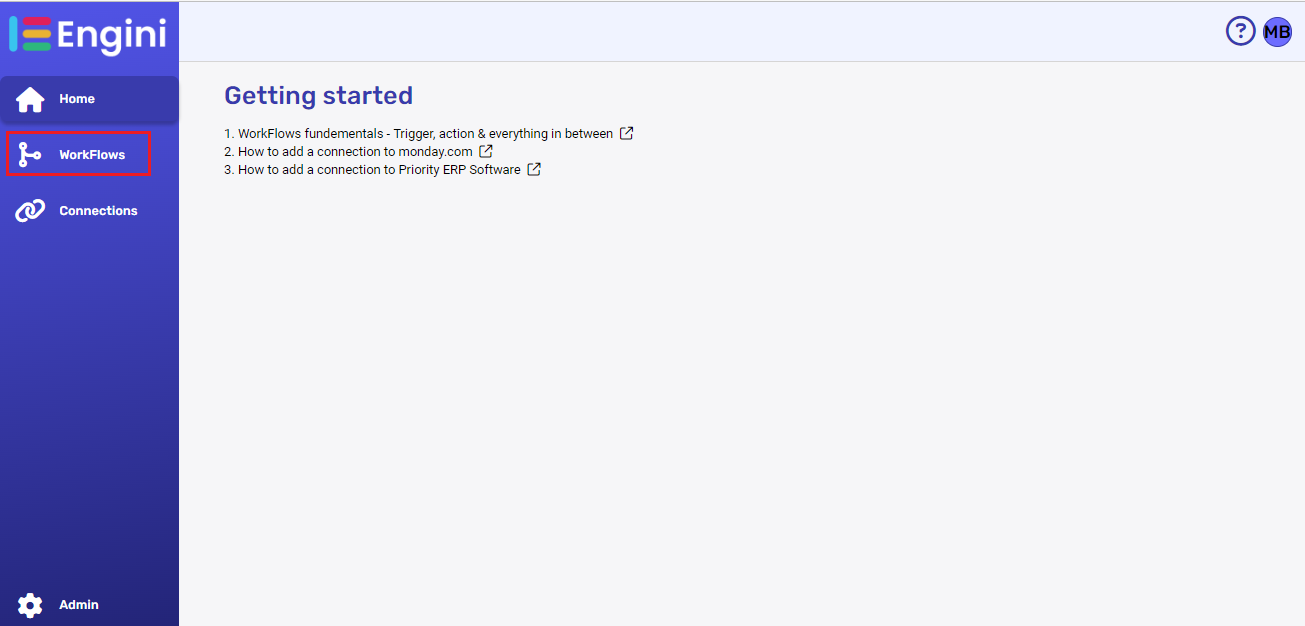
- Hover over the workflow you want to edit and click on the pencil right to workflow’s name.

- Hover over the workflow you want to edit and click on the pencil right to workflow’s name.
Second way #
- On the sidebar, click on the “WorkFlows” option.
- Click on the three dots on the right side of the workflow row in the table.

- Click on “Edit”.

Third way #
- On the sidebar, click on the “WorkFlows” option.
- Click on the name of the workflow you want to edit.
- Click on the pencil located on the top bar.

Add Activity #
Engini activities represent individual steps in your workflow. There are two types of activities available:
- Trigger – appears only one time in each workflow and always at the top. The trigger is what initiates the workflow run.
- Action – there is no limit to the number of actions you can add to your workflow. To add an action, follow the next steps:
- If you want to add an action between two existing activities, hover over the arrow between the two actions and click on the plus icon that appears.

- You can choose to add a sequential action that will appear before the lower of the two activities – click on “add an action”.

- You can choose to add a parallel activity – click on “add as parallel branch”.

- You can choose to add a sequential action that will appear before the lower of the two activities – click on “add an action”.
- If you want to add an action after the last action you added, click on the “next step” button.

Choose the Engini software and click on the name of the action you want to use.
For more information on the types of actions for each software, see the apps category.
- If you want to add an action between two existing activities, hover over the arrow between the two actions and click on the plus icon that appears.
Delete Activity #
- Click on the three dots on the right side of the activity.

- Click on the “Delete” option.

- In the warning window that pops up, click on the “Accept & Delete” button in case you sure you want to delete the activity. In other case, click on the “Cancel” button and the activity won’t be deleted.

Copy to clipboard #
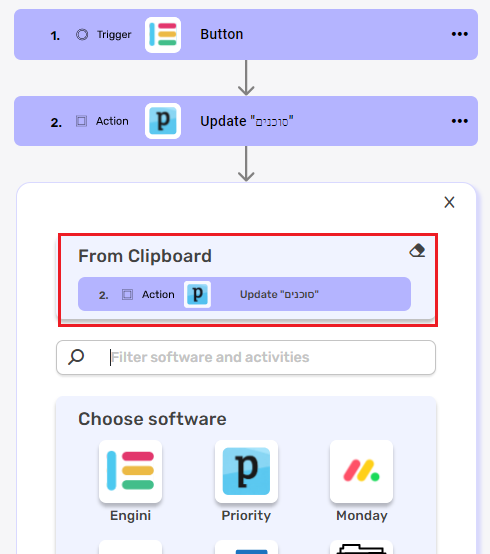
- Click on the three dots on the right side of the activity.
- Click on the “Copy to clipboard” option.

- In the next actions you add, you will have the option to paste the activity you copied by clicking on the activity as shown in the picture below.
Rename Activity #
- Click on the three dots on the right side of the activity.
- Click on the “Rename” option.

- The name field will be opened for editing, and you will be able to change the name of the activity.

- When you finish editing the activity name, click outside of the input field and the name will be saved automatically.
Note that if you won’t save the workflow the name change won’t take effect.
Refresh the connection #
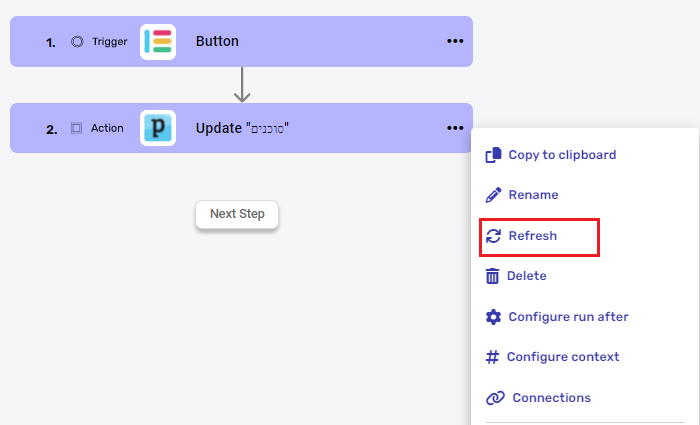
If you updated fields or objects in your software after the activity was created. You can “refresh” the connection, and then you will be able to use the fields or objects you updated.
- Click on the three dots on the right side of the activity.
- Click on the “Refresh” option.
Configure run after #
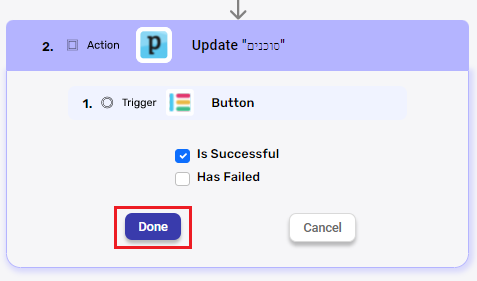
You can set a activity to run after the previous neighboring activity has succeeded or failed. The action will work only after the success or failure of the action before it. By default, each activity is configured to run after previous neighboring activity has succeeded.
To change the default settings, do the following:
- Click on the three dots on the right side of the activity.
- Click on the “Configure run after” option.

- After clicking on the option, the display of the activity will change and you can define if you want the current activity to work only after the previous activity succeeded, failed or both of them.

- Click the “Done” button to return the previous activity view.
Configure context #
The context field is a field that can be populated at runtime. This is a global variable in the workflow that you can populate in different activities throughout your workflow, and the value that will be displayed to the user is the last value that was populated in this variable. The value received in the field can be seen in the history table and thus allow the user to easily identify which run history to open.
- Click on the three dots on the right side of the activity.
- Click on the “Configure context” option.

- After clicking on the option, the display of the activity will change and you can define the context.

- Click the “Done” button to return the previous activity view.

Dynamic Connection #
Enable use of several different connections within the same activity.
- In the workflow, select an activity that includes the connections you want use
- Click on the 3 dots on the right side of the activity
- Choose ‘Dynamic connection’ in ‘Connections’

- Click on the empty field near the connection label

- Select the relevant connections for this activity.
- You can define conditions with functions that will choose which connection to use in this activity

- You can define conditions with functions that will choose which connection to use in this activity
- Finalize Connection Selection or Cancel Dynamic Connection
- Click “Done” to save your selection

- Click “Cancel” if you don’t want to save your selection
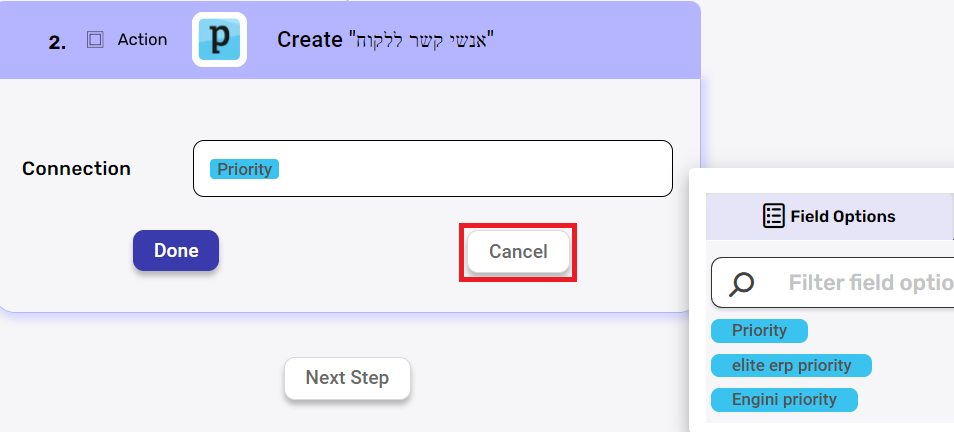
- Click “Done” to save your selection
Workflow edit Top Bar #

Save #
When you’re done editing your workflow, click the save icon to save your progress.
The workflow isn’t saved automatically.
If you have unsaved edits and you try to leave the page, to restore previous version or to run a workflow, Engini will display the Unsaved Changes dialog.
You can then choose from the following options:

- Discard Changes to leave without saving
- Save & Continue to keep your new edits and proceed to the page you wanted to navigate to.
- X to dismiss the dialog and remain on the page.
In addition, if you try to access another page without saving your changes in Engini, the system will display the following message:
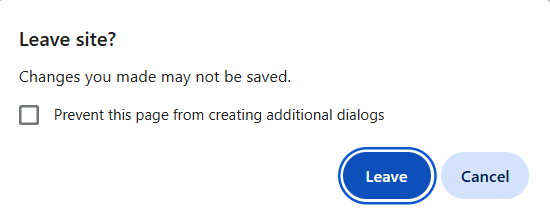
This is an extra layer of protection to ensure you don’t lose your work unintentionally. You can choose to leave the page or remain on the Engini page by clicking Cancel.
Restore #
Previous versions of workflows over 45 days will be automatically removed.
If you want to restore to a previous version, follow the next steps:
- Click on the restore icon located at the top bar.
- Choose the version you want to restore.
- Click on “Restore” button.
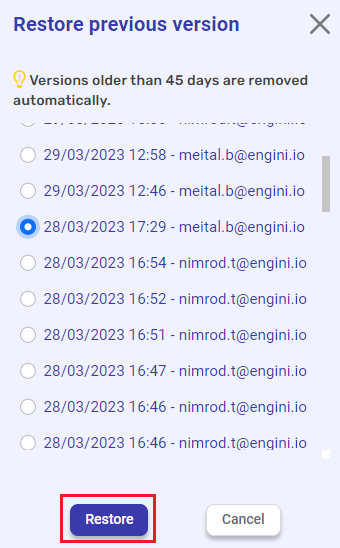
In order to restore the workflow to the version you chose to display, you need to save the workflow using the save button on the top bar. You can switch between versions freely. As long as you haven’t saved the version you retrieved, you can always go back to the original workflow.
Run #
Run your workflow to ensure that all components are functioning correctly.
To learn how to run workflow click here
Using values from previous operations #
- After you add an action, press on the text box to enter a value.
The pictures are for illustration only, it can be used in any activity.

2. Choose the previous activity from which you want to take a value and press on the arrow next to it.

3. Choose the value you want to use.

Webhook metadata #
Metadata can be useful for storing additional information about the object in a structured format. If you would like to use the metadata of certain conector:
1. Choose the action of the desired connector.

2. Press on the arrow next to the “Webhook metadata”

3.Choose the the data you need:

- Url- The address where the webhook expects to receive HTTP requests, It’s where the data will be sent after trigger.
- Method- The HTTP method used for sending data to the webhook endpoint.
- Headers[]-HTTP request headers contain additional information related to the request itself.
- Query parameters[]- key-value pairs, where the key identifies the parameter and the value is the information associated with that parameter.
- Url parameters[]-The additional information appended to a URL that is sent to a web server as part of an HTTP request.
- Body- The request body contains data that the client wants to send to the server.
Workflow status #
A workflow in Engini has two types of states: Active or inactive.
Active workflows run when their trigger is activated and also when you run them manually by testing them.
You can switch between the two statuses whenever you want (active workflows can become inactive and vice versa), by clicking the ON/OFF button in the top bar. To save the workflow status you have to save the workflow.

You can also change the workflow status from the details page of the workflow or from the workflow’s table.


.png)