Learn how to connect Engini to Shopify.
Getting Started with Shopify #
Prerequisites #
- A Shopify account
If you don’t have an account, create an account at www.shopify.com/signup.
Connecting Engini to Shopify #
Retrieve your Shopify access token #
- Log in to your Shopify admin dashboard and navigate to the “Apps” section.
- Click on the “App and sales channel setting” button.

- Click on the “Develop apps” button.

- Click on the “Create a new private app” button.

- Enter a name for your private app and provide an email address for notifications, then click on “create app” button.
- Click Configuration.

- Click on Configure button next to Admin API integration.

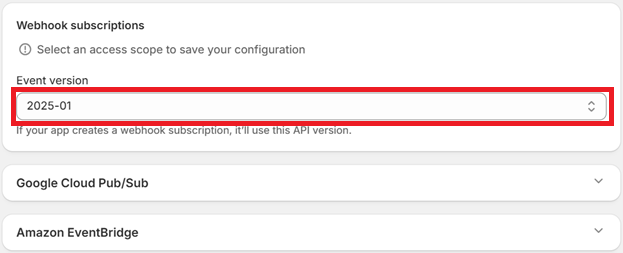
- Under the “Admin API” section, select the permissions that you want to grant to your app and Event version, for now choose 2025-01.
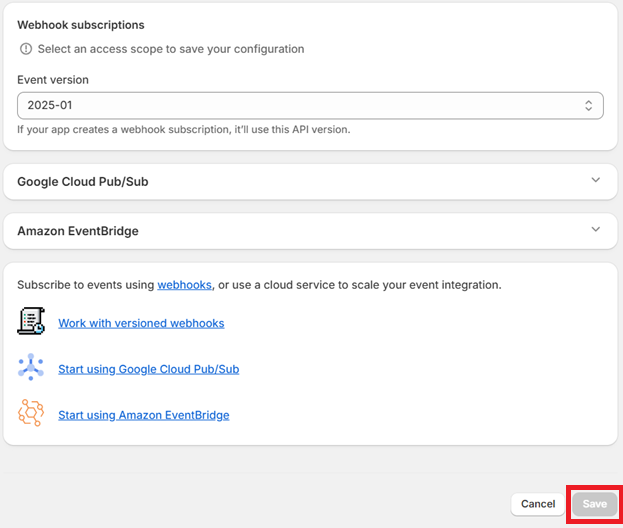
- Click on the “Save” button to create the private app.
- Switch to the API credentials tab and under Access tokens, click Install app.

- In the dialog that appears, confirm the action by clicking Install.

- Shopify creates an Admin API access token. Click Reveal token and copy the token.

Add a connection to Shopify in Engini #
To connect your Shopify account to Engini, follow the next steps:
- Enter your Engini account at https://app.engini.io.
- Navigate to Connections page by clicking on the Connections on the left sidebar or by clicking here.
- Click on the Add connection option located at the topbar.

- Choose Shopify option from the available applications

- Enter the following details in the “Edit Connection” form:
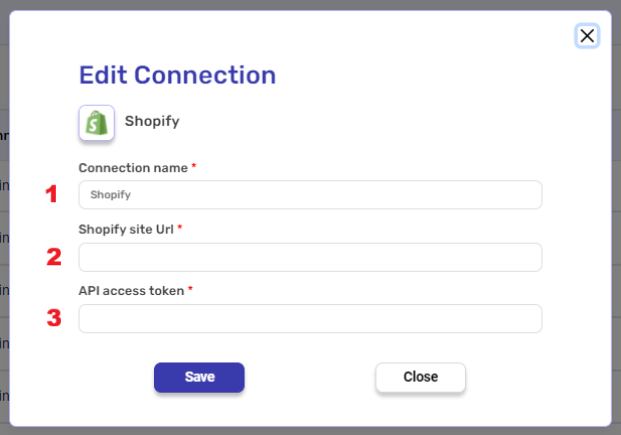
- Connection name – Enter a descriptive and unique name for this connection.
- Shopify site URL – Enter your Shopify store’s URL here.
- API access token – Enter the access token you obtained from Shopify.
General Information #
This section contains essential configurations for your Shopify integration. Please ensure your connection settings are optimized to avoid data mismatches.
Working with Shopify Metafields #
To successfully sync Metafields with Shopify, you must follow a strict structural workflow. Any deviation from this flow may result in failed API requests or Metafields not being saved.
Correct Implementation Flow:
- Initialize the Metafields Array
Create a variable and set its Object Element Type to Metafields. This variable will hold all Metafield objects.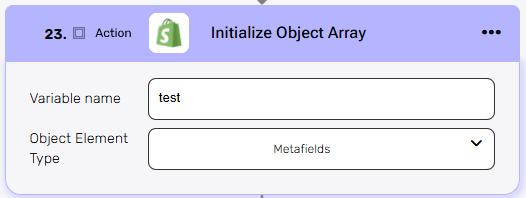
- Append Metafield Objects
Use the Append action to add Metafields one by one. Each Metafield object must include:namespacekeytypevalue
- Validate Data Types and Formatting
Ensure that each Metafield’stypeandvaluestrictly match Shopify’s expected schema.
For example, list-type Metafields must be properly serialized (e.g., arrays converted usingToJsonString).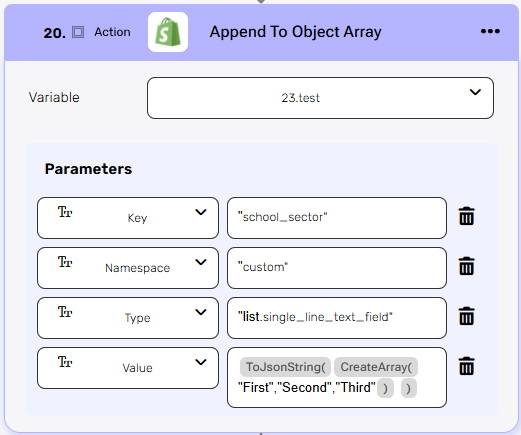
Important:
Shopify enforces strict validation on Metafield structure and data types. Any mismatch will cause the request to fail silently or the data to be ignored.
If you encounter issues with specific Metafield types or formatting, refer to the official Shopify Metafields API Documentation.
Shopify Subscription Plan #
Field availability depends on your Shopify Subscription Plan. In Basic plans, Shopify restricts access to specific business data. Attempting to fetch restricted fields will result in errors or empty data.
Common restricted fields in Basic plans:
- Payment Terms (ID/Name): Typically available only for Advanced/Plus or B2B transactions.
- Staff Member: Details of the staff member who processed the order.
Required Action: Within the Output Fields settings, ensure you uncheck or remove any fields not supported by your Shopify plan (such as Payment Terms or Staff Member). To prevent errors, select only standard fields like Customer, Total Price, and Line Items.
Triggers #
The trigger is executed automatically in response to a specific event.
Every workflow has to start with a trigger. You can use order, customer, refund and product triggers.
Orders #
Order Created #
An order is created when a customer completes the checkout process, during which time they provide an email address, billing address and payment information.

Listens for a new order creation.
Add conditions
If you want the trigger “Order Created” to be activated only under a certain condition, click on the “Add Condition” button.
By choosing to add a condition, the workflow will only work if the condition or the number of conditions you added are met. Follow the next steps to add conditions:
- Select the field from the dropdown on which you want to add the condition.
- Select the condition you want the record to meet.
- Click on the empty field and the tooltip will pop up showing the options you can choose.
- You can populate the field in one of the following options:
- Static value – number / string. when using strings, you need to surround them with single quotes (‘).
- Property value from a previous activity (Using the tooltip that opens when clicking on the field).
- Expression – using functions and/or Previous activity properties and/or static values (Using the tooltip that opens when clicking on the field).
- Repeat steps 1-4 for all the fields you want to populate.
Order Updated #
Listens for updates to an order based on specified conditions

Add conditions
If you want the trigger “Order Updated” to be activated only under a certain condition, click on the “Add Condition” button.
By choosing to add a condition, the workflow will only work if the condition or the number of conditions you added are met. Follow the next steps to add conditions:
- Select from the drop down the field you want to add the condition on.
- Select the condition you want the record to meet.
- Click on the empty field and the tooltip will pop up showing the options you can choose.
- You can populate the field in one of the following options:
- Static value – number / string. when using strings, you need to surround them with single quotes (‘).
- Property value from a previous activity (Using the tooltip that opens when clicking on the field).
- Expression – using functions and/or Previous activity properties and/or static values (Using the tooltip that opens when clicking on the field).
- Repeat steps 1-4 for all the fields you want to populate.
Order Fulfilled #
Listens for the fulfillment of an order based on your conditions.

In Shopify, “Order Fulfilled” means that the order has been processed, and the items purchased by the customer have been shipped or are on their way to the customer.
Add conditions
If you want the trigger “Order Fulfilled” to be activated only under a certain condition, click on the “Add Condition” button.
By choosing to add a condition, the workflow will only work if the condition or the number of conditions you added are met. Follow the next steps to add conditions:
- Select from the drop down the field you want to add the condition on.
- Select the condition you want the record to meet.
- Click on the empty field and the tooltip will pop up showing the options you can choose.
- You can populate the field in one of the following options:
- Static value – number / string. when using strings, you need to surround them with single quotes (‘).
- Property value from a previous activity (Using the tooltip that opens when clicking on the field).
- Expression – using functions and/or Previous activity properties and/or static values (Using the tooltip that opens when clicking on the field).
- Repeat steps 1-4 for all the fields you want to populate.
Order Paid #
Listens for the order being paid, based on your conditions.

Add conditions
If you want the trigger “Order Paid” to be activated only under a certain condition, click on the “Add Condition” button.
By choosing to add a condition, the workflow will only work if the condition or the number of conditions you added are met. Follow the next steps to add conditions:
- Select from the drop down the field you want to add the condition on.
- Select the condition you want the record to meet.
- Click on the empty field and the tooltip will pop up showing the options you can choose.
- You can populate the field in one of the following options:
- Static value – number / string. when using strings, you need to surround them with single quotes (‘).
- Property value from a previous activity (Using the tooltip that opens when clicking on the field).
- Expression – using functions and/or Previous activity properties and/or static values (Using the tooltip that opens when clicking on the field).
- Repeat steps 1-4 for all the fields you want to populate.
Order Cancelled #
Listens for the order being cancelled, based on your conditions.

Add conditions
If you want the trigger “Order Cancelled” to be activated only under a certain condition, click on the “Add Condition” button.
By choosing to add a condition, the workflow will only work if the condition or the number of conditions you added are met. Follow the next steps to add conditions:
- Select from the drop down the field you want to add the condition on.
- Select the condition you want the record to meet.
- Click on the empty field and the tooltip will pop up showing the options you can choose.
- You can populate the field in one of the following options:
- Static value – number / string. when using strings, you need to surround them with single quotes (‘).
- Property value from a previous activity (Using the tooltip that opens when clicking on the field).
- Expression – using functions and/or Previous activity properties and/or static values (Using the tooltip that opens when clicking on the field).
- Repeat steps 1-4 for all the fields you want to populate.
Customers #
Customer Created #
Listens for a new customer creation, based on your conditions.

Add conditions
If you want the trigger “Customer Created” to be activated only under a certain condition, click on the “Add Condition” button.
By choosing to add a condition, the workflow will only work if the condition or the number of conditions you added are met. Follow the next steps to add conditions:
- Select from the drop down the field you want to add the condition on.
- Select the condition you want the record to meet.
- Click on the empty field and the tooltip will pop up showing the options you can choose.
- You can populate the field in one of the following options:
- Static value – number / string. when using strings, you need to surround them with single quotes (‘).
- Property value from a previous activity (Using the tooltip that opens when clicking on the field).
- Expression – using functions and/or Previous activity properties and/or static values (Using the tooltip that opens when clicking on the field).
- Repeat steps 1-4 for all the fields you want to populate.
Customer Updated #
Listens for customer’s updates, based on your conditions.

Add conditions
If you want the trigger “Customer Updated” to be activated only under a certain condition, click on the “Add Condition” button.
By choosing to add a condition, the workflow will only work if the condition or the number of conditions you added are met. Follow the next steps to add conditions:
- Select from the drop down the field you want to add the condition on.
- Select the condition you want the record to meet.
- Click on the empty field and the tooltip will pop up showing the options you can choose.
- You can populate the field in one of the following options:
- Static value – number / string. when using strings, you need to surround them with single quotes (‘).
- Property value from a previous activity (Using the tooltip that opens when clicking on the field).
- Expression – using functions and/or Previous activity properties and/or static values (Using the tooltip that opens when clicking on the field).
- Repeat steps 1-4 for all the fields you want to populate.
Refund #
Refund Created #
Listens for refund creation, based on your conditions.

In Shopify, “Refund created” means that the seller has initiated the process of refunding the customer for a returned or cancelled order.
Add conditions
If you want the trigger “Refund Created” to be activated only under a certain condition, click on the “Add Condition” button.
By choosing to add a condition, the workflow will only work if the condition or the number of conditions you added are met. Follow the next steps to add conditions:
- Select from the drop down the field you want to add the condition on.
- Select the condition you want the record to meet.
- Click on the empty field and the tooltip will pop up showing the options you can choose.
- You can populate the field in one of the following options:
- Static value – number / string. when using strings, you need to surround them with single quotes (‘).
- Property value from a previous activity (Using the tooltip that opens when clicking on the field).
- Expression – using functions and/or Previous activity properties and/or static values (Using the tooltip that opens when clicking on the field).
- Repeat steps 1-4 for all the fields you want to populate.
Products #
Product Created #
Listens for a product creation, based on your conditions.
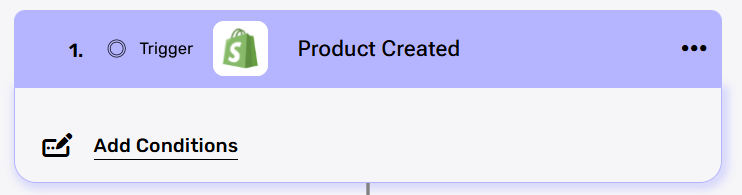
Listens for a product creation.
Add conditions
If you want the trigger “Product Created” to be activated only under a certain condition, click on the “Add Condition” button.
By choosing to add a condition, the workflow will only work if the condition or the number of conditions you added are met. Follow the next steps to add conditions:
- Select from the drop down the field you want to add the condition on.
- Select the condition you want the record to meet.
- Click on the empty field and the tooltip will pop up showing the options you can choose.
- You can populate the field in one of the following options:
- Static value – number / string. when using strings, you need to surround them with single quotes (‘).
- Property value from a previous activity (Using the tooltip that opens when clicking on the field).
- Expression – using functions and/or Previous activity properties and/or static values (Using the tooltip that opens when clicking on the field).
- Repeat steps 1-4 for all the fields you want to populate.
Product Updated #
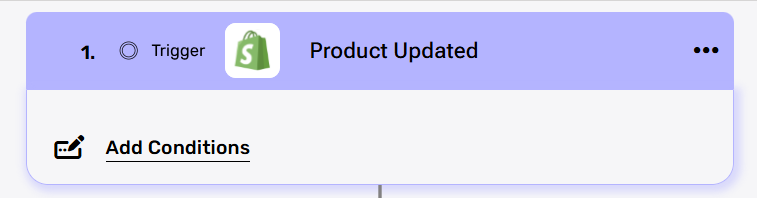
Listens for a product’s Updates.
Add conditions
If you want the trigger “Product Updated” to be activated only under a certain condition, click on the “Add Condition” button.
By choosing to add a condition, the workflow will only work if the condition or the number of conditions you added are met. Follow the next steps to add conditions:
- Select from the drop down the field you want to add the condition on.
- Select the condition you want the record to meet.
- Click on the empty field and the tooltip will pop up showing the options you can choose.
- You can populate the field in one of the following options:
- Static value – number / string. when using strings, you need to surround them with single quotes (‘).
- Property value from a previous activity (Using the tooltip that opens when clicking on the field).
- Expression – using functions and/or Previous activity properties and/or static values (Using the tooltip that opens when clicking on the field).
- Repeat steps 1-4 for all the fields you want to populate.
Actions #
Tags #
Add Tags #
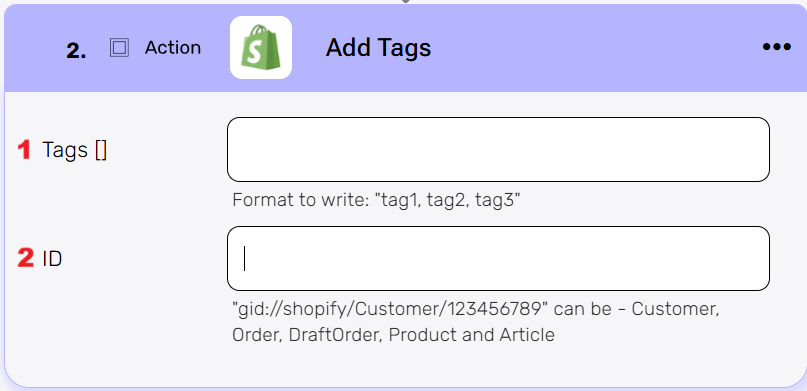
Now you can add tags to different objects.
- Tags
The list of tags you want to assign to the object. The format should be comma-separated, like in the example.
Click on the empty field and the tooltip will pop up showing the options you can choose.
You can populate the field in one of the following options:- Static value – number / string. when using strings, you need to surround them with single quotes (‘).
- Property value from a previous activity (Using the tooltip that opens when clicking on the field).
- Expression – using functions and/or Previous activity properties and/or static values (Using the tooltip that opens when clicking on the field).
- ID
The unique identifier of the object you want to tag. It must be in Shopify GID format, and can be used with Customers, Orders, Draft Orders and Products.
Click on the empty field and the tooltip will pop up showing the options you can choose.
You can populate the field in one of the following options:- Static value – number / string. when using strings, you need to surround them with single quotes (‘).
- Property value from a previous activity (Using the tooltip that opens when clicking on the field).
Products #
Get Product #
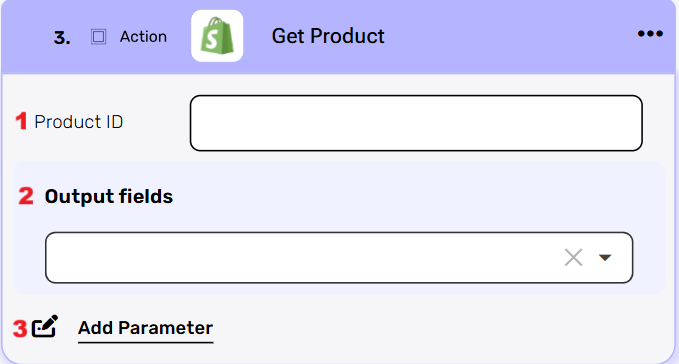
Get one product. To use the “Get product” activity in Engini you need to fill the id field:
- Product ID
- Click on the empty field and select the item ID that is relevant. you can use:
- Static value – number / string. when using strings, you need to surround them with single quotes (‘).
- Property value from a previous activity (Using the tooltip that opens when clicking on the field).
- Click on the empty field and select the item ID that is relevant. you can use:
- Output fields
Define which product properties are returned in the response. The dropdown lists all available properties (for example, product title, description, variants, and images). Selecting fields adds them to the response schema, while choosing all fields returns the full product object. If no fields are selected, all properties are automatically included by default. - Add Parameters
By clicking the “Add Parameter” button, you can define parameters or sort keys for your Shopify action. You can add one parameter or multiple parameters, up to the maximum number of existing parameters in the action. The available parameters vary depending on the specific Shopify action.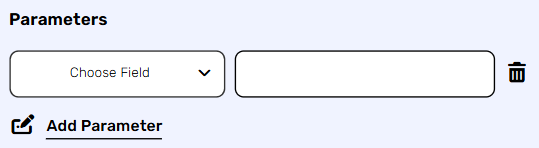
- Choose from the drop down the parameter you want to define.
- Click on the empty field to the right of the drop down to be shown the tooltip with all the options you can use to define the parameter.
- You can choose the value of the parameter using one of the following options:
- Static value: A number or string. For strings, you need to surround them with single quotes (”).
- Property value from a previous activity: Select a value from a previous activity using the tooltip that opens when you click on the field.
- Expression: Use functions, properties from previous activities, and/or static values.
- To add more parameters, repeat the steps above.
Get Products #

- Output fields
Define which products properties are returned in the response. The dropdown lists all available properties (for example, products title, descriptions and product id). Selecting fields adds them to the response schema, while choosing all fields returns the full products object. If no fields are selected, all properties are automatically included by default. - Add Filters
allows you to refine the list of products that will be returned. Each filter is defined by selecting a field (such as products id, barcode or price), choosing a condition (for example equals, greater than, less than, or contains), and then specifying a value. By applying filters, you can narrow the query results to only the products that meet the given criteria, instead of retrieving all products.- Click on the field to show the tooltip with all the options you can choose.
- You can populate the field in one of the following options:
- Static value – number / string. when using strings, you need to surround them with single quotes (‘).
- Property value from a previous activity (Using the tooltip that opens when clicking on the field).
- Add Parameters
By clicking the “Add Parameter” button, you can define parameters or sort keys for your Shopify action. You can add one parameter or multiple parameters, up to the maximum number of existing parameters in the action. The available parameters vary depending on the specific Shopify action.
- Choose from the drop down the parameter you want to define.
- Click on the empty field to the right of the drop down to be shown the tooltip with all the options you can use to define the parameter.
- You can populate the parameter using one of the following options:
- Static value: A number or string. For strings, you need to surround them with single quotes (”).
- Property value from a previous activity: Select a value from a previous activity using the tooltip that opens when you click on the field.
- Expression: Use functions, properties from previous activities, and/or static values.
- To add more parameters, repeat the steps above.
Create Product #

Creates a new product. To use the “Create product” activity block in Engini you need to fill to following fields:
- Title
The title is the name of the new product you create. The title can come from the trigger or another action you performed in the process before the “create product” action.
Click on the empty field and select the title of the new item you create. you can use:- Static value – number / string. when using strings, you need to surround them with single quotes (‘).
- Property value from a previous activity (Using the tooltip that opens when clicking on the field).
- Add Field
By clicking the “Add field” button, you can choose how to fill in the various fields in the record you are creating. You can add one field to the activity or more fields to the activity definitions, up to the number of fields in the board.- Choose from the drop down the field you want to fill.
- Click on the empty field to the right of the drop down to be shown the tooltip with all the options you can use to fill the field.
- You can populate the field in one of the following options:
- Static value – number / string. when using strings, you need to surround them with single quotes (‘).
- Property value from a previous activity (Using the tooltip that opens when clicking on the field).
- Expression – using functions and/or Previous activity properties and/or static values (Using the tooltip that opens when clicking on the field).
- Repeat steps 1-3 for all the fields you want to populate.
Object Array Fields: Media [], Metafields [], Product Options []
Each one of them is an array of objects. The array is initialized using Intialize Object Array, and each object is added to it with Append to Object Array. In case of a single object, the Append to Object Array is not required.
Update product #

- Product ID
Click on the empty field Select the item ID that is relevant (Note that you choose an ID and not a name).
You can use:- Static value – number / string. when using strings, you need to surround them with single quotes (‘).
- Property value from a previous activity (Using the tooltip that opens when clicking on the field).
- Add Field
By clicking the “Add field” button, you can choose how to fill in the various fields in the record you are updating. You can add one field to the activity or more fields to the activity definitions, up to the number of fields in the board.- Choose from the drop down the field you want to fill.
- Click on the empty field to the right of the drop down to be shown the tooltip with all the options you can use to fill the field.
- You can populate the field in one of the following options:
- Static value – number / string. when using strings, you need to surround them with single quotes (‘).
- Property value from a previous activity (Using the tooltip that opens when clicking on the field).
- Expression – using functions and/or Previous activity properties and/or static values (Using the tooltip that opens when clicking on the field).
- Repeat steps 1-3 for all the fields you want to populate.
Object Array Fields: Media [], Metafields []
Each one of them is an array of objects. The array is initialized using Intialize Object Array, and each object is added to it with Append to Object Array. In case of a single object, the Append to Object Array is not required.
Object Array #
Initializes Object Array #
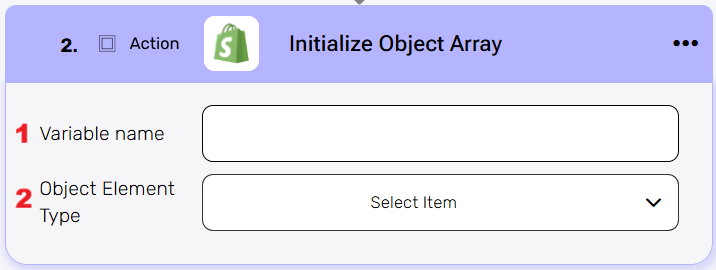
This activity initializes an object array in Shopify and stores a single structured entry based on the selected object type (e.g. Fulfillment Order Line Items ,Line Items).
- Variable Name
Enter the name of the variable that will hold the initialized object array. This name will be used throughout the workflow whenever you refer to this object array. - Object Element Type
This field defines the type of data the array will store, such as Fulfillment Order Line Items ,Line Items. The selected type determines the structure of the array and its use in subsequent actions.
Append To Object Array #
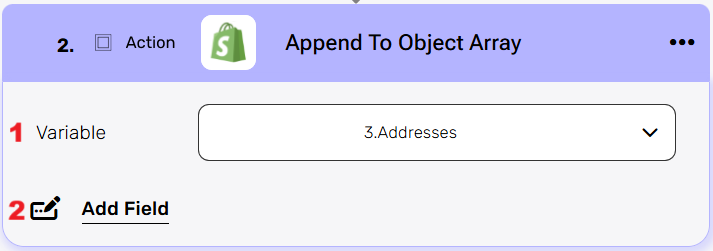
Append To Object Array is used to add new elements into an array of objects.
This action is directly connected to Initialize Object Array.
- Variable
dropdown that lists all object arrays initialized in previous steps of the workflow. Here you select the specific array to which a new object will be appended. - Add Field
shows all fields defined under Object Element Type during the Initialize step. Selecting fields here allows you to provide values for each property of the object schema.
Map Array #
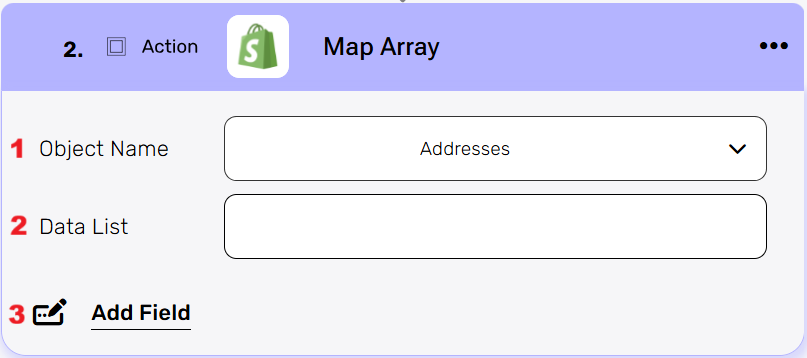
The map array activity allows you to transform an object that contains multiple pieces of data into a new data list based on the fileds and values you choose.
- Object Name
Select the object you want to map. The available options are the same objects that were previously initialized using Initialize Object Array. - Data List
The data provided here must match the structure of the selected object name. Once the object is chosen, you will be able to add fields that correspond to the fields defined in that object. - Add Field
You can add one field to the activity or more fields to the activity, up to the number of fields you have in the selected object.- Choose from the drop down the field you want to fill.
- Click on the empty field to the right of the drop down to be shown the tooltip with all the options you can use to fill the field.
- You can populate the field in one of the following options:
- Static value – number / string. when using strings, you need to surround them with single quotes (‘).
- Property value from a previous activity (Using the tooltip that opens when clicking on the field).
- Expression – using functions and/or Previous activity properties and/or static values (Using the tooltip that opens when clicking on the field).
- Repeat steps 1-3 for all the fields you want to populate.
Inventory #
Get Inventory Item #
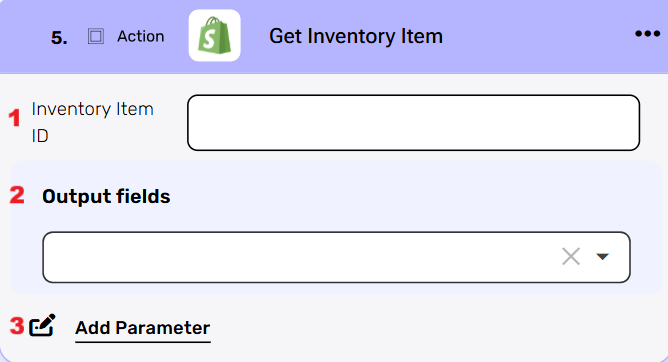
Get one Inventory Item. To use the “Get Inventory Item” activity in Engini you need to fill the id field:
- Inventory Item ID
Click on the empty field Select the item ID that is relevant. you can use:- Static value – number / string. when using strings, you need to surround them with single quotes (‘).
- Property value from a previous activity (Using the tooltip that opens when clicking on the field).
- Output fields
Define which Inventory Item properties are returned in the response. The dropdown lists all available properties (for example, Inventory Item ID, description, quantities, and images). Selecting fields adds them to the response schema, while choosing all fields returns the full Inventory Item object. If no fields are selected, all properties are automatically included by default. - Add Parameters
By clicking the “Add Parameter” button, you can define parameters or sort keys for your Shopify action. You can add one parameter or multiple parameters, up to the maximum number of existing parameters in the action. The available parameters vary depending on the specific Shopify action.
- Choose from the drop down the parameter you want to define.
- Click on the empty field to the right of the drop down to be shown the tooltip with all the options you can use to define the parameter.
- You can populate the parameter using one of the following options:
- Static value: A number or string. For strings, you need to surround them with single quotes (”).
- Property value from a previous activity: Select a value from a previous activity using the tooltip that opens when you click on the field.
- Expression: Use functions, properties from previous activities, and/or static values.
- To include more parameters, repeat the steps above.
Update Inventory Item #
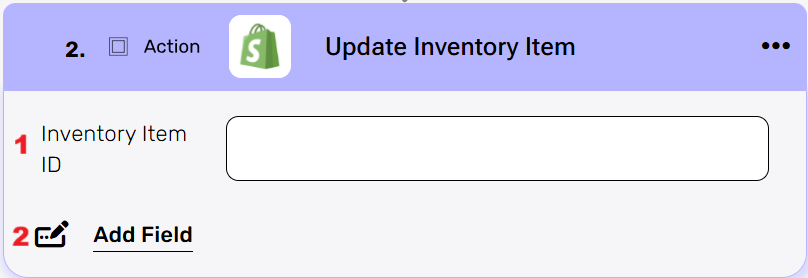
- Inventory Item ID
The id of the Inventory Item you want to update.- Click on the empty field Select the item ID that is relevant. you can use:
- Static value – number / string. when using strings, you need to surround them with single quotes (‘).
- Property value from a previous activity (Using the tooltip that opens when clicking on the field).
- Click on the empty field Select the item ID that is relevant. you can use:
- Add Field
By clicking the “Add field” button, you can choose how to fill in the various fields in the Inventory Item you are updating his variants. You can add one field to the activity or more fields to the activity definitions.- Choose from the drop down the field you want to fill.
- Click on the empty field to the right of the drop down to be shown the tooltip with all the options you can use to fill the field.
- You can populate the field in one of the following options:
- Static value – number / string. when using strings, you need to surround them with single quotes (‘).
- Property value from a previous activity (Using the tooltip that opens when clicking on the field).
- Expression – using functions and/or Previous activity properties and/or static values (Using the tooltip that opens when clicking on the field).
- Repeat steps 1-3 for all the fields you want to populate.
Update Inventory level #
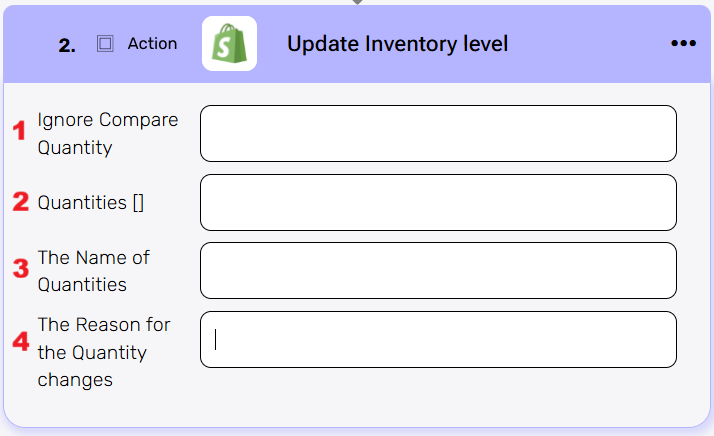
In Shopify, the Inventory Level represents the actual quantity of an item available at a specific location.
- Ignore Compare Quantity
A Boolean indicating whether Shopify should skip the comparison against the current stock quantity. If False, the update will proceed regardless of mismatched values. - Quantities []
This expects an array of objects. To build it, you must first initialize an Object Array and then append elements using Append To Object Array. Each object in this array represents one inventory update.
Each element you append to the Quantities array includes the following fields:- Inventory Item Id – The unique identifier of the inventory item you want to update.
- Compare Quantity – The current stock level you expect to see in Shopify before the update. Used for concurrency control.
- Location Id – The ID of the location (warehouse or store) where this inventory change applies.
- Quantity – The new stock level you want to set for the item at the given location.
- The Name of Quantities
The label or identifier for the quantities array, used internally in the workflow to reference this object. Can be “AVAILABLE” or “ON_HAND”. - The Reason for the Quantity changes
An Enum field to specify why the inventory level was modified (for example: “restock”, “other”, or “correction” and some more).
Order #
Get Order #
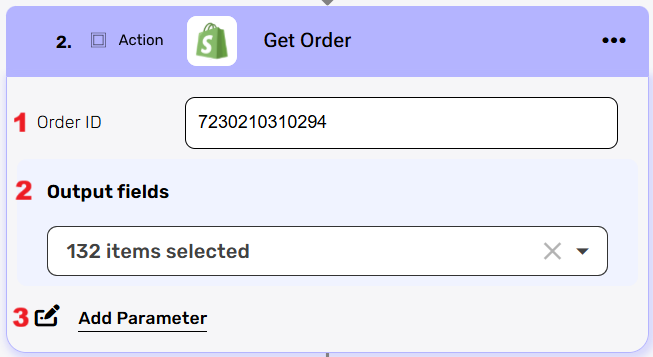
- Order ID
Click on the empty field and choose how to populate the field in one of the following options:- Static value – number / string. when using strings, you need to surround them with single quotes (‘).
- Property value from a previous activity (Using the tooltip that opens when clicking on the field).
- Output fields
Define which Inventory Item properties are returned in the response. The dropdown lists all available properties (for example, Inventory Item ID, description, quantities, and images). Selecting fields adds them to the response schema, while choosing all fields returns the full Inventory Item object. If no fields are selected, all properties are automatically included by default. To more information about Shopify Subscription Plan For this action , discounted-plan subscribers cannot select the fields:- Payment Terms – Id
- Staff Member – Email
- Staff Member – Id
- Staff Member – Name
- Staff Member – Phone
- Add Parameters
By clicking the “Add Parameter” button, you can define parameters or sort keys for your Shopify action. You can add one parameter or multiple parameters, up to the maximum number of existing parameters in the action. The available parameters vary depending on the specific Shopify action.
Create Order #
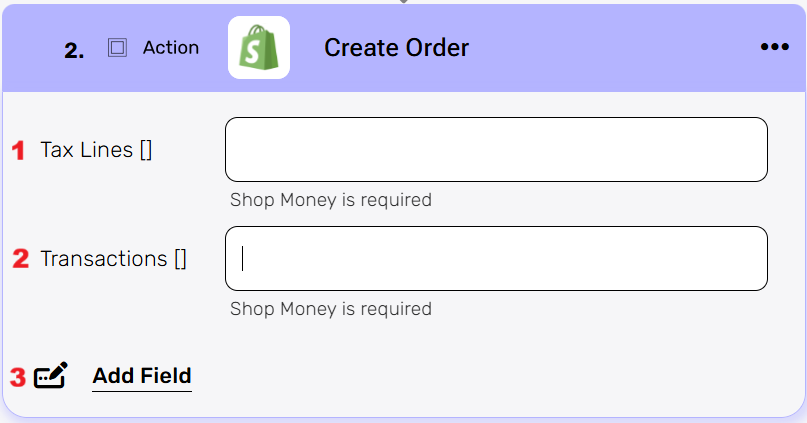
- Tax Lines []
An array of tax details applied to the order. Each tax line can include information such as the tax rate, title (e.g., “VAT”), and the amount charged. - Transactions []
A list of payment transactions related to the order. Each transaction can include details such as the payment method, amount, and status. This is required when recording how the order was paid (e.g., credit card, PayPal, shop money). - Add Field
By clicking the “Add field” button, you can choose how to fill in the various fields in the Order you are creating. You can add one field to the activity or more fields to the activity definitions.- Choose from the drop down the field you want to fill.
- Click on the empty field to the right of the drop down to be shown the tooltip with all the options you can use to fill the field.
- You can populate the field in one of the following options:
- Static value – number / string. when using strings, you need to surround them with single quotes (‘).
- Property value from a previous activity (Using the tooltip that opens when clicking on the field).
- Expression – using functions and/or Previous activity properties and/or static values (Using the tooltip that opens when clicking on the field).
- Repeat steps 1-3 for all the fields you want to populate.
Object Array Fields: Custom Attributes [], Line Items [], Metafields []
Each one of them is an array of objects. The array is initialized using Initialize Object Array, and each object is added to it with Append to Object Array. In case of a single object, the Append to Object Array is not required.
Update Order #
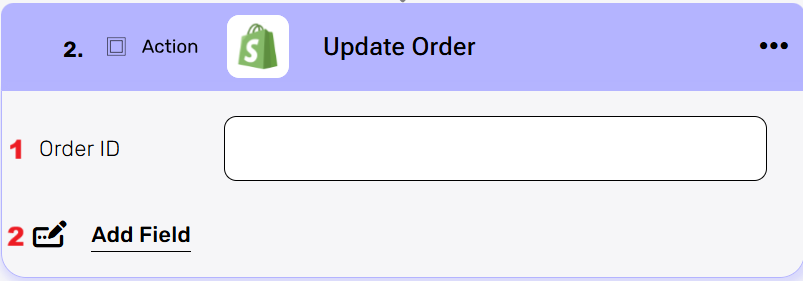
- Order ID
The id of the order you want to update. Click on the field and choose how to populate the field in one of the following options:- Static value – number / string. when using strings, you need to surround them with single quotes (‘).
- Property value from a previous activity (Using the tooltip that opens when clicking on the field).
- Add Field
By clicking the “Add field” button, you can choose how to fill in the various fields in the order you are updating. You can add one field to the activity or more fields to the activity definitions.- Choose from the drop down the field you want to fill.
- Click on the empty field to the right of the drop down to be shown the tooltip with all the options you can use to fill the field.
- You can populate the field in one of the following options:
- Static value – number / string. when using strings, you need to surround them with single quotes (‘).
- Property value from a previous activity (Using the tooltip that opens when clicking on the field).
- Expression – using functions and/or Previous activity properties and/or static values (Using the tooltip that opens when clicking on the field).
- Repeat steps 1-3 for all the fields you want to populate.
Object Array Fields: Custom Attributes [], Metafields [], Localized Fields []
Each one of them is an array of objects. The array is initialized using Initialize Object Array, and each object is added to it with Append to Object Array. In case of a single object, the Append to Object Array is not required.
Variant #
Get variant #
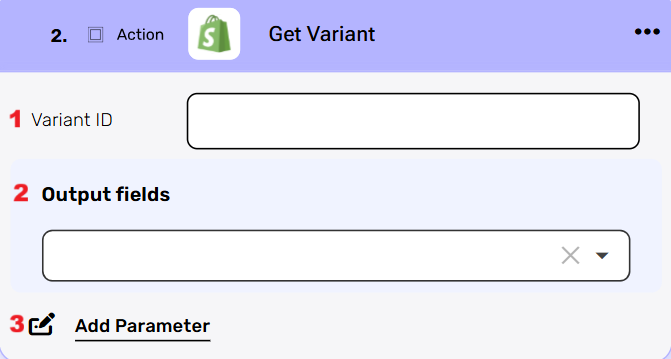
Specific version of a product that has a unique combination of attributes such as size, color, material, and price.
- Variant ID
Click on the field and choose how to populate the field in one of the following options:- Static value – number / string. when using strings, you need to surround them with single quotes (‘).
- Property value from a previous activity (Using the tooltip that opens when clicking on the field).
- Output Fields
Define which variant properties are returned in the response. The dropdown lists all available properties (for example, variant title, description and images). Selecting fields adds them to the response schema, while choosing all fields returns the full variant object. If no fields are selected, all properties are automatically included by default. - Add Parameters
By clicking the “Add Parameter” button, you can define parameters or sort keys for your Shopify action. You can add one parameter or multiple parameters, up to the maximum number of existing parameters in the action. The available parameters vary depending on the specific Shopify action.
- Choose from the drop down the parameter you want to define.
- Click on the empty field to the right of the drop down to be shown the tooltip with all the options you can use to define the parameter.
- You can populate the parameter using one of the following options:
- Static value: A number or string. For strings, you need to surround them with single quotes (”).
- Property value from a previous activity: Select a value from a previous activity using the tooltip that opens when you click on the field.
- Expression: Use functions, properties from previous activities, and/or static values.
- To add more parameters, repeat the steps above.
Create Variant #
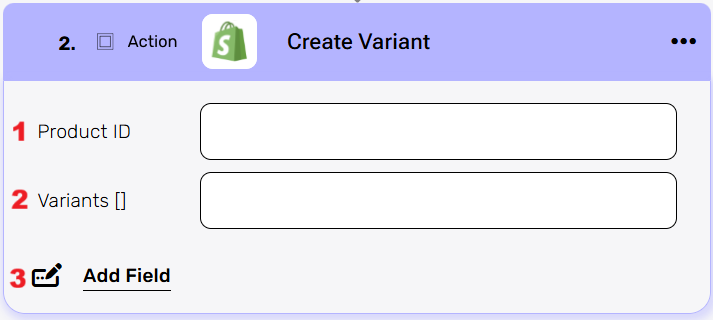
- Product ID
The id of the product for which you want to create a variant.
Click on the field and choose how to populate the field in one of the following options:- Static value – number / string. when using strings, you need to surround them with single quotes (‘).
- Property value from a previous activity (sing the tooltip that opens when clicking on the field).
- Variants []
is an array of objects. Each object represents a single variant of the product. To create a variant, you must provide the required fields inside the object. The array is initialized using Initialize Object Array, and each variant object is added to it with Append to Object Array. Without filling in the object, the variant cannot be created.
You can populate the field in one of the following options:- Static value – number / string. when using strings, you need to surround them with single quotes (‘).
- Property value from a previous activity (Using the tooltip that opens when clicking on the field).
- Add Field
By clicking the “Add field” button, you can choose how to fill in the various fields in the variant you are creating. You can add one field to the activity or more fields to the activity definitions.- Choose from the drop down the field you want to fill.
- Click on the empty field to the right of the drop down to be shown the tooltip with all the options you can use to fill the field.
- You can populate the field in one of the following options:
- Static value – number / string. when using strings, you need to surround them with single quotes (‘).
- Property value from a previous activity (Using the tooltip that opens when clicking on the field).
- Expression – using functions and/or Previous activity properties and/or static values (Using the tooltip that opens when clicking on the field).
- Repeat steps 1-3 for all the fields you want to populate.
Object Array Field: Media []
Each one of them is an array of objects. The array is initialized using Initialize Object Array, and each object is added to it with Append to Object Array. In case of a single object, the Append to Object Array is not required.
Update variant #
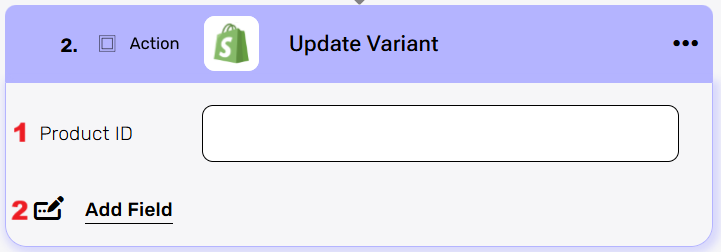
- Product ID
The ID of the product whose variants you wish to update.
Click on the field and choose how to populate the field in one of the following options:- Static value – number / string. when using strings, you need to surround them with single quotes (‘).
- Property value from a previous activity (Using the tooltip that opens when clicking on the field).
- Add Field
By clicking the “Add field” button, you can choose how to fill in the various fields in the product you are updating his variants. You can add one field to the activity or more fields to the activity definitions.- Choose from the drop down the field you want to fill.
- Click on the empty field to the right of the drop down to be shown the tooltip with all the options you can use to fill the field.
- You can populate the field in one of the following options:
- Static value – number / string. when using strings, you need to surround them with single quotes (‘).
- Property value from a previous activity (Using the tooltip that opens when clicking on the field).
- Expression – using functions and/or Previous activity properties and/or static values (Using the tooltip that opens when clicking on the field).
- Repeat steps 1-3 for all the fields you want to populate.
Object Array Fields: Media [], Variants []
Each one of them is an array of objects. The array is initialized using Initialize Object Array, and each object is added to it with Append to Object Array. In case of a single object, the Append to Object Array is not required.
Transactions #
In Shopify, a transaction refers to any payment or refund that is associated with an order.
Get Transactions #

- Output fields
Define which transactions properties are returned in the response. The dropdown lists all available properties (for example, order id, description and transaction id). Selecting fields adds them to the response schema, while choosing all fields returns the full transaction object. If no fields are selected, all properties are automatically included by default. - Add Filters
Each filter is defined by selecting a field (such as id, processed at or point of sale device id), choosing a condition (for example equals, greater than, less than, or contains), and then specifying a value. By applying filters, you can narrow the query results to only the transactions that meet the given criteria, instead of retrieving all transactions.- Click on the field to show the tooltip with all the options you can choose.
- You can populate the field in one of the following options:
- Static value – number / string. when using strings, you need to surround them with single quotes (‘).
- Property value from a previous activity (Using the tooltip that opens when clicking on the field).
- Add Parameters
By clicking the “Add Parameter” button, you can define parameters or sort keys for your Shopify action. You can add one parameter or multiple parameters, up to the maximum number of existing parameters in the action. The available parameters vary depending on the specific Shopify action.
- Choose from the drop down the parameter you want to define.
- Click on the empty field to the right of the drop down to be shown the tooltip with all the options you can use to define the parameter.
- You can populate the parameter using one of the following options:
- Static value: A number or string. For strings, you need to surround them with single quotes (”).
- Property value from a previous activity: Select a value from a previous activity using the tooltip that opens when you click on the field.
- Expression: Use functions, properties from previous activities, and/or static values.
- To add more parameters, repeat the steps above.
Location #
In Shopify, a location refers to a physical address or place associated with the management of inventory and fulfillment.
Get Location #
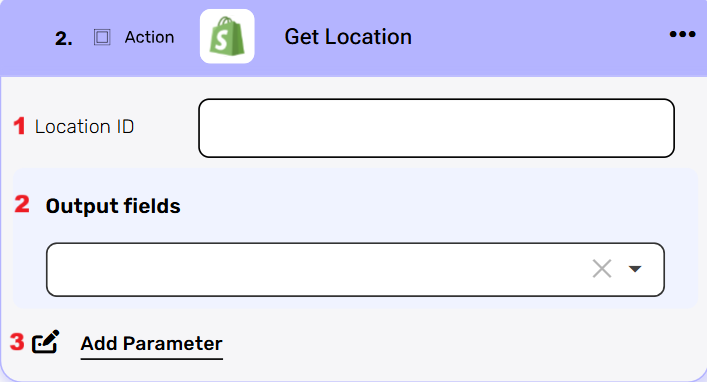
- Location ID
Click on the field to show the tooltip with all the options you can choose.
You can populate the field in one of the following options:- Static value – number / string. when using strings, you need to surround them with single quotes (‘).
- Property value from a previous activity (Using the tooltip that opens when clicking on the field).
- Output fields
Define which location properties are returned in the response. The dropdown all available properties (for example, location title, description and images). Selecting fields adds them to the response schema, while choosing all fields returns the full location object. If no fields are selected, all properties are automatically included by default. - Add Parameters
By clicking the “Add Parameter” button, you can define parameters for your Shopify action. You can add one parameter or multiple parameters, up to the maximum number of existing parameters in the action. The available parameters vary depending on the specific Shopify action.
- Choose from the drop down the parameter you want to define.
- Click on the empty field to the right of the drop down to be shown the tooltip with all the options you can use to define the parameter.
- You can populate the parameter using one of the following options:
- Static value: A number or string. For strings, you need to surround them with single quotes (”).
- Property value from a previous activity: Select a value from a previous activity using the tooltip that opens when you click on the field.
- Expression: Use functions, properties from previous activities, and/or static values.
- To add more parameters, repeat the steps above.
Get Locations #
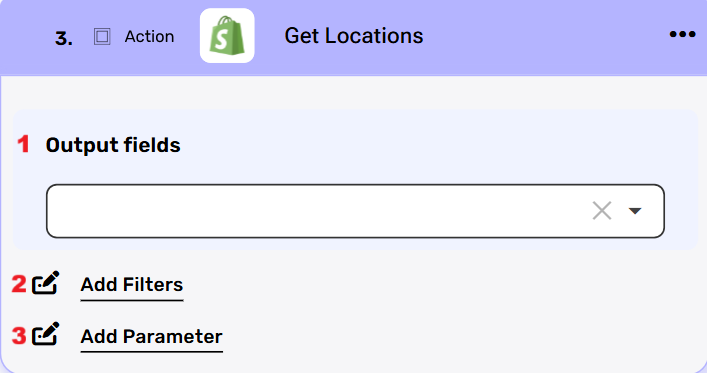
- Output fields
Define which locations properties are returned in the response. The dropdown lists all available properties (for example, location title, description and location id). Selecting fields adds them to the response schema, while choosing all fields returns the full location object. If no fields are selected, all properties are automatically included by default. - Add Filters
allows you to refine the list of locations that will be returned. Each filter is defined by selecting a field (such as location id, zip or country), choosing a condition (for example equals, greater than, less than, or contains), and then specifying a value. By applying filters, you can narrow the query results to only the locations that meet the given criteria, instead of retrieving all locations.- Click on the field to show the tooltip with all the options you can choose.
- You can populate the field in one of the following options:
- Static value – number / string. when using strings, you need to surround them with single quotes (‘).
- Property value from a previous activity (Using the tooltip that opens when clicking on the field).
- Add Parameters
By clicking the “Add Parameter” button, you can define parameters or sort keys for your Shopify action. You can add one parameter or multiple parameters, up to the maximum number of existing parameters in the action. The available parameters vary depending on the specific Shopify action.
- Choose from the drop down the parameter you want to define.
- Click on the empty field to the right of the drop down to be shown the tooltip with all the options you can use to define the parameter.
- You can populate the parameter using one of the following options:
- Static value: A number or string. For strings, you need to surround them with single quotes (”).
- Property value from a previous activity: Select a value from a previous activity using the tooltip that opens when you click on the field.
- Expression: Use functions, properties from previous activities, and/or static values.
- To add more parameters, repeat the steps above.
Price Lists #
A price list in Shopify is a collection of product prices that can be applied to specific customers or markets, allowing the system to display and use those defined prices instead of the default ones.
Get Price Lists #
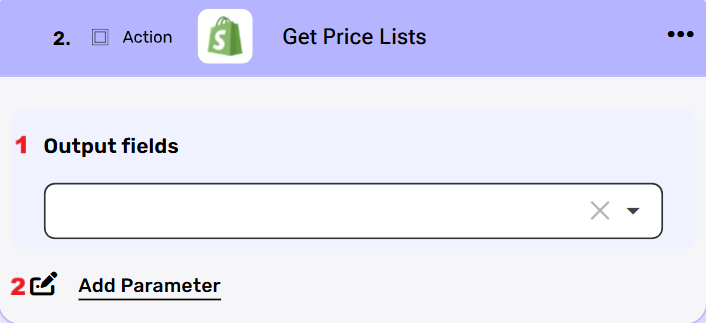
- Output fields
Define which Price Lists properties are returned in the response. The dropdown lists all available properties (for example, title, description and price list id). Selecting fields adds them to the response schema, while choosing all fields returns the full price list object. If no fields are selected, all properties are automatically included by default. - Add Parameters
By clicking the “Add Parameter” button, you can define parameters or sort keys for your Shopify action. You can add one parameter or multiple parameters, up to the maximum number of existing parameters in the action. The available parameters vary depending on the specific Shopify action.
- Choose from the drop down the parameter you want to define.
- Click on the empty field to the right of the drop down to be shown the tooltip with all the options you can use to define the parameter.
- You can populate the parameter using one of the following options:
- Static value: A number or string. For strings, you need to surround them with single quotes (”).
- Property value from a previous activity: Select a value from a previous activity using the tooltip that opens when you click on the field.
- Expression: Use functions, properties from previous activities, and/or static values.
- To add more parameters, repeat the steps above.
Create Price List #
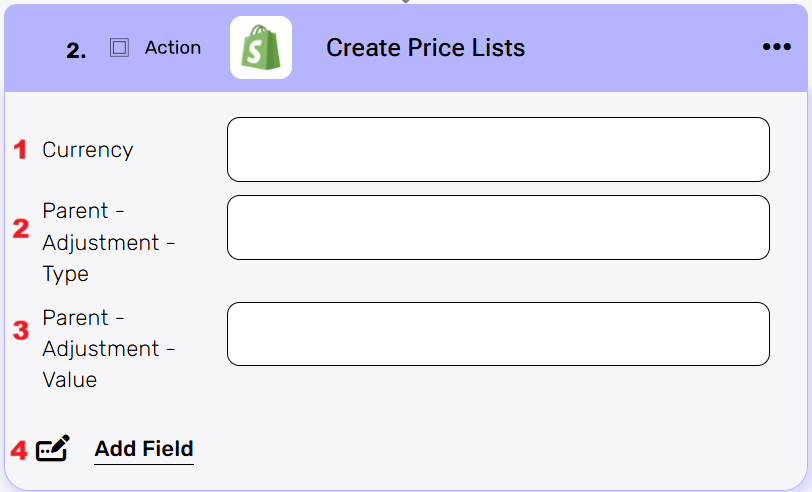
- Currency
Defines the currency in which the price list will be created. By default, in our setup this will be set to ILS. - Parent – Adjustment – Type
Specifies the type of price adjustment that will be applied relative to the parent price list. For example, whether the adjustment is a percentage increase or decrease. - Parent – Adjustment – Value
Defines the numeric value of the adjustment. Depending on the type selected above, this can represent either the percentage to increase/decrease or the fixed amount to add/subtract from the parent price. - Add Field
By clicking the “Add field” button, you can choose how to fill in the various fields in the price list you are creating. You can add one field to the activity or more fields to the activity definitions.
Update Price List #
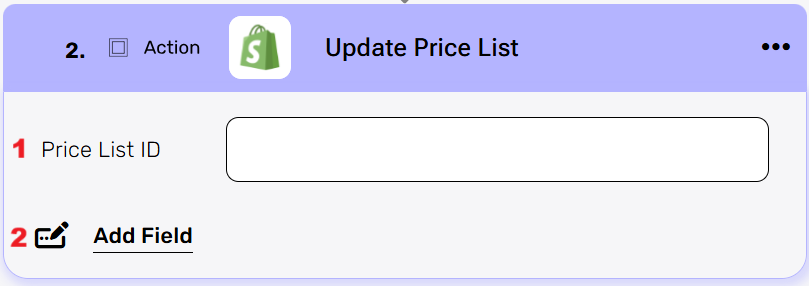
- Price List ID
The id of the price list you want to update his price list.
Click on the field and choose how to populate the field in one of the following options:- Static value – number / string. when using strings, you need to surround them with single quotes (‘).
- Property value from a previous activity (Using the tooltip that opens when clicking on the field).
- Add Field
By clicking the “Add field” button, you can choose how to fill in the various fields in the price list. You can add one field to the activity or more fields to the activity definitions.- Choose from the drop down the field you want to fill.
- Click on the empty field to the right of the drop down to be shown the tooltip with all the options you can use to fill the field.
- You can populate the field in one of the following options:
- Static value – number / string. when using strings, you need to surround them with single quotes (‘).
- Property value from a previous activity (Using the tooltip that opens when clicking on the field).
- Expression – using functions and/or Previous activity properties and/or static values (Using the tooltip that opens when clicking on the field).
- Repeat steps 1-3 for all the fields you want to populate.
Customers #
A customer in Shopify is a record that stores basic information about a person or company that has interacted with the store, such as their name, contact details, and order history.
Get Customers #
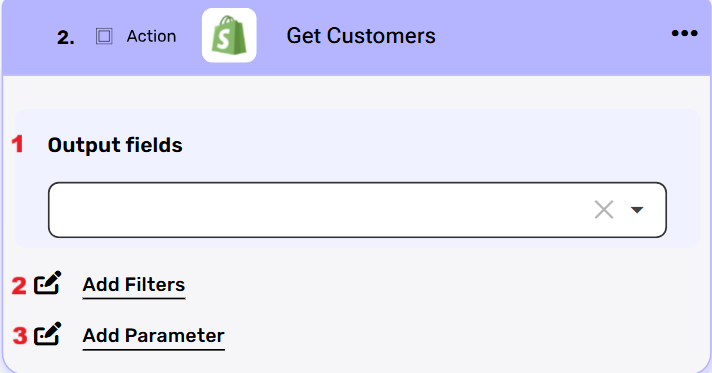
- Output fields
Define which customers properties are returned in the response. The dropdown lists all available properties (for example, name, address details and customer id). Selecting fields adds them to the response schema, while choosing all fields returns the full customers object. If no fields are selected, all properties are automatically included by default. - Add Filters
Each filter is defined by selecting a field (such as customer id, email or first name), choosing a condition (for example equals, greater than, less than, or contains), and then specifying a value. By applying filters, you can narrow the query results to only the customers that meet the given criteria, instead of retrieving all customers.- Click on the field to show the tooltip with all the options you can choose.
- You can populate the field in one of the following options:
- Static value – number / string. when using strings, you need to surround them with single quotes (‘).
- Property value from a previous activity (Using the tooltip that opens when clicking on the field).
- Add Parameters
By clicking the “Add Parameter” button, you can define parameters or sort keys for your Shopify action. You can add one parameter or multiple parameters, up to the maximum number of existing parameters in the action. The available parameters vary depending on the specific Shopify action.
- Choose from the drop down the parameter you want to define.
- Click on the empty field to the right of the drop down to be shown the tooltip with all the options you can use to define the parameter.
- You can populate the parameter using one of the following options:
- Static value: A number or string. For strings, you need to surround them with single quotes (”).
- Property value from a previous activity: Select a value from a previous activity using the tooltip that opens when you click on the field.
- Expression: Use functions, properties from previous activities, and/or static values.
- To add more parameters, repeat the steps above.
Create Customer #

- Add Field
By clicking the “Add field” button, you can choose how to fill in the various fields in the customer you are creating. You can add one field to the activity or more fields to the activity definitions.- Choose from the drop down the field you want to fill.
- Click on the empty field to the right of the drop down to be shown the tooltip with all the options you can use to fill the field.
- You can populate the field in one of the following options:
- Static value – number / string. when using strings, you need to surround them with single quotes (‘).
- Property value from a previous activity (Using the tooltip that opens when clicking on the field).
- Expression – using functions and/or Previous activity properties and/or static values (Using the tooltip that opens when clicking on the field).
- Repeat steps 1-3 for all the fields you want to populate.
Object Array Fields: Addresses [], Metafields []
Each one of them is an array of objects. The array is initialized using Initialize Object Array, and each object is added to it with Append to Object Array. In case of a single object, the Append to Object Array is not required.
Update Customer #
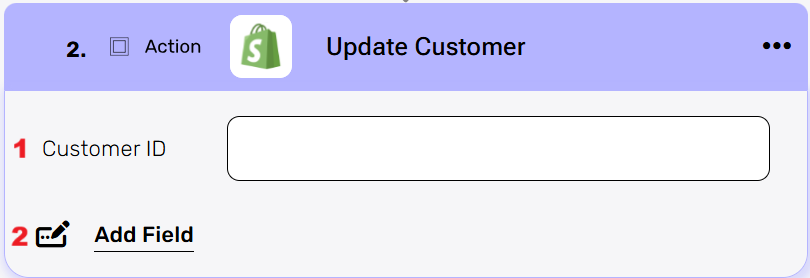
- Customer ID
The id of the Customer you want to update.
Click on the field and choose how to populate the field in one of the following options:- Static value – number / string. when using strings, you need to surround them with single quotes (‘).
- Property value from a previous activity (Using the tooltip that opens when clicking on the field).
- Add Field
By clicking the “Add field” button, you can choose how to fill in the various fields in the Customer. You can add one field to the activity or more fields to the activity definitions.- Choose from the drop down the field you want to fill.
- Click on the empty field to the right of the drop down to be shown the tooltip with all the options you can use to fill the field.
- You can populate the field in one of the following options:
- Static value – number / string. when using strings, you need to surround them with single quotes (‘).
- Property value from a previous activity (Using the tooltip that opens when clicking on the field).
- Expression – using functions and/or Previous activity properties and/or static values (Using the tooltip that opens when clicking on the field).
- Repeat steps 1-3 for all the fields you want to populate.
Object Array Fields: Addresses [], Metafields []
Each one of them is an array of objects. The array is initialized using Initialize Object Array, and each object is added to it with Append to Object Array. In case of a single object, the Append to Object Array is not required.
Draft Order #
A draft order in Shopify is a preliminary order created by the store owner or staff, which can be saved, updated, and later converted into a completed order.
Complete Draft Order #
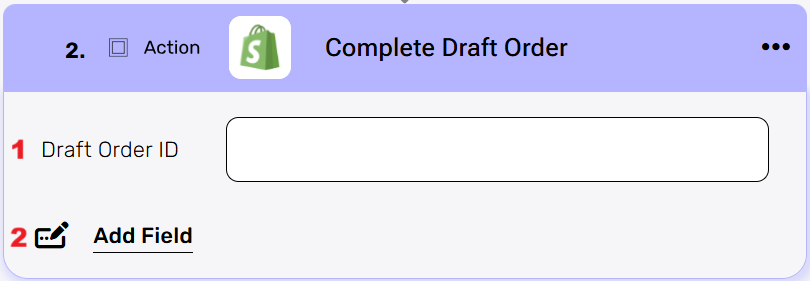
In Shopify, Complete Draft Order means finalizing a draft order so that it becomes a regular order in the store. Once completed, the draft order is no longer editable as a draft, it moves into the standard orders list, payment can be recorded, and the order is treated like any other confirmed purchase.
- Draft Order ID
The id of the Draft Order you want to make a real order.
Click on the field and choose how to populate the field in one of the following options:- Static value – number / string. when using strings, you need to surround them with single quotes (‘).
- Property value from a previous activity (Using the tooltip that opens when clicking on the field).
- Add Field
By clicking the “Add field” button, you can choose how to fill in the various fields in the Draft Order. You can add one field to the activity or more fields to the activity definitions.- Choose from the drop down the field you want to fill.
- Click on the empty field to the right of the drop down to be shown the tooltip with all the options you can use to fill the field.
- You can populate the field in one of the following options:
- Static value – number / string. when using strings, you need to surround them with single quotes (‘).
- Property value from a previous activity (Using the tooltip that opens when clicking on the field).
- Expression – using functions and/or Previous activity properties and/or static values (Using the tooltip that opens when clicking on the field).
- Repeat steps 1-3 for all the fields you want to populate.
Receive a single Draft Order #
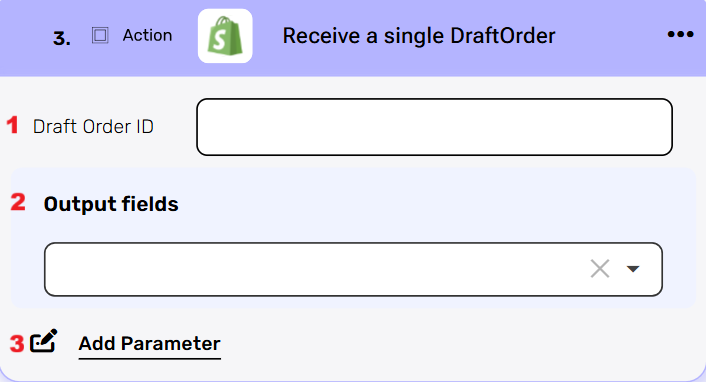
- Draft Order ID field
Click on the field and choose how to populate the field in one of the following options:- Static value – number / string. when using strings, you need to surround them with single quotes (‘).
- Property value from a previous activity (Using the tooltip that opens when clicking on the field).
- Output fields
Define which Draft Order properties are returned in the response. The dropdown lists all available properties (for example, Draft Order ID, tags, quantities, and updated at). Selecting fields adds them to the response schema, while choosing all fields returns the full Draft Order object. If no fields are selected, all properties are automatically included by default. - Add Parameters
By clicking the “Add Parameter” button, you can define parameters for your Shopify action. You can add one parameter or multiple parameters, up to the maximum number of existing parameters in the action. The available parameters vary depending on the specific Shopify action.
- Choose from the drop down the parameter you want to define.
- Click on the empty field to the right of the drop down to be shown the tooltip with all the options you can use to define the parameter.
- You can populate the parameter using one of the following options:
- Static value: A number or string. For strings, you need to surround them with single quotes (”).
- Property value from a previous activity: Select a value from a previous activity using the tooltip that opens when you click on the field.
- Expression: Use functions, properties from previous activities, and/or static values.
- To add more parameters, repeat the steps above.
Retrieves a list of a Draft Orders #
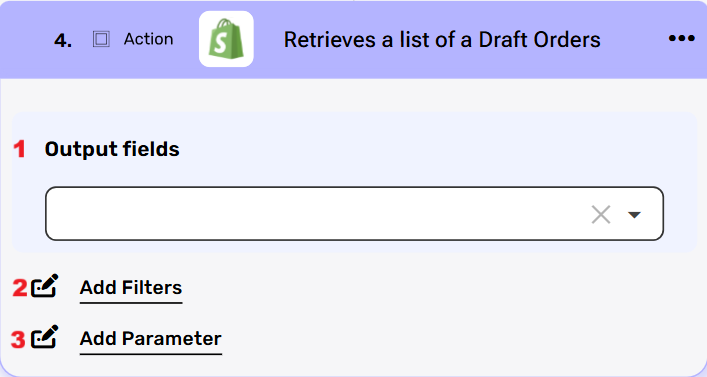
- Output fields
Define which draft orders properties are returned in the response. The dropdown lists all available properties (for example, status, tags and draft order id). Selecting fields adds them to the response schema, while choosing all fields returns the full draft orders object. If no fields are selected, all properties are automatically included by default. - Add Filters
allows you to refine the list of draft orders that will be returned. Each filter is defined by selecting a field (such as location id, zip or country), choosing a condition (for example equals, greater than, less than, or contains), and then specifying a value. By applying filters, you can narrow the query results to only the draft orders that meet the given criteria, instead of retrieving all locations.- Click on the field to show the tooltip with all the options you can choose.
- You can populate the field in one of the following options:
- Static value – number / string. when using strings, you need to surround them with single quotes (‘).
- Property value from a previous activity (Using the tooltip that opens when clicking on the field).
- Add Parameters
By clicking the “Add Parameter” button, you can define parameters or sort keys for your Shopify action. You can add one parameter or multiple parameters, up to the maximum number of existing parameters in the action. The available parameters vary depending on the specific Shopify action.
- Choose from the drop down the parameter you want to define.
- Click on the empty field to the right of the drop down to be shown the tooltip with all the options you can use to define the parameter.
- You can populate the parameter using one of the following options:
- Static value: A number or string. For strings, you need to surround them with single quotes (”).
- Property value from a previous activity: Select a value from a previous activity using the tooltip that opens when you click on the field.
- Expression: Use functions, properties from previous activities, and/or static values.
- To add more parameters, repeat the steps above.
Modify An Existing Draft Order #
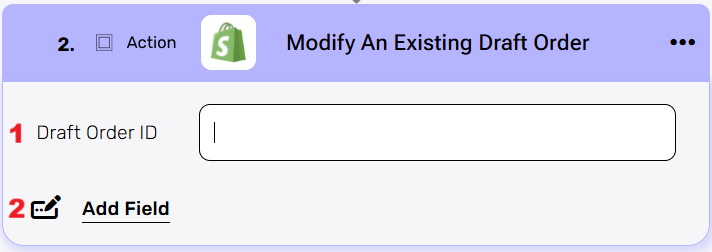
- Draft Order ID
The id of the Draft Order you want to update.
Click on the field and choose how to populate the field in one of the following options:- Static value – number / string. when using strings, you need to surround them with single quotes (‘).
- Property value from a previous activity (Using the tooltip that opens when clicking on the field).
- Add Field
By clicking the “Add field” button, you can choose how to fill in the various fields in the Draft Order. You can add one field to the activity or more fields to the activity definitions.- Choose from the drop down the field you want to fill.
- Click on the empty field to the right of the drop down to be shown the tooltip with all the options you can use to fill the field.
- You can populate the field in one of the following options:
- Static value – number / string. when using strings, you need to surround them with single quotes (‘).
- Property value from a previous activity (Using the tooltip that opens when clicking on the field).
- Expression – using functions and/or Previous activity properties and/or static values (Using the tooltip that opens when clicking on the field).
- Repeat steps 1-3 for all the fields you want to populate.
Object Array Fields: Custom Attributes [], Line Items [], Localized Fields [], Metafields [], Payment Schedules []
Each one of them is an array of objects. The array is initialized using Intialize Object Array, and each object is added to it with Append to Object Array. In case of a single object, the Append to Object Array is not required.
Create Draft Order #
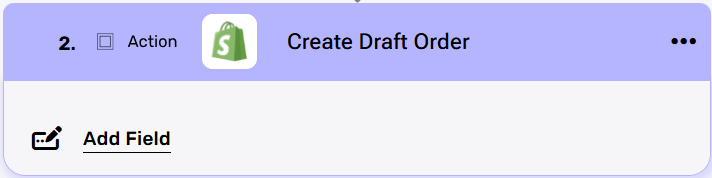
To create a Draft Order you must add fields, it cannot be created completely empty. However, there are no mandatory fields, so you can choose which details to include.
- Add Field
By clicking the “Add field” button, you can choose how to fill in the various fields in the Draft Order you are creating. You can add one field to the activity or more fields to the activity definitions.- Choose from the drop down the field you want to fill.
- Click on the empty field to the right of the drop down to be shown the tooltip with all the options you can use to fill the field.
- You can populate the field in one of the following options:
- Static value – number / string. when using strings, you need to surround them with single quotes (‘).
- Property value from a previous activity (Using the tooltip that opens when clicking on the field).
- Expression – using functions and/or Previous activity properties and/or static values (Using the tooltip that opens when clicking on the field).
- Repeat steps 1-3 for all the fields you want to populate.
Object Array Fields: Custom Attributes [], Discount Codes [], Line Items [], Localized Fields [], Metafields [], Payment Schedules []
Each one of them is an array of objects. The array is initialized using Intialize Object Array, and each object is added to it with Append to Object Array. In case of a single object, the Append to Object Array is not required.
Remove an existing DraftOrder #
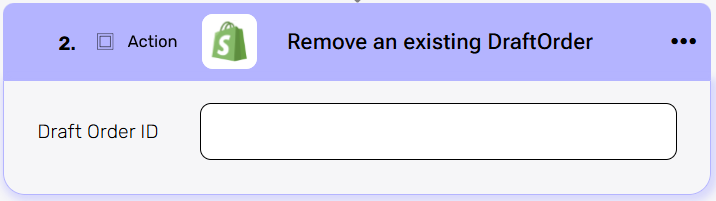
- Draft Order ID
Click on the empty field and the tooltip will pop up showing the options you can choose.
You can populate the field in one of the following options:- Static value – number / string. when using strings, you need to surround them with single quotes (‘).
- Property value from a previous activity (Using the tooltip that opens when clicking on the field).
Fulfillments #
Retrieve Specific Fulfillment Order #
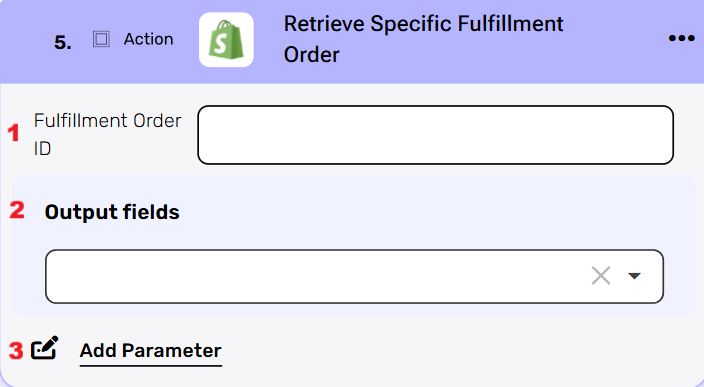
- Fulfillment Order ID
Click on the field to show the tooltip with all the options you can choose.
You can populate the field in one of the following options:- Static value – number / string. when using strings, you need to surround them with single quotes (‘).
- Property value from a previous activity (Using the tooltip that opens when clicking on the field).
- Output fields
Define which Fulfillment Order properties are returned in the response. The dropdown lists all available properties (for example, Fulfillment Order id, tax info and total weight). Selecting fields adds them to the response schema, while choosing all fields returns the full Fulfillment Order object. If no fields are selected, all properties are automatically included by default. - Add Parameters
By clicking the “Add Parameter” button, you can define parameters for your Shopify action. You can add one parameter or multiple parameters, up to the maximum number of existing parameters in the action. The available parameters vary depending on the specific Shopify action.
- Choose from the drop down the parameter you want to define.
- Click on the empty field to the right of the drop down to be shown the tooltip with all the options you can use to define the parameter.
- You can populate the parameter using one of the following options:
- Static value: A number or string. For strings, you need to surround them with single quotes (”).
- Property value from a previous activity: Select a value from a previous activity using the tooltip that opens when you click on the field.
- Expression: Use functions, properties from previous activities, and/or static values.
- To add more parameters, repeat the steps above.
Retrieves a List of Fulfillment Order for a Specific Order #
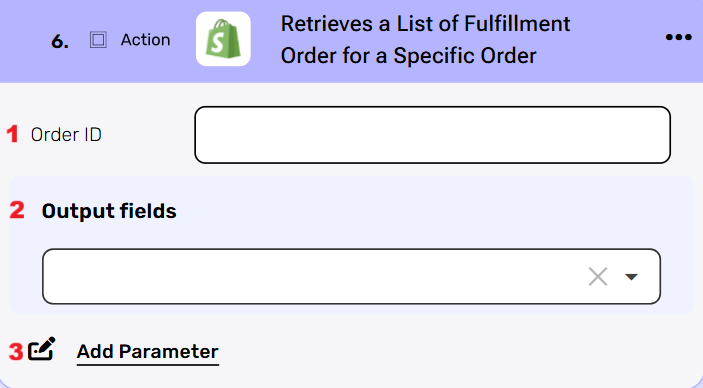
- Order ID
Click on the field and choose how to populate the field in one of the following options:- Static value – number / string. when using strings, you need to surround them with single quotes (‘).
- Property value from a previous activity (Using the tooltip that opens when clicking on the field).
- Output fields
Define which Order properties are returned in the response. The dropdown lists all available properties (for example, Order id, channel id, and status). Selecting fields adds them to the response schema, while choosing all fields returns the full Order object. If no fields are selected, all properties are automatically included by default. - Add Parameters
By clicking the “Add Parameter” button, you can define parameters for your Shopify action. You can add one parameter or multiple parameters, up to the maximum number of existing parameters in the action. The available parameters vary depending on the specific Shopify action.
- Choose from the drop down the parameter you want to define.
- Click on the empty field to the right of the drop down to be shown the tooltip with all the options you can use to define the parameter.
- You can populate the parameter using one of the following options:
- Static value: A number or string. For strings, you need to surround them with single quotes (”).
- Property value from a previous activity: Select a value from a previous activity using the tooltip that opens when you click on the field.
- Expression: Use functions, properties from previous activities, and/or static values.
- To add more parameters, repeat the steps above.
Create a Fulfillment #
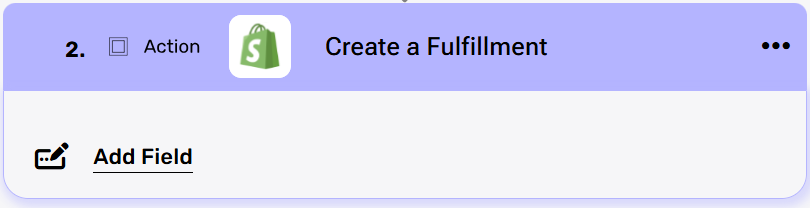
- Add Field
By clicking the “Add field” button, you can choose how to fill in the various fields in the fulfillment you are creating. You can add one field to the activity or more fields to the activity definitions.- Choose from the drop down the field you want to fill.
- Click on the empty field to the right of the drop down to be shown the tooltip with all the options you can use to fill the field.
- You can populate the field in one of the following options:
- Static value – number / string. when using strings, you need to surround them with single quotes (‘).
- Property value from a previous activity (Using the tooltip that opens when clicking on the field).
- Expression – using functions and/or Previous activity properties and/or static values (Using the tooltip that opens when clicking on the field).
- Repeat steps 1-3 for all the fields you want to populate.
Object Array Field: Fulfillment Order []
Each one of them is an array of objects. The array is initialized using Intialize Object Array, and each object is added to it with Append to Object Array. In case of a single object, the Append to Object Array is not required.


.png)