Discover how to connect Engini to the powerful Google Gemini API.
Getting Started with Gemini #
Prerequisites #
- A Google Account / Google AI Studio Access.
- An Active API Key.
Retrieve your Gemini API Key #
- Create a Google AI Account:
Navigate to the Google AI Studio website or the Google Cloud console. - Log in to Google AI Studio:
Once you have an account, log in to the Google AI Studio platform. - Navigate to the API Key Section:
After logging in, go to the API keys section in your Google AI Studio dashboard.
- Generate a new API Key:
Click on the Create API Key button. Once you click, a new key will be generated. This is your access token.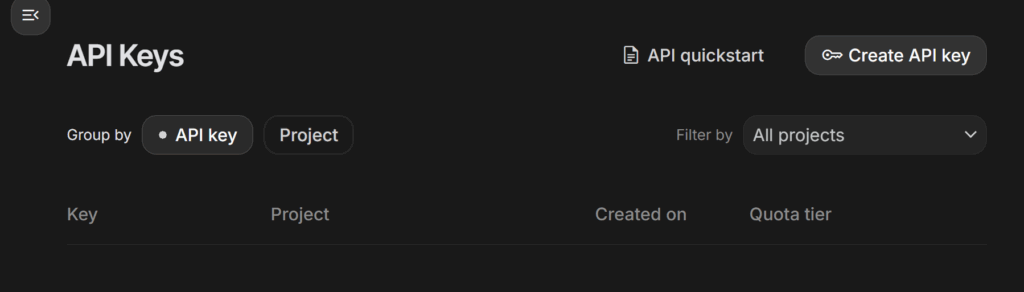
- Create a new key:
- Name your key as you wish.
- Press the “Create key” when you are done.
- Copy the key:
- Copy the API key immediately. You will not be able to view the full key again for security reasons. Make sure to store it securely, as it provides access to your Gemini resources.
Connecting Engini to Gemini #
- Enter your Engini account at https://app.engini.io.
- Navigate to the Connections page by clicking on Connections in the left sidebar or by clicking here.
- Click on the “New Integration” option located in the top bar.
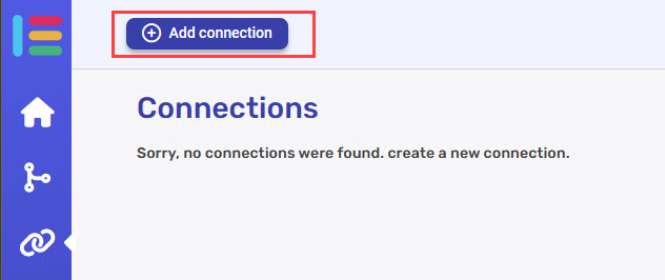
- Choose the Gemini option from the available applications.
- Enter the following details in the “Add Connection” form:
- Connection name
- API Key – Enter the api key you obtained from OpenAI.
Actions #
Create a completion #
Send a prompt (text, image or document) to a Gemini model and receive an AI generated response.
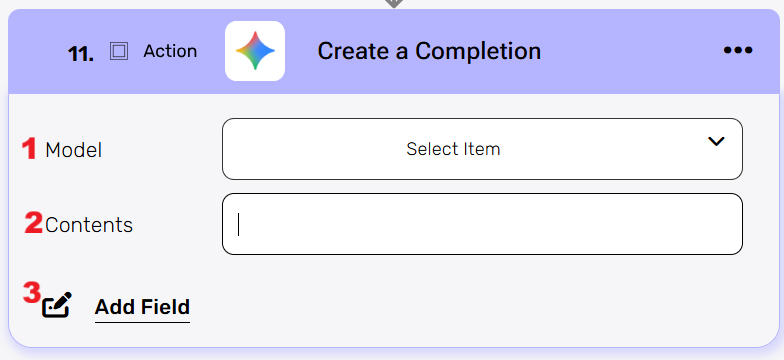
- Model
Select the Gemini model you want to use (e.g.,gemini-2.5-flash,gemini-2.5-pro). - Contents
Enter the input or conversation history for the model. For a single-turn request, this is the main prompt text. For multi-turn conversations, this field contains the array of previous user/model messages.
To build it for the Create a Completion activity, you must initialize and append objects in three steps:- Use Initialize Object Array twice:
- Create the inner Parts with its fields.
- Variable: Parts, Type: Parts
- Create the outer Contents with its fields.
- Variable: Contents, Type: Contents
- Create the inner Parts with its fields.
- Use Add Field or the Append to Object Array activity to construct the necessary JSON objects and arrays, which is the fundamental step required before passing the final, structured data to the Create a Completion activity.
Use Append to Object Array to add object fields. - Final Step: In the Create a Completion activity, set the Contents field to the dynamic array variable from step 2.
- Use Initialize Object Array twice:
- Add Field
By clicking the Add Field button, you can configure advanced settings for the generation request.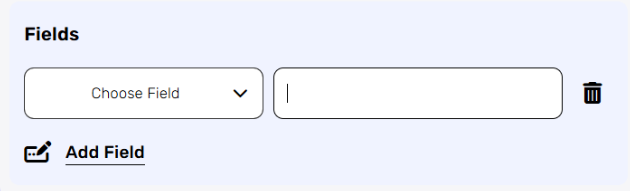
- Click on the empty field to the right of the drop down to be shown the tooltip with all the options you can use to fill the field.
- You can populate the field in one of the following options:
- Static value – number / string. when using strings, you need to surround them with single quotes (‘).
- Property value from a previous activity (Using the tooltip that opens when clicking on the field).
- Expression – using functions and/or Previous activity properties and/or static values (Using the tooltip that opens when clicking on the field).
- Repeat it for all the fields you want to populate.
Initialize Object Array #
Creates a new variable object in your workflow to store structured data for use in subsequent Gemini steps. For example, a Contents object can be initialized here and used in other actions, such as create a completion.
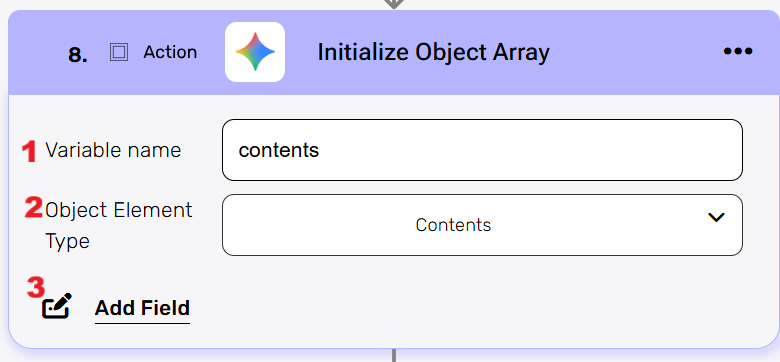
- Variable name
Enter a name for the new object variable you’re creating. This name will be used to reference this object in other workflow steps. - Object Element Type
Select the type of data structure you want to initialize from the dropdown options. This action prepares an empty object of the specified type that you can then populate the first object here and then later in the append action. - Add Field
By clicking the “Add field” button, you can choose how to fill in the various fields in the object you are creating. You can add one field to the activity or more fields to the activity definitions, up to the number of fields you have in the selected object. The fields vary depending on the selected object.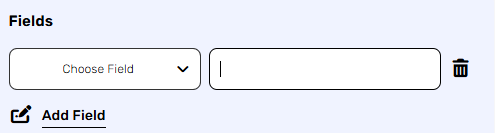
- Choose from the drop down the field you want to fill.
- Click on the empty field to the right of the drop down to be shown the tooltip with all the options you can use to fill the field.
- You can populate the field in one of the following options:
- Static value – number / string. when using strings, you need to surround them with single quotes (‘).
- Property value from a previous activity (Using the tooltip that opens when clicking on the field).
- Expression – using functions and/or Previous activity properties and/or static values (Using the tooltip that opens when clicking on the field).
- Repeat steps 1-3 for all the fields you want to populate.
Append to Object Array #
Adds new data elements to an existing array of objects in your workflow.
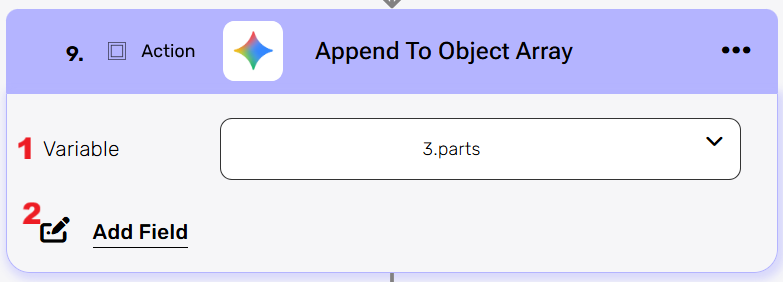
- Variable
Select the array variable from your workflow that you want to append new objects to. This dropdown shows all available array variables that you initialized from previous steps in your automation. - Add Field
By clicking the “Add field” button, you can choose how to fill in the various fields in the object you are creating. You can add one field to the activity or more fields to the activity definitions, up to the number of fields you have in the selected object. The fields vary depending on the selected object.
- Choose from the drop down the field you want to fill.
- Click on the empty field to the right of the drop down to be shown the tooltip with all the options you can use to fill the field.
- You can populate the field in one of the following options:
- Static value – number / string. when using strings, you need to surround them with single quotes (‘).
- Property value from a previous activity (Using the tooltip that opens when clicking on the field).
- Expression – using functions and/or Previous activity properties and/or static values (Using the tooltip that opens when clicking on the field).
- Repeat steps 1-3 for all the fields you want to populate.
Map object array #
This activity is particularly useful when there is an array of data that needs to be translated into another structure.
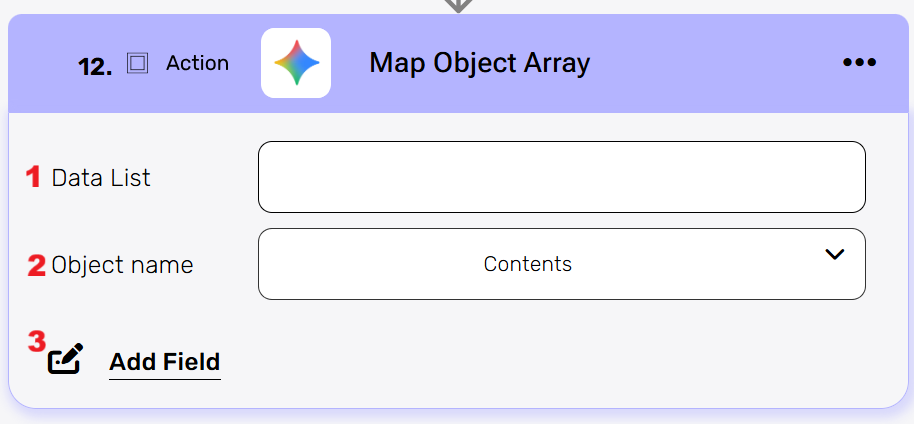
- Data List
Choose a data list that you’ve obtained from previous activities in your workflow. This data list typically contains an array of objects that you want to process and transform. - Object name
You need to define the type of objects from the drop down that will be stored within the array. - Add Field
By clicking the “Add field” button, you can choose how to fill in the various fields when you are mapping.- Choose from the drop down the field you want to fill.

- Click on the empty field to the right of the drop down to be shown the tooltip with all the options you can use to fill the field.
- You can populate the field in one of the following options:
- Static value – number / string. when using strings, you need to surround them with single quotes (‘).
- Property value from a previous activity (Using the tooltip that opens when clicking on the field).
- Expression – using functions and/or Previous activity properties and/or static values (Using the tooltip that opens when clicking on the field).
- Repeat steps 1-3 for all the fields you want to populate.
- Choose from the drop down the field you want to fill.
Delete a File #
This action allows you to delete a file from Gemini’s system.
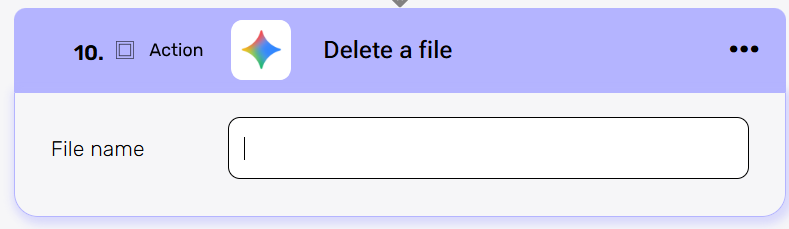
File name
The name must follow the format files/{file} (e.g., files/abc-123). This unique format is how the service internally identifies and locates the specific file to be deleted.
Note: The name field can be selected dynamically from the Get Files activity output. When more than one file is returned, apply the first() function to retrieve the name of the first file.
Extract structure data #
This activity uses the advanced capabilities of the Gemini model to analyze unstructured or semi-structured input (such as text, emails, or images) and extract meaningful information, returning the results in a structured JSON format.
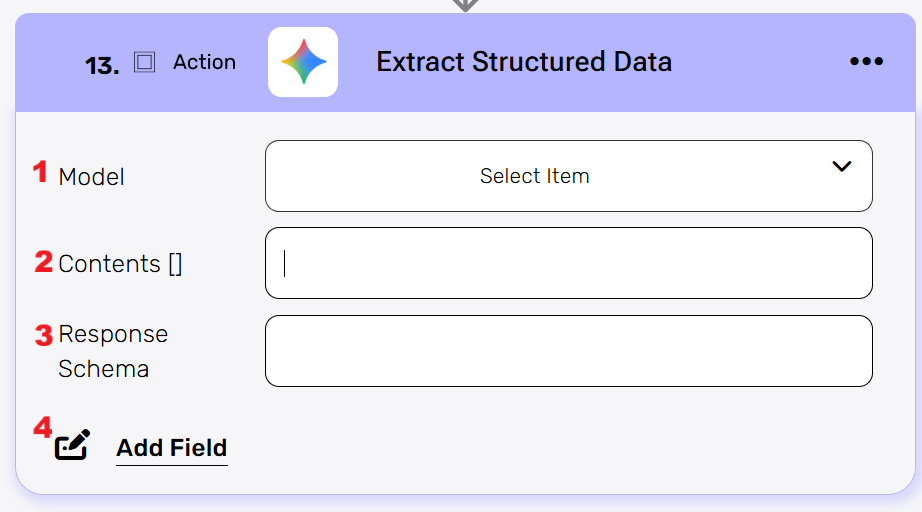
- Model
Selects the specific Gemini model (e.g., gemini-pro) that will perform the extraction. Different models have varying capabilities in handling text, images, and complexity. - Contents
This is the information you give to Gemini for analysis. It can be plain text (like an email body or a paragraph you type in) and/or a reference to a file (like a recently uploaded image, a PDF, or an audio clip) that the model will read.
Initialize and append objects in three steps:- Use Initialize ObjectArray twice:
- Create the inner Parts with its fields.
- Variable: Parts, Type: Parts
- Create the outer Contents with its fields.
- Variable: Contents, Type: Contents
- Create the inner Parts with its fields.
- Use Add Field or the Append to Object Array activity to construct the necessary JSON objects and arrays, which is the fundamental step required before passing the final, structured data to the Create a Completion activity.
Use Append to Object Array to add object fields. - Final Step: In the Extract structure data activity, set the Contents field to the dynamic array variable from previous step.
- Use Initialize ObjectArray twice:
- Response Schema
This is where you insert a JSON structure that defines exactly how the final output must look. The Gemini model will use this blueprint to organize the data it extracts, ensuring you get a predictable, standardized JSON object every time (e.g., specifying fields like “Name,” “Amount,” and “Date”).- Properties
Defines all the keys (fields) and their data types for the output JSON object. Used once at the top level of the schema, but can contain multiple field definitions (keys) inside it. - Description
The Model’s Instruction. Tells the Gemini model precisely what value to extract for a specific field (e.g., “The customer’s full name, extracted from the first sentence.”). Highly recommended for accurate extraction; acts as a prompt for that specific field. - Required
The Constraint. An array listing the field names that must be present in the final JSON object.Guarantees the key will be present. If data is missing, the model will try to infer a value or use a null/default value to satisfy this constraint.
- Properties
- Add Field
By clicking the “Add field” button, you can choose how to fill in the various fields when you are mapping.- Choose from the drop down the field you want to fill.

- Click on the empty field to the right of the drop down to be shown the tooltip with all the options you can use to fill the field.
- You can populate the field in one of the following options:
- Static value – number / string. when using strings, you need to surround them with single quotes (‘).
- Property value from a previous activity (Using the tooltip that opens when clicking on the field).
- Expression – using functions and/or Previous activity properties and/or static values (Using the tooltip that opens when clicking on the field).
- Repeat steps 1-3 for all the fields you want to populate.
- Choose from the drop down the field you want to fill.
Get Files #

This action allows you to retrieve the list of files stored in your Gemini’s account.
Send API Request #
This activity allows you to send a custom API request directly to the Outlook API.
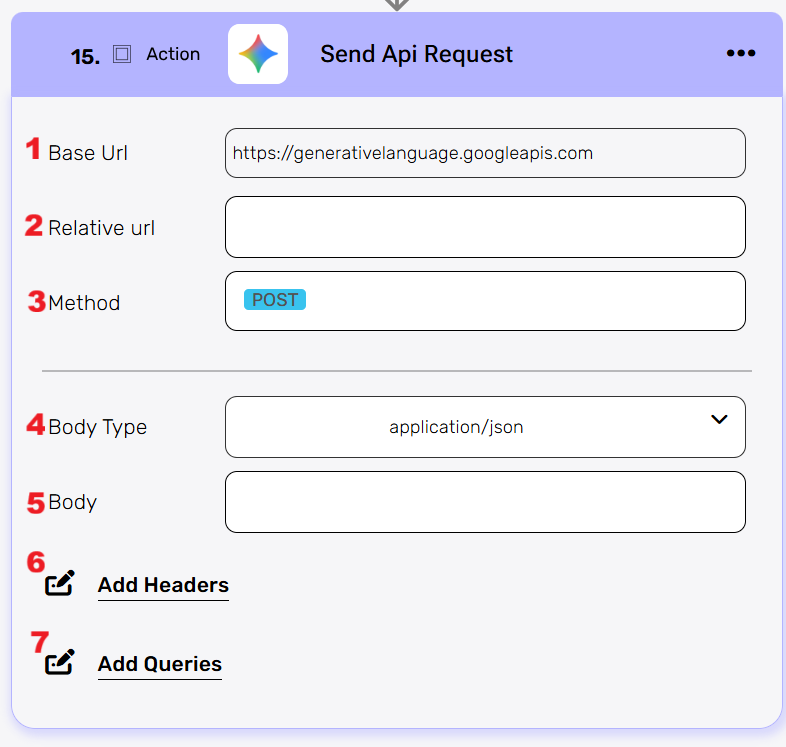
- Base Url – This is the root URL of the API you’re sending the request to.
- Relative url – You can specify additional path segments or parameters that need to be added to the end of the automatically generated URL. This allows you to customize the specific request you want to perform.
- Method – Select the HTTP method (e.g., Get, Post, Put, Delete, Patch).
- Body Type – Defines the format of the data in the body of your request. Commonly used values include application/json (as shown), which means the body will contain a JSON-formatted payload.
- Body – Contains any data that is being sent to the server.
- Add Headers – Additional metadata about the request, such as the type of data the Engini can accept, the length of the request body, and authentication information.
- Add Queries – The query refers to the parameters or data that are included in the URL of an HTTP request to provide additional information or instructions to the server.
Upload a File #
Upload a new file to your Gemini account. The file can be a PDF, image or even a video.

- DisplayName
Choose a unique name for the file uploaded. - Content
This is where you upload the file in a form of base64. Paste the Base64-encoded content of the file you want to upload. This represents the full file data in text format.


.png)