With Engini’s AI Agent, you can add powerful AI capabilities directly into your workflows- generate text, analyze data, transform content, and automate decisions using natural language.
To get started with the AI Agent, make sure you have an active account and connection to a Large Language Model (LLM). Engini currently supports connections such as Claude and OpenAI which must be enabled in you account before using the agent.
Getting Started with AI Agent #
Prerequisites #
- A connection to one of those LLM: Anthropic Claude or OpenAI.
AI Agent Activity #
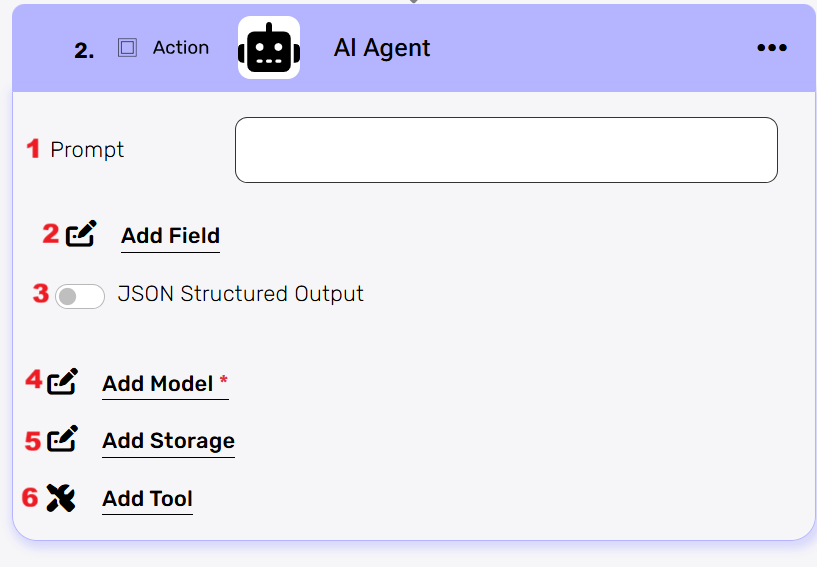
- Prompt– Required
The Prompt is the core instruction that defines how the AI Agent should behave inside your workflow. Here you specify what the model should do with the data coming from your connected systems. The prompt can reference values from any workflow step including CRM, ERP, finance, HR, ticketing, or database connectors allowing the agent to analyze, transform, or generate content based on real-time data. - Add Field
Choose the add field option to control your data: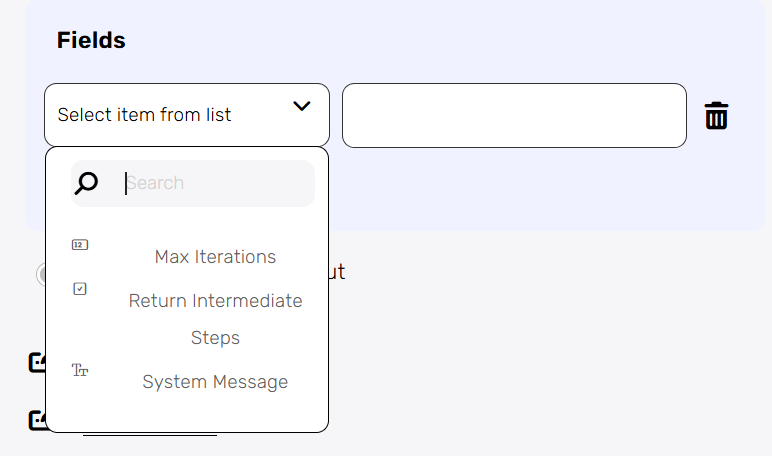
- Max Iterations
This defines the maximum number of reasoning steps the AI Agent is allowed to take when performing tool calls or multi-step logic. A higher number allows the agent to break the task into more steps, while a lower number limits how long the agent can run. - Return Intermediate Steps
When enabled, it displays more details. - System Message
Here you define high-level instructions such as tone, formatting rules, or domain focus (e.g., “You are a CRM assistant” or “Always answer in JSON”).
- Max Iterations
- JSON Structured Output
When JSON Structured Output is enabled, you can define the response format by clicking “Load JSON sample to generate structure.”
This action lets you create the expected JSON schema in two ways:
You can paste or enter a custom JSON example directly. The system will generate the schema based on the sample you provided. - Add Model- Required
This is where you choose the AI model that will power your agent.
Select one of the LLMs you’ve already connected to Engini (e.g., Claude or OpenAI).
The model you choose is the one the agent will use every time this step runs.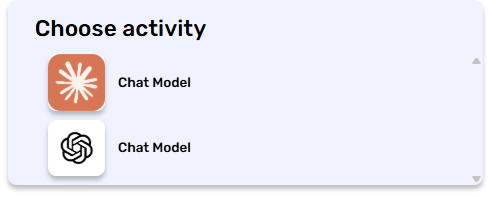
- Add Storage
Click on the Add Storage option and choose the Agent Storage, for example Engini storage.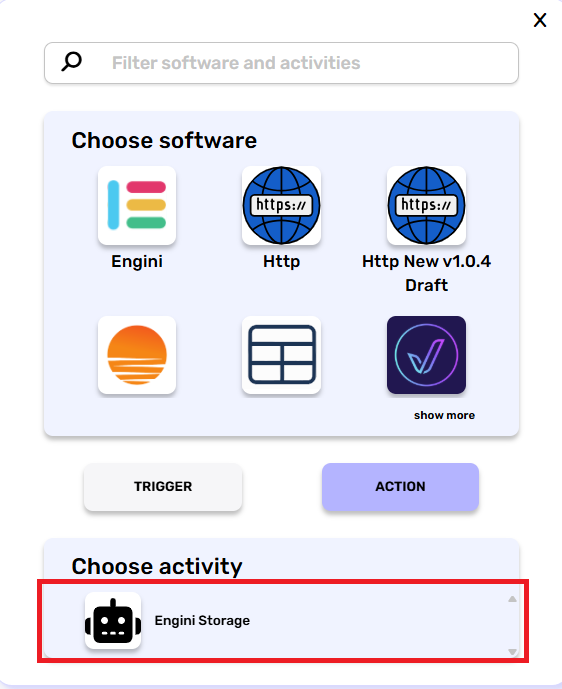
then the Engini Storage activity will be displayed: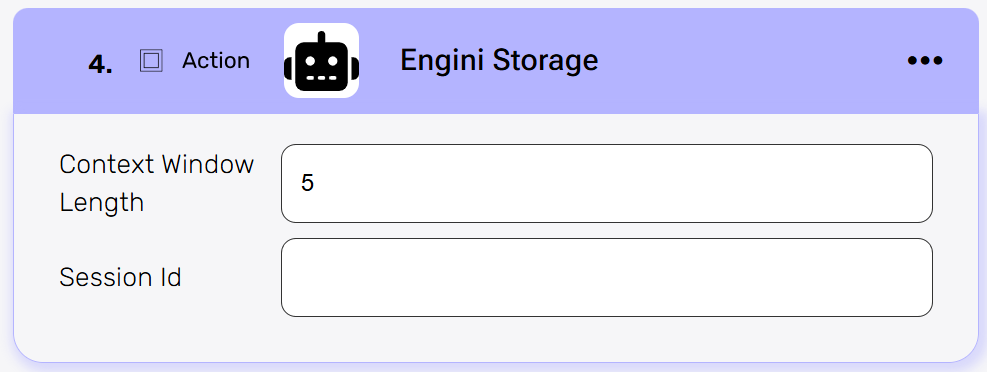
- Context Window Length
Defines how far back the agent can “remember” when retrieving data from Engini Storage. A higher value keeps more history, while a lower value limits the agent to recent interactions. - Session Id
Keeps all messages and memory tied to the same conversation.
Each session needs a unique identifier so the agent knows which stored context belongs together.
- Context Window Length
- Tools
This is where you choose the activities the AI Agent is allowed to use from the connections in your account. You can select multiple activities from different systems such as Priority, Engini Tables, Okta, and more. The agent will decide when and how to use these tools based on your prompt and system message, and there is no predefined flow between the tools.
You can also enable “Let the AI decide” for fields inside some activities.
When this option is turned on, the AI Agent will determine the appropriate value to populate based on the logic you defined for the agent.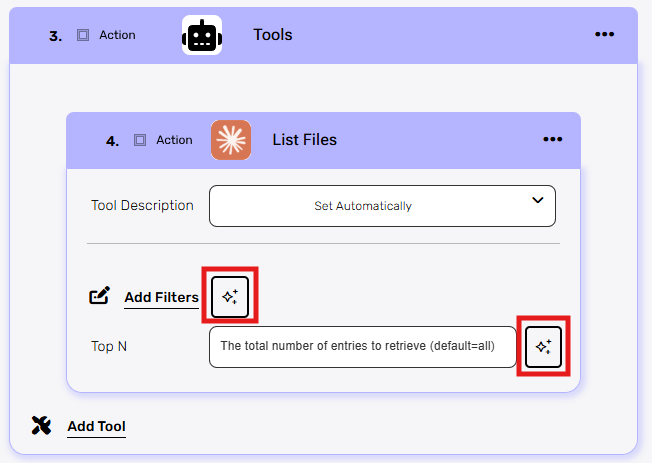
As you can see in the picture, this is an example of a tool that uses the “Let the AI decide” option.
When you want the AI to choose which filters to apply in order to retrieve the list of files, you simply click the button on the left (marked in red).
You can also enable this option for Top N, allowing the AI to determine how many files to retrieve based on the context and logic you defined.
Note:
The agent may use some activities, all, or none of tools, depending on the instructions you give in the prompt and the decisions it makes during execution.


.png)