Experience your application from the user’s perspective with a simple yet effective technique.
To begin using Engini apps, open your web browser and go to https://app.engini.io/enginiapps/.
This is where you’ll access your application.
Step 1: Getting to the main view #
As you enter Engini Apps using the provided URL, the first thing you’ll see is the main screen. This screen displays a list of all the applications you’ve created using Engini, allows you to easily navigate and select the specific application you want to use or work on.
For example, the main screen presents 3 distinct screens: “App 1,” “App 2,” and “App 3.” 
Step 2: Get into your App #
From the list of applications, select the one you want to explore.
Tap on its name to enter the app and start your journey.
For example, “App 2” selected.
After selecting the desired application, its screens will come into view:
For going back, press the arrow at the left.
Step 3: Explore your screen #
As you step into the screen, the “preview” display welcomes you. This is where you’ll find an overview of your records. Each record comes with its own set of fields, neatly organized for your convenience.
For example, let’s select “Work order” screen.
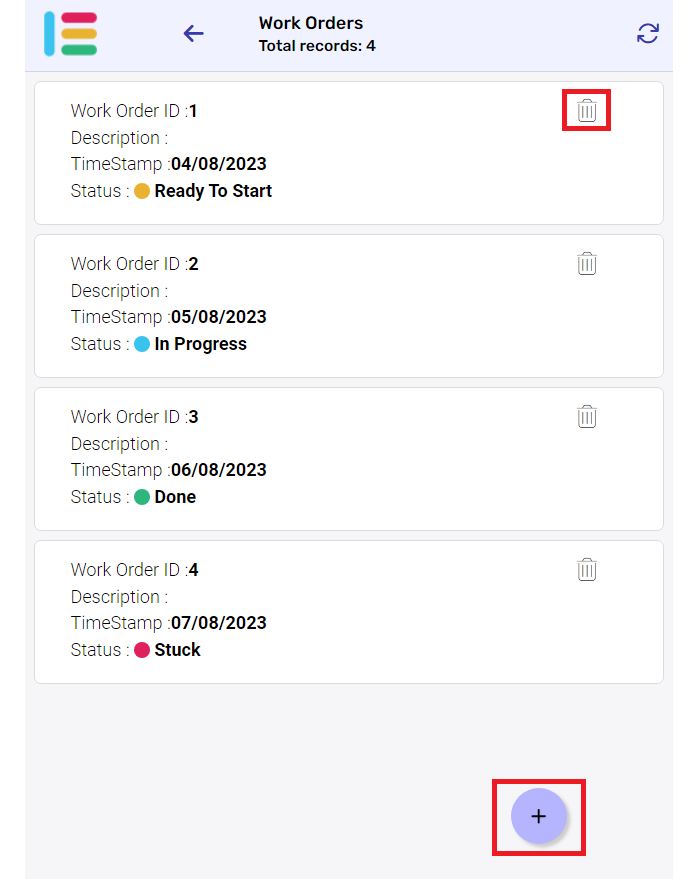
After selecting the desired screen, its records will come into view:
Upon viewing the screen, you will notice that certain icons are displayed while others may not be visible. These icon appearances are determined by the specific settings configured for the application.
You can interact with your records in several ways:
- Delete record
If needed, you can delete records using the trash can icon.
- Add record
You can add new record using the plus icon.
- Edit record
To edit a record, simply click on the record you wish to modify.
Once selected, you can edit the displayed fields:
Remember to click the arrow icon located above after making your edits to update the record accordingly.
To cancel the operation and go back, click on the 3 dots located on the upper right side and select “Cancel”.
Step 4: Exploring Sub screens #
If you’ve selected a record on the screen and notice additional screen options displayed above it, these are known as subscreens.
Not all screens have subscreens, but when available, they provide you with a way to delve into specific details.
For exmaple, the screen “Update Status” is a Subscreen of “Work Orders” as you can see in the image below:
By clicking on a sub screen from the above, you can explore it just like we did in the previous step (Step 3).


.png)