With FillFaster, you can track submissions in real time and view completed forms as structured PDF documents. Easily automate form processes and prefill user data to make your workflow faster.
Getting Started with FillFaster #
Prerequisites #
- A FillFaster account.
You can create an account at FillFaster. - A personal API Token.
After creating your account, go to your FillFaster account and click on Developer:
Copy the token you received: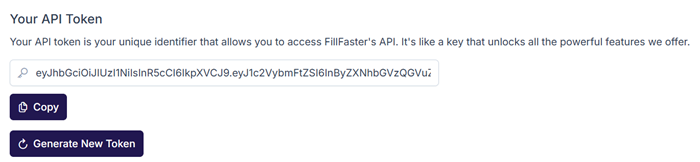
Connecting Engini to FillFaster #
- Enter your Engini account at https://app.engini.io.
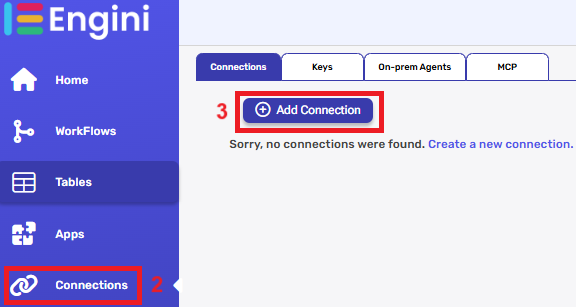
- Navigate to connections page by clicking on the Connections on the left sidebar or by clicking here.
- Click on the Add connection option located at the topbar.
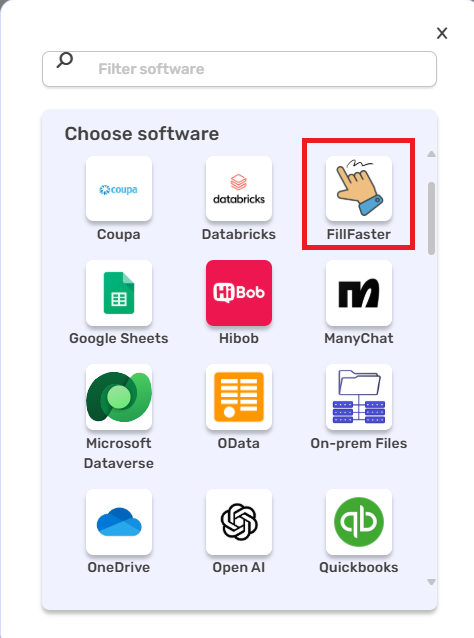
4. Choose FillFaster option from the available applications.
5. Enter the following details in the “Edit Connection” form:
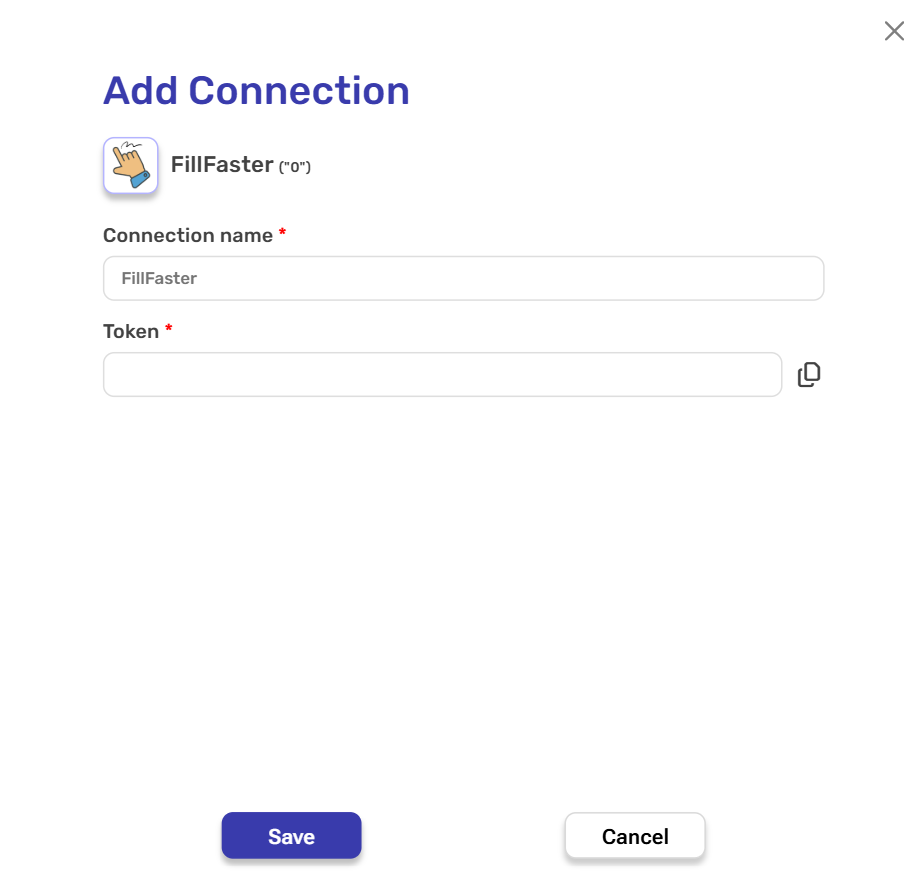
- Connection name – Enter a meaningful name for your connection.
- Token – Generate your unique API Token from your FillFaster Account Settings. paste the API Token you copied earlier from the Developer section.
- Save– Click on the save button to save your connection.
Actions #
Create Submission #
This action is used to create a new submission in your FillFaster workspace, based on an existing form template.
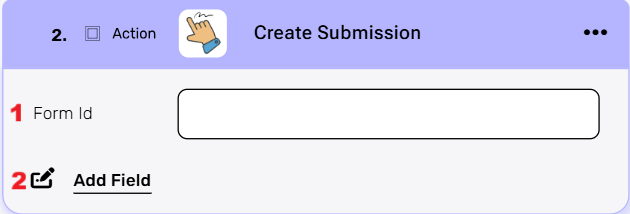
- Form Id – Enter the unique identifier of the form you want to submit. It tells the system which specific form to use for the submission.
- Add Field – By clicking the “Add field” button, you can add and define the specific fields required by the chosen FillFaster form.
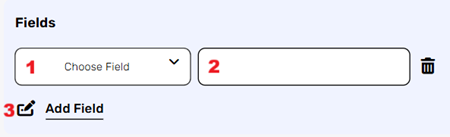
- Choose from the drop down the field you want to fill.
- Click on the empty field to the right of the dropdown to see a tooltip with all the available options you can use to fill the field. You can populate the field in one of the following options:
- Static value – number / string. when using strings, you need to surround them with single quotes (‘).
- Property value from a previous activity (Using the tooltip that opens when clicking on the field).
- Expression – using functions and/or Previous activity properties and/or static values (Using the tooltip that opens when clicking on the field).
- Repeat steps 1-2 for all the fields you want to populate.
Get Submission PDF #
This action retrieves the submitted signed PDF file in your FillFaster workspace.
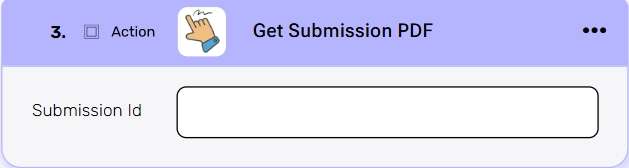
Submission Id – Enter the unique identifier of the submission you want to download. You may use an ID returned from the Create Submission action, or any existing Submission Id from FillFaster.
Send Api Request #
This action allows you to send a fully customizable request to any FillFaster API endpoint.
Use this action for operations not covered by the built-in actions.
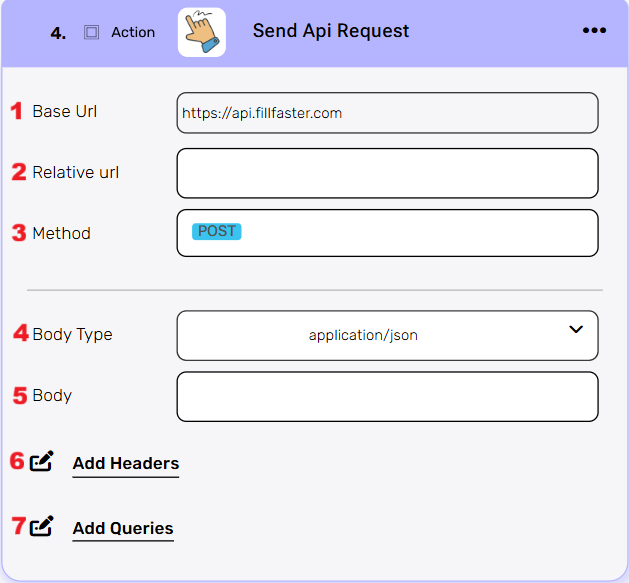
- Base Url – This is the root URL of the API you’re sending the request to.
- Relative url – You can specify additional path segments or parameters that need to be added to the end of the automatically generated URL. This allows you to customize the specific request you want to perform.
- Method – Select the HTTP method (e.g., Get, Post, Put, Delete, Patch).
- Body Type – Defines the format of the data in the body of your request. Commonly used values include application/json (as shown), which means the body will contain a JSON-formatted payload.
- Body – Contains any data that is being sent to the server.
- Add Headers – Additional metadata about the request, such as the type of data the Engini can accept, the length of the request body, and authentication information.
- Add Queries – The query refers to the parameters or data that are included in the URL of an HTTP request to provide additional information or instructions to the server.


.png)