Learn how to connect Engini to Oracle.
Using Engini’s Oracle activities, you can:
- Create individual records or batches of records
- Delete records
- Execute customized SQL queries
- Execute stored procedures
- Retrieve records directly from your Oracle ERP
To get started with the Oracle app, create an account at Oracle Cloud sign-up, and ensure you have access to Oracle’s admin area or an active access token.
Getting Started with Oracle #
Prerequisites #
- An active Oracle account.
Connecting Engini to Oracle #
- Enter your Engini account at https://app.engini.io.
- Navigate to Connections page by clicking on the Connections on the left sidebar or by clicking here.
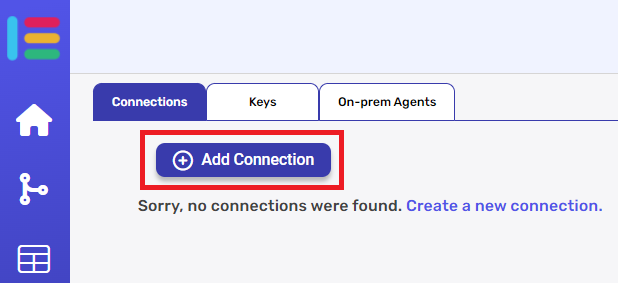
- Click on the “Add connection” option located at the topbar.
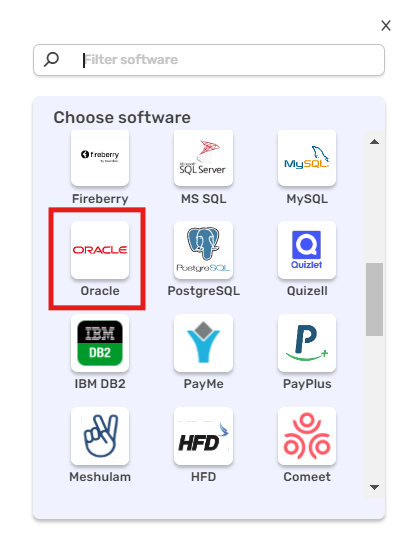
- Choose the Oracle option from the available applications.
- Enter the following details in the “Add Connection” form and press Save:
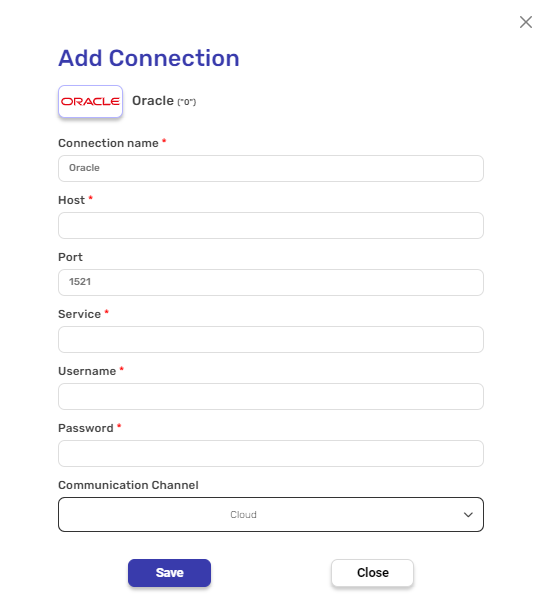
- Connection name
- Enter a unique and descriptive name for this connection. This name will help you easily identify and manage the Oracle connection within your Engini account.
- Host
- Specify the host or address of your Oracle database. This is the server location where the Oracle database is hosted.
- Port
- Provide the port number used by your Oracle database for communication. By default, the port is set to 1521, but you can adjust it based on your setup.
- Service
- Input the name of the Oracle service to which you want to connect. This field corresponds to the service provided by the Oracle database.
- Username
- Enter the username associated with your Oracle database. Make sure this user has the appropriate permissions to access and interact with the database.
- Password
- Provide the password for the specified username. Ensure the password is correct to establish a secure connection.
- Communication Channel
- Select the appropriate communication channel for this connection.
- Cloud- If you are connecting to a database hosted in a cloud environment, select “Cloud”.
- OPA- If your database is on-premises and you are using an On-Premises Agent (OPA) for the connection, select “OPA”.
In this case, an additional field will appear:
On-Prem Agent- Choose the specific On-Premises Agent that you want to use for this connection if you have multiple agents configured.
- Select the appropriate communication channel for this connection.
Once all required fields are completed, click Save to establish the connection.
- After clicking “save”, a window will prompt you to select Database Objects from available Tables/Views/Stored Procedures.
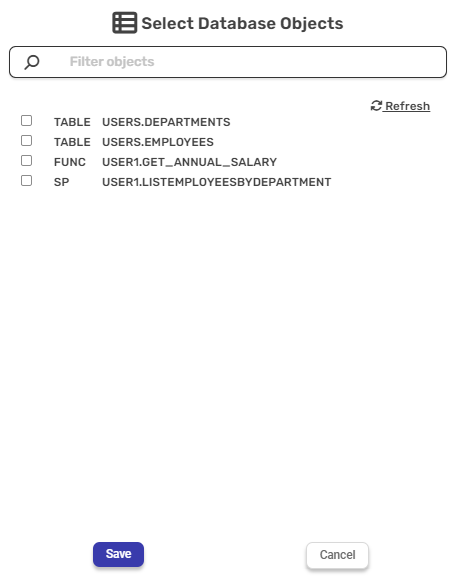
- You can select the databases you want to use by marking the corresponding checkboxes of the tables/view/Stored Procedures you intend to utilize. Subsequently, you can perform various activities within your workflow and access the data stored within these selected tables/views/Stored Procedures.
Actions #
Create Record #

- Table
- Click on the empty field to display a tooltip listing all available tables in your Oracle database. From this list, select the table where you want to create the new record. Ensure that the selected table matches the data structure for the record you intend to insert.
Get Records #

- Table/View
- In this field, select the table or view from which you want to retrieve records. Click on the empty field, and a tooltip will appear showing the available tables and views in your Oracle database. Choose the appropriate one to proceed with the data retrieval.
- Top
- Specify the number of rows to retrieve from the table or view. If left blank, the default is set to retrieve 100 rows. This field allows you to limit the number of rows returned by the query.
- Offset
- Enter the number of rows to skip before starting to retrieve data. By default, the offset is set to 0, meaning data retrieval will start from the first row unless you specify a different value.
- Add Sorting
- Click this option to define how the retrieved records should be sorted. You can sort the data by one or more columns in ascending or descending order based on your needs.
- Add Filter
- Click this option to add conditions to filter the records that will be retrieved. This allows you to refine the data extraction to only include records that meet specific criteria.
Update Record #

- Table
- Select the table where the record you want to update resides. Click on the empty field to display a tooltip showing the available tables in your Oracle database, and choose the appropriate table where the record will be updated.
Update Records #

- Table
- Select the table where the records you want to update are located. Click on the empty field to display a list of available tables in your Oracle database. Choose the table where the records will be updated.
- Add Filter
- Click this option to define filter criteria for selecting the records you wish to update. Filters help narrow down the records that will be modified, ensuring only the records meeting the specified conditions are updated.
Delete Records #
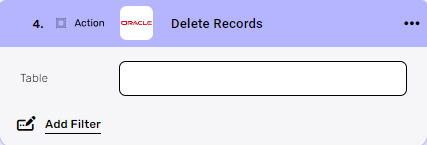
- Table
- Click on the empty field to open a tooltip displaying all available tables in your Oracle database. From the list, select the table from which you wish to delete records. Ensure that the table selection corresponds to where the records you intend to delete are located.
- Add Filter
- Click “Add Filter” to specify criteria for which records should be deleted from the selected table. Filters allow you to define conditions to delete specific records, ensuring only the intended data is removed. Without a filter, all records in the table might be deleted.
Create Batch of Records #

- Data List
- In this field, enter the list of data items you want to insert into the Oracle table. You can input up to 1000 records at a time, as the maximum batch size is 1000 items. Make sure the data format corresponds to the table structure where the records will be inserted.
- Table
- Click on the empty field, and a tooltip will appear showing all the available tables in your Oracle database. You can then select the specific table where you wish to create the new batch of records.
Get Records Batch #

- Data List
- In this field, input the list of data items to be retrieved in a batch. The maximum batch size is 1000 items, which means you can retrieve up to 1000 records at a time. Ensure the data format matches the structure of the table you are working with.
- Table
- Select the table from which the batch of records will be retrieved. Click on the empty field to display a tooltip listing all available tables in your Oracle database, and choose the appropriate one.
- Top
- Specify the number of rows to retrieve in the batch. If left blank, the default is set to 100 rows. You can adjust this number to retrieve more or fewer rows based on your requirements.
- Add Sorting
- Click this option to sort the retrieved batch of records. Sorting can be applied to one or more columns in either ascending or descending order, depending on your needs.
- Add Filter
- Click this option to apply filters to the batch of records being retrieved. Adding filters allows you to narrow down the results by specifying criteria that the records must meet to be included in the batch.
Update Batch of Records #

- Data List
- In this field, input the list of data items to be updated in a batch. The maximum batch size is 1000 items, meaning you can update up to 1000 records at once. Ensure the data matches the structure of the table where the records will be updated.
- Table
- Select the table where the batch of records will be updated. Click on the empty field to display a tooltip listing all available tables in your Oracle database, and choose the appropriate one where the updates will be applied.
- Add Filter
- Click this option to specify the filter criteria for the records you wish to update. By adding filters, you can narrow down the selection and only update records that match the specified conditions, ensuring you modify the correct data.
Execute Customized SQL #

- SQL
- In this field, enter your custom SQL query to execute on the Oracle database. This allows you to run specific SQL commands such as SELECT, INSERT, UPDATE, DELETE, or any other custom query. Ensure that the SQL query is correctly formatted and valid for the Oracle database you are working with, as incorrect queries may result in errors or unintended changes.
Execute Procedure #

- Procedure Name
- In this field, enter the name of the stored procedure you want to execute in your Oracle database. The procedure must already exist in the database, and it can perform various tasks such as data manipulation or calculations. Ensure that the procedure name is spelled correctly and that you provide any required parameters when executing the procedure.
After selecting a procedure from the Procedure Name field, the “Add fields” option will appear.
- Add fields
- This option allows you to specify and provide input parameters required by the selected procedure. Depending on the procedure, it might need several inputs (fields) to be executed correctly. By clicking “Add fields,” a list of necessary fields or parameters will appear, where you can fill in the corresponding values. This ensures the procedure runs with the correct inputs as defined in your Oracle database.


.png)