Creating a connection is a critical component of integration between diffracts systems, and it serves as a central element in Engini workflows.
This guide will walk you through the step-by-step process of establishing a connection in Engini.
Create a Connection #
Step 1: Add Connections #
Navigate to Connections page by clicking on ‘Connections’ on the left sidebar.

Step 2: Add New Connection #
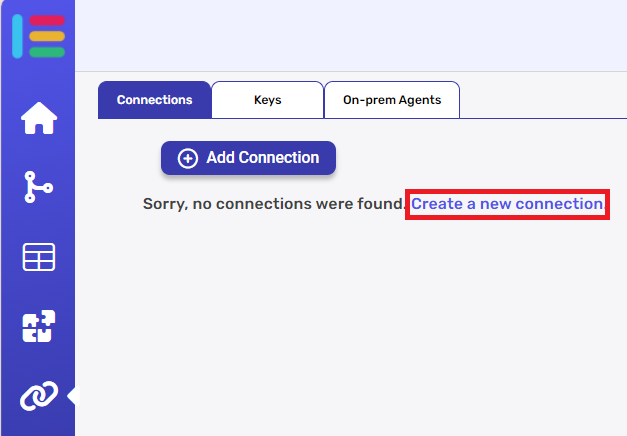
- If it’s your first connection, you have 2 options:
- Click on ‘Add Connection’.

- Click ‘Create a new connection’ on the page.

- Click on ‘Add Connection’.
- If it’s not your first connection, you have one option:
- Click on ‘Add Connection’:

- Click on ‘Add Connection’:
Step 3: Choose a Software #
Choose the software you want to connect to.
You have 2 options:
- Type the name and you’ll find it right away.
- Search it in the box and click it.
Every software you want to connect to comes with its specific connection prerequisites as outlined in its documentation.
Upon selecting the software, a window will appear, prompting you to input the necessary connection data.
For further guidance on establishing a connection with particular software, refer to the information provided in the Apps section.
Step 4: Modify the Connection #
After you have established a connection, you can modify it by following few steps:
- clicking on the 3 dots, in the right side of the connection.


- Next, A new window will open, and now you can choose which action you want to execute.

- Edit
You can modify the components you entered in the connection. - Refresh Objects
After you created or modified the connection, you need to refresh the connection. The use of this feature varies by application. In broad terms, it is usually used when structural changes are made within the application. For example:
– monday.com – Adding new boards.
– Priority – Opening access to forms and subforms.
– Salesforce – Creating new objects.
– SQL – Selection of tables, views and stored Procedures.
When you click the Refresh Objects action, a status indicator labeled ‘In Progress’ appears. Alongside it, there is a refresh button that allows you to check the current status of the process.

If the process completes successfully, the ‘In Progress’ status disappear, and the refresh button is no longer visible.
If the process fails, the status will change to ‘Error’, indicating that there is a problem with the connector.
- Refresh Objects Status
The Refresh Objects Status action displays the current status of the Refresh Objects process. It shows whether the process is still ‘In Progress’ or has ‘Finished’.
- Delete
After choosing the “Delete” option, a warning window will pops up as you can see below:
In the warning window, click on the “Accept & Delete” button in case you sure you want to delete the connection.
In other case, click on the “Cancel” button and the activity won’t be deleted.
Important:
Deleting a connection will have a direct impact on all processes and functionalities associated with it.
Be cautious when proceeding with this action, as it may disrupt your existing workflows and integrations.
- Edit


.png)