The Engini on-prem agent provides a secure way for Engini to selectively access customer-authorized on-prem apps, databases, and folders without having to open ports in the corporate firewall. In addition, this feature is designed to help you with operations such as data synchronization, writing to data tables, data retrieval, and more by connecting directly to databases.
With OPA, you receive maximum security management, physical protection, and the capability to ensure regulatory compliance.
Step 1- Add an Agent #
It is recommended to connect to Engini using the computer on which you want to install the agent.
- Navigate to Connections page by clicking on ‘Connections’ on the left sidebar.

- Click on ‘On- Prem Agents’ option located at the left top bar.
- Click on ‘Add Agent’.

- Enter the following details in the form and press Save:
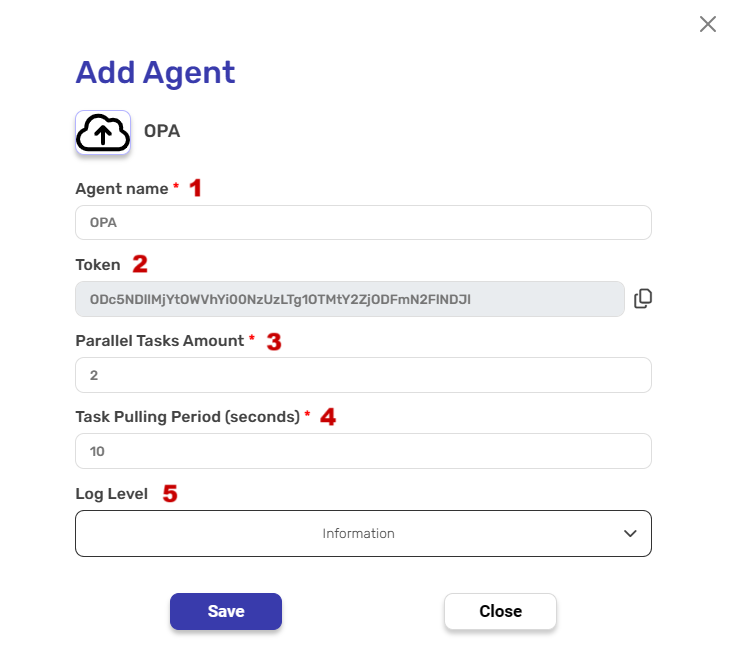
- Agent Name- Choose the name of the agent.
- Token- Token which created automatically by Engini for each agent.
- Parallel Tasks Amount- The default is 2 tasks, but you can choose the number of tasks you want.
- Task Pulling Period- The default is 10 seconds, but you can choose the number of seconds you want. The defaults numbers have been set in order not to burden your server.
- Log Level- Determine the level of detail recorded in the logs generated by the agent.

- Click on the small arrow and a dropdown menu will pop up.
- Choose the log level from the following options:
- INFORMATION (Default)
The INFORMATION log level is set as standard. It records essential information each time a task is requested, providing insights into task reception and any encountered errors. - DEBUG
The DEBUG log level is employed selectively at specific points within the software. It provides a deeper level of detail, recording granular information for troubleshooting and in-depth investigation.
- INFORMATION (Default)
- Note: With the latest OPA version 6 1.006, there’s now an added capability to download logs at 3 intervals when the agent is ONLINE. Please anticipate a brief duration for the download process to complete.
- Copy the Token
- Click on “Save” button.

Step 2- Download the Agent #
- Click on ‘Download Agent’ at the top of the agent’s details.

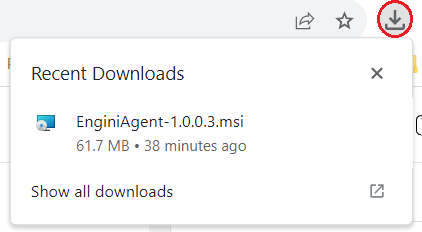
- After a few seconds, you can click on the circle located on the right side of the window and then click on the file.
- A blue window will pop up. Click on ‘Run anyway’ to continue.

- Click on the ”Next” button.

- Accept End-User License Agreement

- Mark the checkbox
- Click on the “Next” button.
- Specify the destination.

- Click on the ‘Change’ button in case you want to change the default location.
- Click on the ”Next” button to continue.
- Enter the Token from the creation of the agent and then press “Next”.

- If you didn’t copy the token from step 1.5 follow the next steps, otherwise enter the token you copied in the field:
- Open the “Connections” page in Engini site.
- Click on the 3 dots on the right side of the agent and click “Edit”.
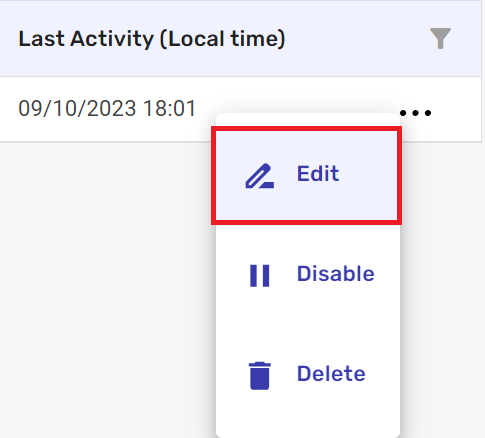
- Copy the token to the clipboard and paste it to the installation.

- If you didn’t copy the token from step 1.5 follow the next steps, otherwise enter the token you copied in the field:
- Click ‘Install’ to begin Engini on-premise Agent installation.

- A popup window will show up, click ‘Yes’ to continue.
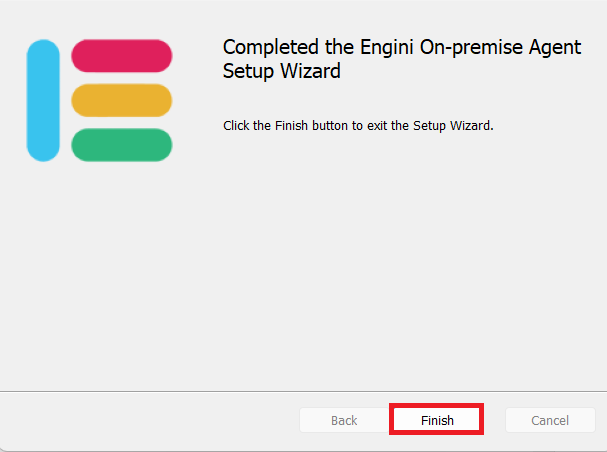
- After a few seconds, the installation will be completed. Click on ‘Finish’.
- Open ‘Services’ App in your computer.
- Search for Engini’s agent.
- Click on ‘Start’ in order to activate Engini’s service.
Step 3- Test Agent Connection #
- After running the file, go back to ‘On-prem Agents’ in the Engini website and click on the icon of refreshing the status.

- Now the status should change to ‘Online’.

- If the status hasn’t changed to ‘Online,’ go to the services and check the status of the Engini service.
- If the service isn’t running, please connect us – info@engini.io.
- If the service isn’t running, please connect us – info@engini.io.
- If the status hasn’t changed to ‘Online,’ go to the services and check the status of the Engini service.
Step 4 – Add your OPA #
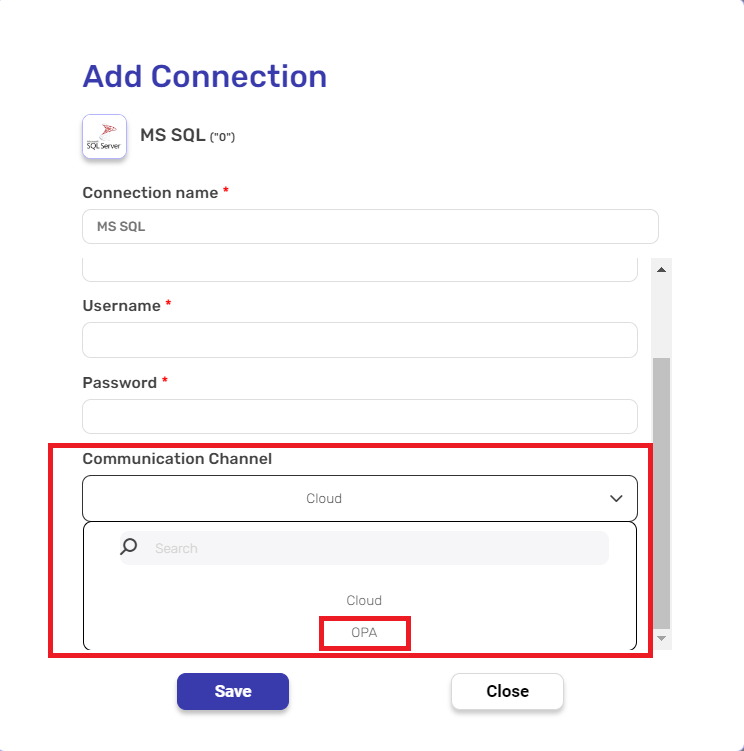
To add your On-Prem Agent (OPA) to your connection, follow these steps:
- Navigate to Connections: Go to the Connections Section.

- Add a Connection: Start the process of adding a new connection.

- You can choose a connection such as MSSQL or IBM DB2 and setup your OPA, Scroll down to the Communication Channel and select your OPA.


.png)