Adding contacts to your Engini account allows you to collaborate and share access with people associated with or outside of your company.
This guide will walk you through the simple steps to add contacts.
Step 1: Accessing Settings #
Click on the Gear Wheel Icon (setting) locate in the lower left corner of the screen.
Step 2: Inviting a Contact #
Click on the “Invite users” button.
Important!
By pressing the three dots ••• on the right side of the user, you can choose to either delete or deactivate an existing user.
Step 3: Providing Contact Details #
Now, a window will appear where you can enter the necessary details:
- Enter the email address of the contact you want to add in the provided field.
- Click on the small arrow and a pop-up will appear. select the contact type from the 3 options:
- Administrator – Complete control over the platform, enable to create and modify processes, manage settings, add users, invite individuals to the account, and alter account-related details, providing full account management capabilities.
- Member – Ability to execute actions within the system, utilize various features, and contribute to processes based on their assigned role. However, they do not have privileges to manage the account and modify settings.
- App Only – Users with this contact type can only view and use the app. They are restricted from interacting with the processes, making changes or accessing other functions within the system including editing the application.
- Administrator – Complete control over the platform, enable to create and modify processes, manage settings, add users, invite individuals to the account, and alter account-related details, providing full account management capabilities.
- Click on the “Add User to Invitation List” button.
Step 4: Sending Invitations #
- Repeat step 3 to add more contacts as needed.
- Once you’ve added all the desired contacts, click on the “Send Invitation” button to invite them to the account as you can see in the image below:

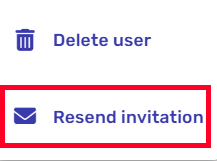
When an invitation is sent to a user, the status of the user will remain as Pending until the invitation is accepted. In case he didn’t recieve it, you can resend the invitation to the same user. Click the 3 dots:
Choose the Resend invitation.


.png)