If Condition #
Engini’s if condition activity offers a functionality equivalent to that of the if statement used in software development. It provides a way to selectively execute different blocks based on whether set of conditions is true or false.
Note that if you add more than one condition then they will be linked with the AND operator.
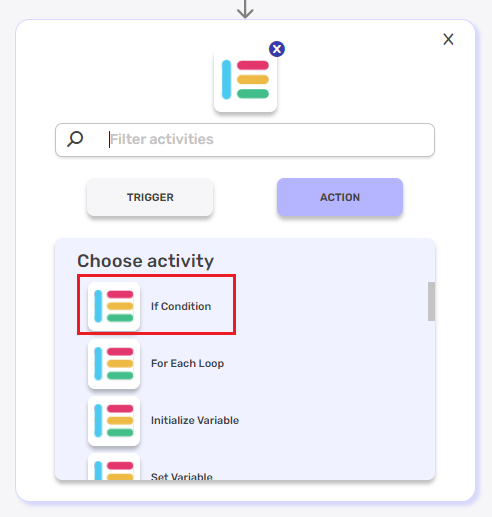
Choose the Engini software and click on the “if condition” action:
Follow the next steps to define the activity: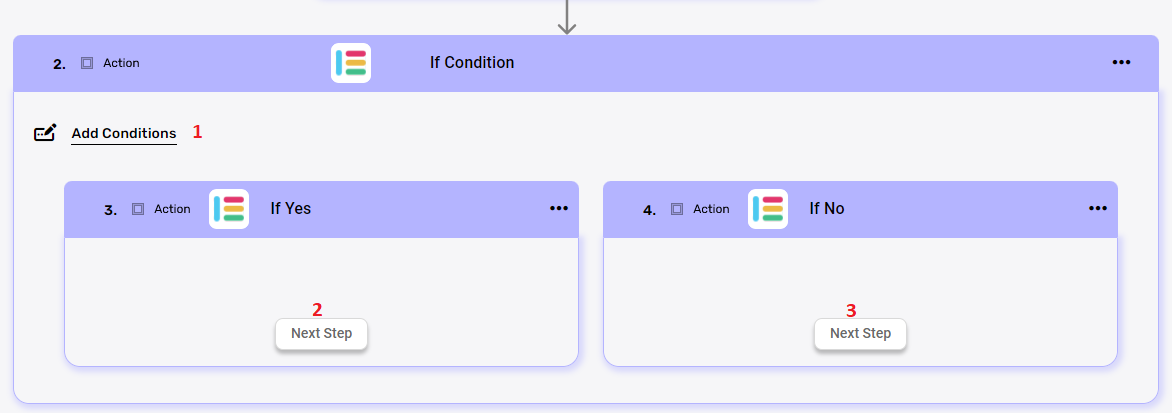
- Add conditions
You can add one or more conditions.- Click on “Add conditions” button.
- Click on left the field to show the tooltip with all the options you can choose. You can populate the field in one of the following options:
- Static value – number / string. when using strings, you need to surround them with single quotes (‘).
- Property value from a previous activity (Using the tooltip that opens when clicking on the field).
- Expression – using functions and/or Previous activity properties and/or static values (Using the tooltip that opens when clicking on the field).
- Select the condition you want.
- Click on the right field to show the tooltip with all the options you can choose. You can populate the field in one of the following options:
- Static value – number / string. when using strings, you need to surround them with single quotes (‘).
- Property value from a previous activity (Using the tooltip that opens when clicking on the field).
- Expression – using functions and/or Previous activity properties and/or static values (Using the tooltip that opens when clicking on the field).
- Repeat steps a-d for all the fields you want to populate.
- If Yes
If all conditions are met, the workflow will turn to execute the process within the if yes block.- Click on “Next step” button to add a activity that will be carried out if all condition are met.
- If No
If one or more conditions isn’t met, the workflow will turn to execute the process within the if no block.- Click on “Next step” button to add a acticity that will be carried out if the one or more conditions are not met.
- Click on “Next step” button to add a acticity that will be carried out if the one or more conditions are not met.
For Each Loop #
The “For Each Loop” activity automatically iterates through each element in the data list and executes a set of activity blocks for each element.
If one of the activities in the loop fails and is not handled (For example, using the configure run after option), The whole loop stops.
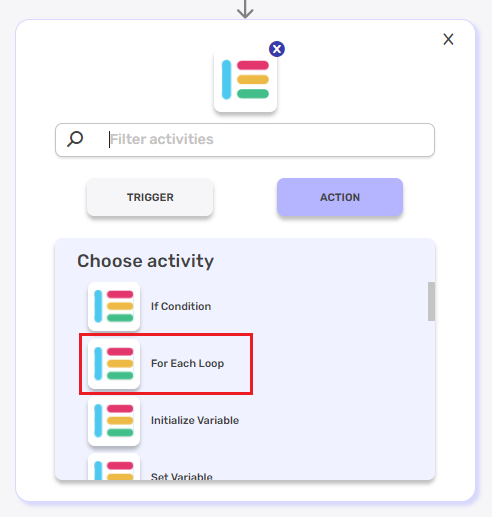
Choose the Engini software and click on the “For Each Loop” action:
- Click on the empty field next to the data list label and the tooltip will popup showing only previous activities than contains data lists from which you can choose. Choose a data list to iterate on.
- Click on “Next step” button.

- Choose the software you want in which the activity will be performed.
- Make sure the “Action” button is makred.
- Choose the type of action you want to use.
- Repeat steps 3-5 to add all the actions you want to perform inside the loop.

For more information on the possible actions for each software, see the apps category.
Switch #
An activity that provides a workflow a way to selectively execute different blocks which are called “cases” depending on the value of a particular expression. A switch can be used as an alternative to a series of nested ‘if’ statements when there are multiple possible values that need to be checked on one variable / expression.
Each case has a set of activities specifically defined in it.
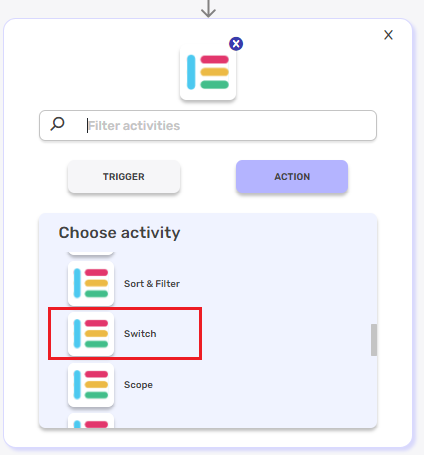
Choose the Engini software and click on the “Switch” action:
Follow the next steps to learn how to define this activity:
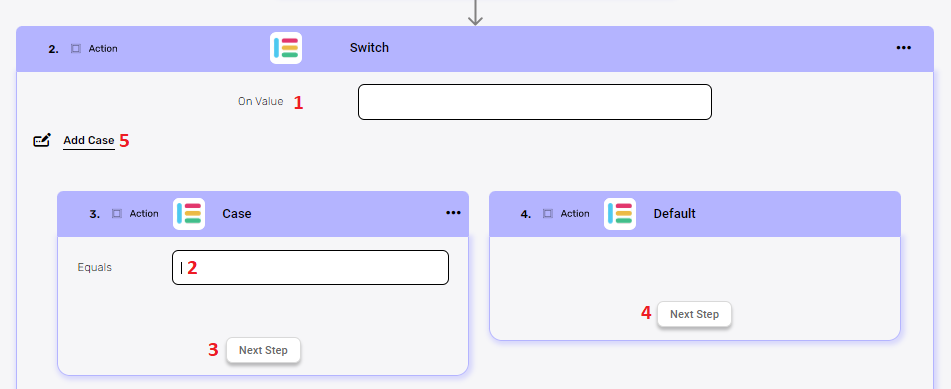
- On value – click on the empty field to define the variable / expression that his result will be used for the switch cases evaluation.
- Equals – you have to fill at least one case. click on the empty field to fill a value that the workflow will check if it is equal to the variable or the expression you entered in the “on value” field.
- Next step – Click the “Next step” button to add an action that will be executed in case the “case value” equals the value in this case.
- Default – The workflow only executes the default block if it hasn’t executed any of the case blocks you defined for it. In the default block, you can define one or more actions to be performed if this block is executed.
- Add Case – Repeat steps 2-3 to add more than one case to the switch block. Click on the “Add Case” to add another case.
Do While #
The do-while is a type of activity that allows a set of activities to be executed repeatedly as long as all conditions are true. You can set one or more conditions. If you add more than one condition, then they will be linked with the AND operator.
Choose the Engini software and click on the “do while” action:
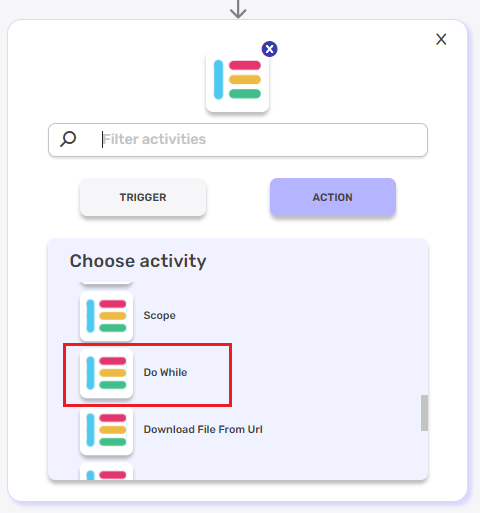
Follow the next steps to learn how to define this activity:
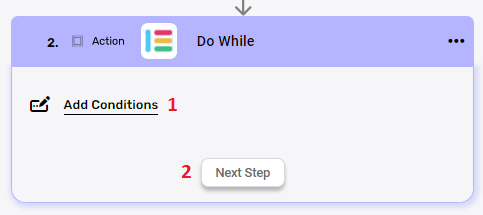
- Click on the “Add Conditions” button to add a condition. While the loop meets the condition, it will run and execute the activities you defined.

- To define a condition click on the left field and the tooltip will pop up showing the options you can choose. You can populate the field in one of the following options:
- Static value – number / string. when using strings, you need to surround them with single quotes (‘).
- Property value from a previous activity (Using the tooltip that opens when clicking on the field).
- Expression – using functions and/or Previous activity properties and/or static values (Using the tooltip that opens when clicking on the field).
- Select the condition you want the record to meet from the conditions list.
- Click on the rightest field and the tooltip will pop up showing the options you can choose.
You can populate the field in one of the following options:- Static value – number / string. when using strings, you need to surround them with single quotes (‘).
- Property value from a previous activity (Using the tooltip that opens when clicking on the field).
- Expression – using functions and/or Previous activity properties and/or static values (Using the tooltip that opens when clicking on the field).
- Repeat steps a-c for all the fields you want to populate.
- To define a condition click on the left field and the tooltip will pop up showing the options you can choose. You can populate the field in one of the following options:
- Advanced options

The purpose of these fields is to prevent an infinite loop. - Click the “Next Step” button to add an action that will be performed as long as the conditions are met. You can define more than one action, by clicking the “Next Step” after every action you will add new action. If you want to stop adding actions inside the “Do While” activity, click on the next step outside the activity block.
See the apps category to learn how activities are used in different apps.
Sort & Filter #
A process of organizing data in a particular order based on a specified criteria (sorting) and then extracting data based on specific conditions (filtering). Multi sort is supported.
Choose the Engini software and click on the “Sort & Filter” action:
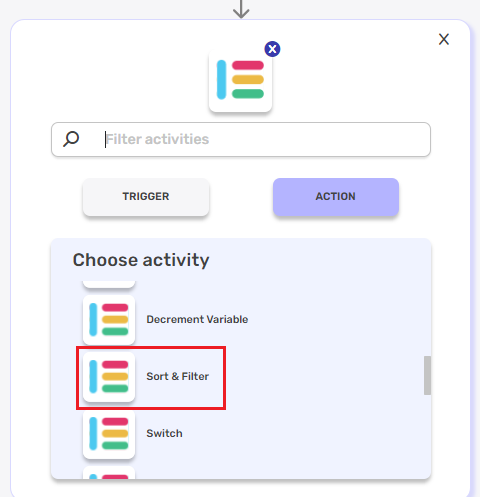
Follow the next steps to learn how to define this activity:
- Data List
Click on the empty field and the tooltip will popup showing only previous activities than contains data lists from which you can choose. - Add Sorting

- Click on the “Add sorting” button.
- Choose from the drop down the field you want to sort by.
- Choose the sorting option: descending or ascending.
You can define a multi sort by adding more than one field to the sort. Use the arrows on the right to define the sort order – which field will be used as the primary sort, secondary, etc.
- Add Filter

- Click on the “Add filters” button.
- Choose from the drop down the item you want to filter by.
- Select the condition you want the records to meet for the selected field.
- Click on the rightest field to show the tooltip with all the options you can choose. You can populate the field in one of the following options:
- Static value – number / string. when using strings, you need to surround them with single quotes (‘).
- Property value from a previous activity (Using the tooltip that opens when clicking on the field).
- Expression – using functions and/or Previous activity properties and/or static values (Using the tooltip that opens when clicking on the field).
- Repeat steps a-d for all the fields you want to populate.
- Top N
You can set the number of rows you want to retrieve. This parameter limits the result set to the specified number of records, with the default being 100.- If you set
Top N = 1, a single record will be returned instead of an array. If no record is found, the action will fail, allowing you to implement an IF condition within the workflow. This can be useful for processes where the existence of a record determines the next steps in the workflow.
- If you set
- Offset
If you want to skip a certain number of rows before retrieving data, you can set the offset value. The default is 0, meaning no rows are skipped.
Output Metadata #
The Sort & Filter activity output includes a Metadata section that provides information about the outcome of the process. The metadata values can be used or displayed in later activities within the workflow.

- Source Data Count
Displays the total number of records retrieved from the selected data source before any sorts and filters were applied. This represents the original dataset size - filtered data count
Displays the number of records remaining after applying the defined filters and sorting criteria. This represents the subset of data that meets the specified conditions.
Scope #
A scope activity is a way to organize or group activities together in a workflow.
There are two important uses for scope:
- Error Handling:
When designing a workflow, the workflow can sometimes fail or fall by condition. The scope can be used as a “try and catch” mechanism. By placing actions in a scope, you can “catch” any errors that occur within. This is because errors that occur on an action within the scope propagate “up”, causing the scope to fail as well.
For example, if we configure a “Send an email” action to run if the scope fails, we now have a workflow that notifies you if anything within the scope fails. - Organizing your workflow:
When making a complex flow, it won’t take long for the number of steps to get out of control. Instead of scrolling up and down to navigate your Flow, you can put actions into a scope. You can click on the title to collapse it and the scope and all the actions within will be condensed into a single step, hiding sections of the flow you’re not working on. This helps tiding up your workflow’s workspace and lets you focus on the actions you’re actively editing.
Choose the Engini software and click on the “Scope” action:
Add the activities you want to add inside the scope block by clicking on the “Next Step” button inside.
Terminate workflow #
Terminating a workflow refers to ending the execution of a workflow.
This action is intentional and can be used when you want to prematurely end a workflow due to a specific reason or when a workflow has completed its intended purpose.
When using this action, you have to set one of the statuses: Failure, Fell by condition, Success.
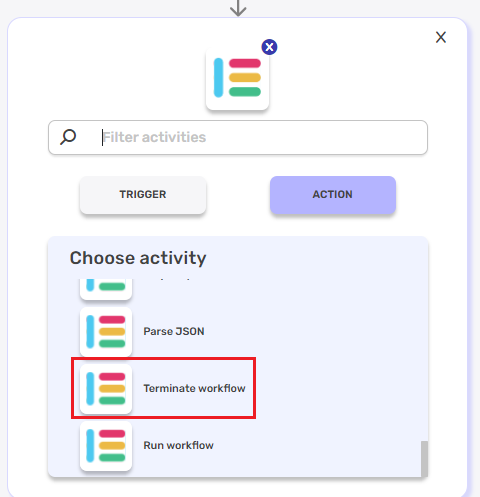
Choose the Engini software and click on the “Terminate workflow” action:
Delay #
Delay allows you to stop the workflow for a specified time.
For example, by entering the value 1 to count of unit to delay and Choosing minutes, the workflow will stop for a minute and then continue to the next activity.
Choose the Engini software and click on the “Delay” action:

Follow the next steps to learn how to define this activity:

- count of unit to delay
Click on the empty field and and write down the amount of time you would like to stop. - unit
Choose from the drop down the time unit.


.png)