This guide shows how to use an AI Agent to automate lead management from Monday to Salesforce. The agent determines whether to create a new lead or update an existing one and sends an email notification via Gmail. This workflow helps prevent duplicate records, maintain clean CRM data, and streamline lead communication.
Prerequisites #
Before you begin, ensure the following:
- Connection between Engini and Monday.
Learn how to connect Monday to Engini. - Connection between Engini and Salesforce.
Learn how to connect Salesforce to Engini. - Connection between Engini to a LLM.
Learn how to connect Anthropic or OpenAI to Engini. - Connection between Engini and Gmail.
Learn how to connect Gmail to Engini.
Create a new Workflow #
To learn how to create a workbook, click on Workflows.
Item Created #
To get started, add a monday trigger.
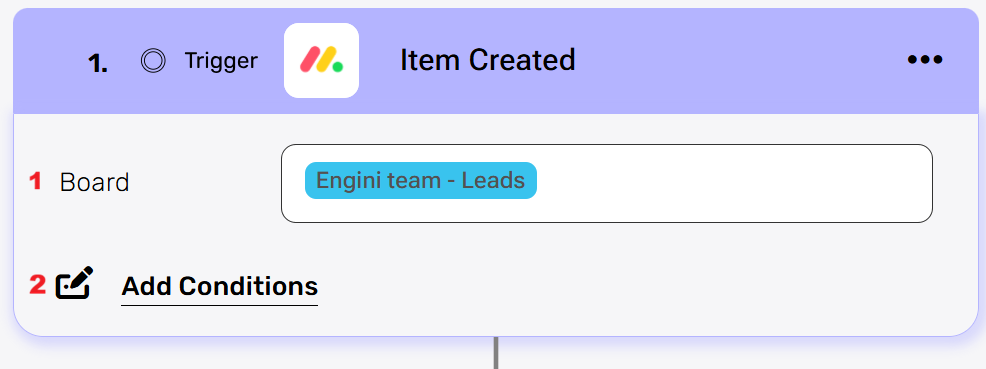
- Board
Choose the Monday board that contains your leads. - Add Conditions
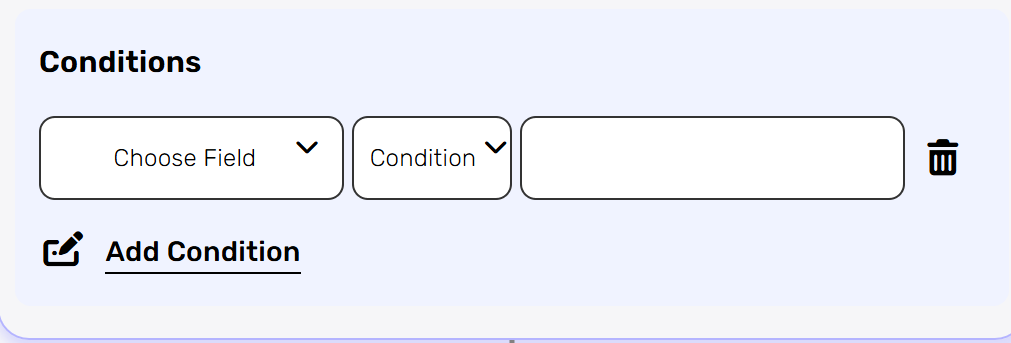
- Choose Field- if you want to be more specific you can add conditions (e.g., Status = “In Progress”).
AI Agent #
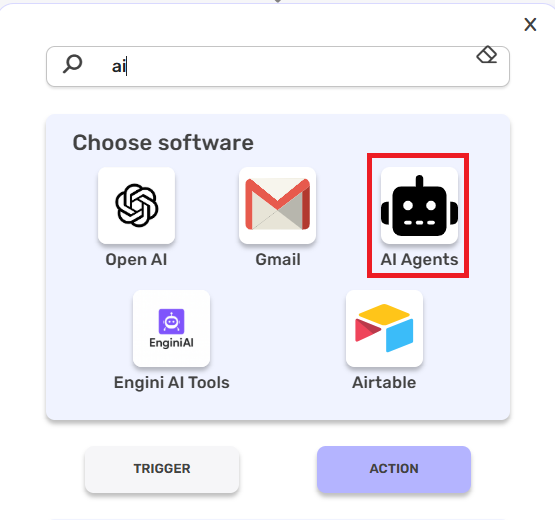
Add the AI Agent to the workflow.
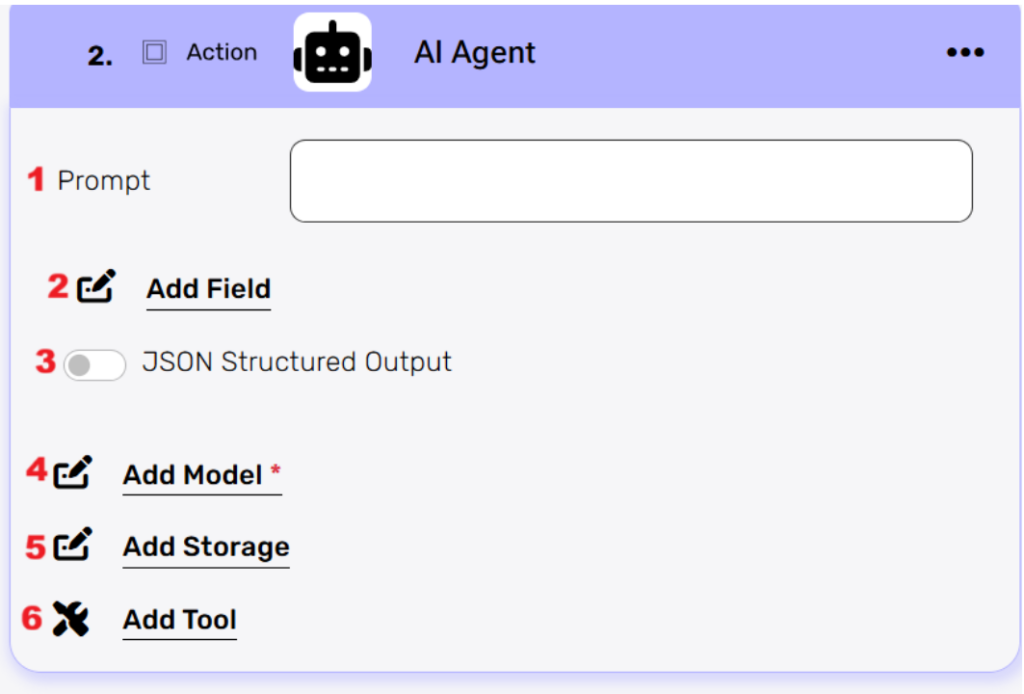
- Prompt– Enter a prompt that defines the task the AI Agent should perform:
“Process the newly created lead from monday.com. Retrieve the item details, check if a Salesforce Lead with the same company already exists, and decide whether to create or update the Lead accordingly. After completing the Salesforce action, send an email to the lead:- If the Lead was created, notify that a new lead was created and details were updated.- If the Lead was updated, notify that the account details were successfully updated.” - Add Field– Choose the System Message field and define the rules and execution flow for the AI Agent:
“Always start by calling Monday Get Item (Item Created trigger has no payload) and treat its response as the source of truth. Extract the lead’s email and name, if email is missing or invalid, stop. Search Salesforce by email (or name if needed), create a Lead only if none exists, otherwise mark as EXISTING.” - JSON Structured Output
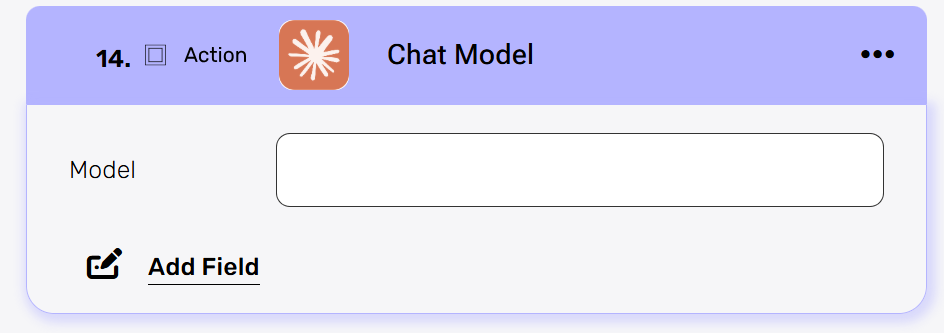
For this tutorial you wont need to use this option. - Add Model
Choose the Chat Model action of Anthropic Claude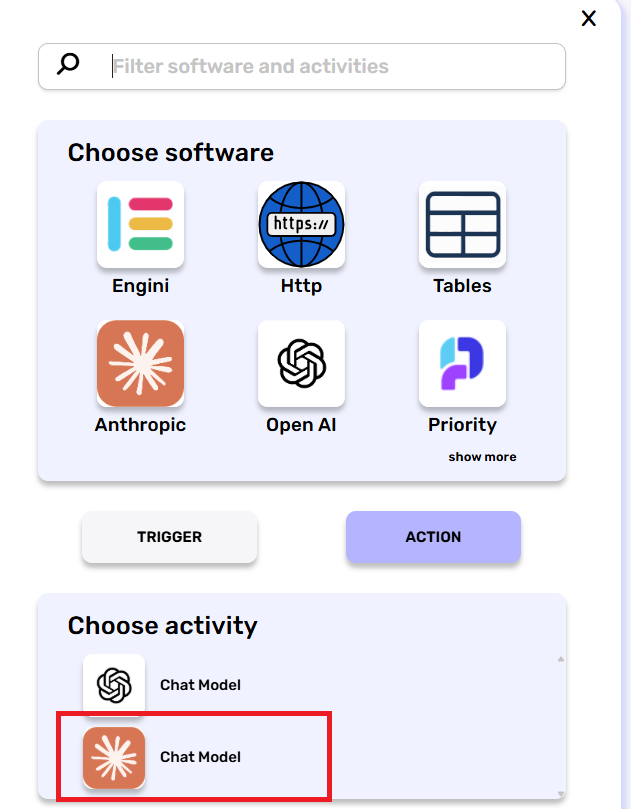
- Choose the model Sonnet/Haiku/Opus of the Anthropic Claude.
- Choose the model Sonnet/Haiku/Opus of the Anthropic Claude.
- Add Storage
For this tutorial you wont need to use this option. - Add Tools
Click Add Tool to define which actions the AI Agent is allowed to use during execution. In this step, you add all the actions from monday.com, Salesforce, and Gmail that the agent may need in order to complete the workflow.
Add Agent Tools #
Get Records #
Choose the Get Records Activity from Salesforce.
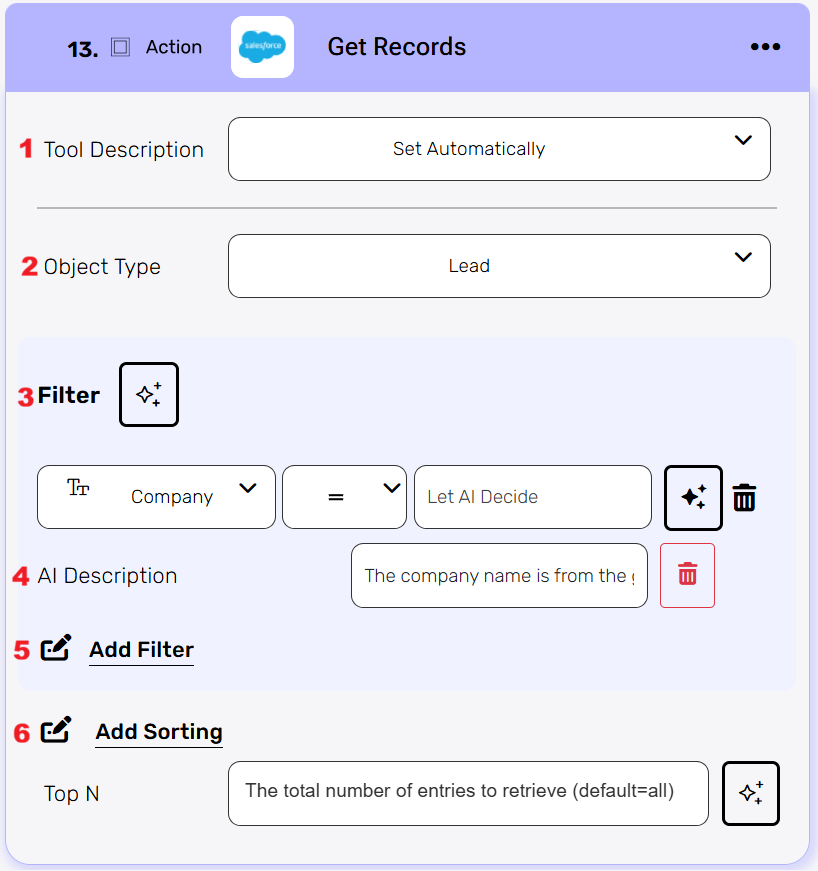
- Tool Description– For this tutorial, leave the Set Automatically option.
- Object Type– Choose Leads.
- Filter– Add the Company name filter and let the Agent decide to which field it should match. We will explain the different options, for this tutorial please use the conditional filter.
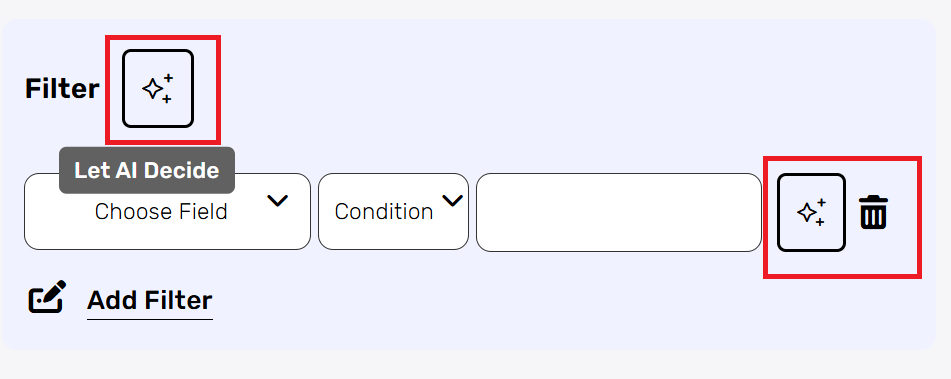
- Main Filter –The Agent decides which filter should be applied based on the prompt and the instructions you provided.
This is useful when multiple filters exist and you want the AI to choose the most relevant one at runtime.
- Conditional Filter – You define the field and condition, but select “Let AI Decide” for the value. The Agent determines which value to use for the filter based on the context and your instructions.
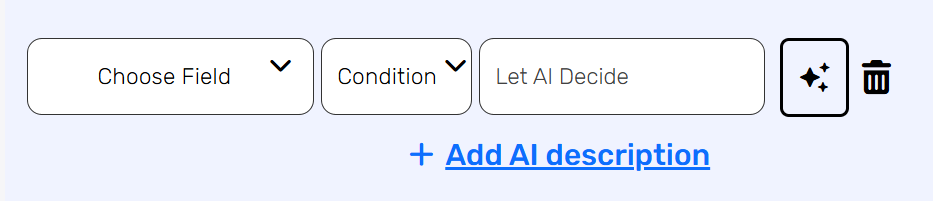
- Main Filter –The Agent decides which filter should be applied based on the prompt and the instructions you provided.
- AI Description– Adjust the agent search to the match the field name to the company name by inserting a short description : “The company name is from the get item activity of monday”.
- Add Filter– Add another filter if you want to be more specific.
- Add Sorting– For this tutorial, you won’t need this option.
Get Item #
Choose the Get Item activity from Monday.
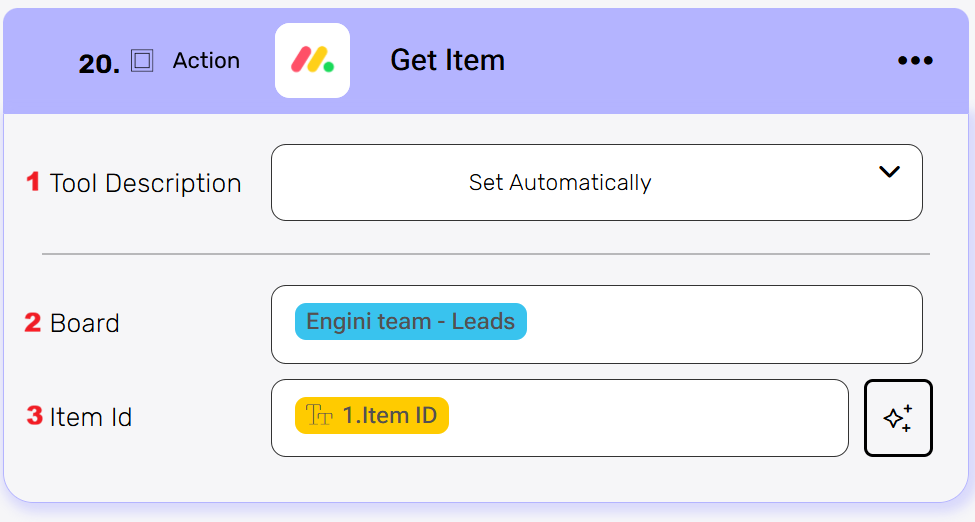
- Tool Description– For this tutorial, leave the Set Automatically option.
- Board– Choose the board in Monday that corresponds to you leads.
- Item Id– Map the item Id to the Item ID field from the Trigger.
Note: The AI Agent is powerful. If you choose to enable “Let AI Decide”, the Agent can also determine which type of ID is most suitable to use, based on the prompt and the available context.
Create Record #
Choose the Create Record activity from Salesforce.
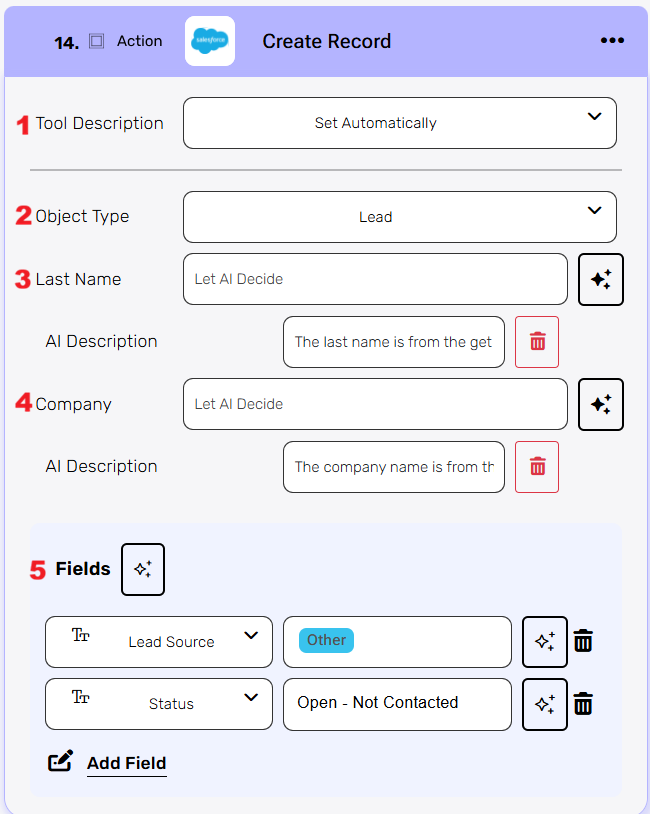
- Tool Description
For this tutorial, leave the Set Automatically option. - Object Type
Choose the Table in Salesforce that corresponds to the Leads. - Last Name
Let the agent decide which name to assign to this field based on the item response from Monday.- AI Description: “The last name is from the get item of monday”.
- Company
Let the agent decide which name to assign to this field based on the item response from Monday.- AI Description: “The company name is from the get item of monday “.
- Fields
To our new record in our Salesforce table we added this two fields. Choose the desired fields that you want to apply to a new lead in your Salesforce table.
Update Record #
Choose the Update Record activity from Salesforce.
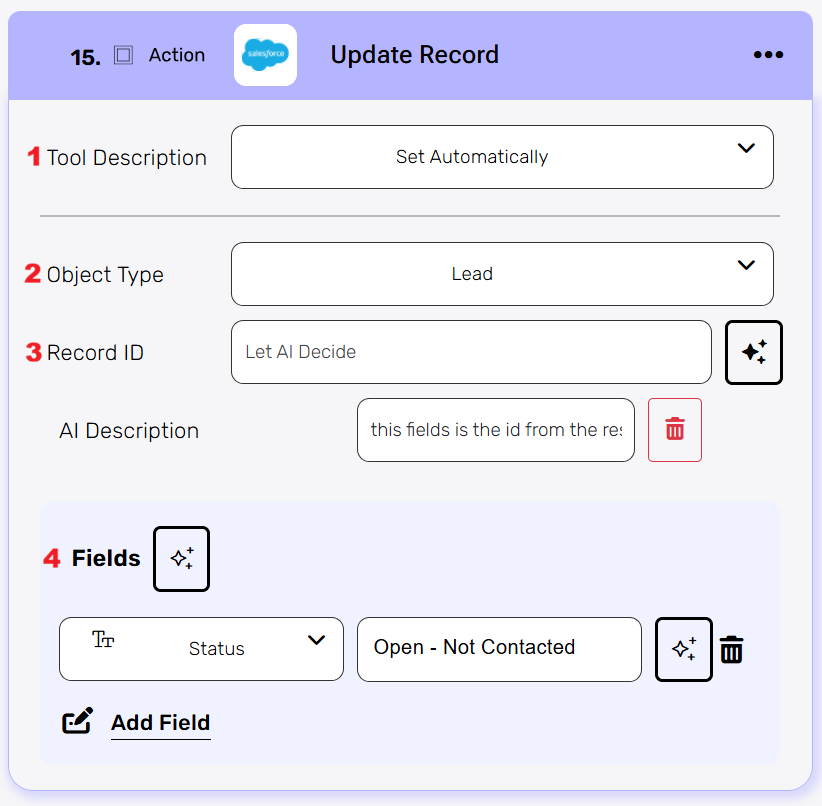
- Tool Description– For this tutorial, leave the Set Automatically option.
- Object Type– Choose the Table in Salesforce that corresponds to the Leads.
- Record ID– Let the agent decide which record Id to assign to this field based on the record response from Salesforce.
- AI Description: “This field is the id from the Get Records response of SALESFORCE. Insert the correct one.”
- Fields– To our new record in our Salesforce table we added this field. Choose the desired fields that you want to apply to a new lead in your Salesforce table.
Send Email #
Choose the Send Email activity from Gmail.
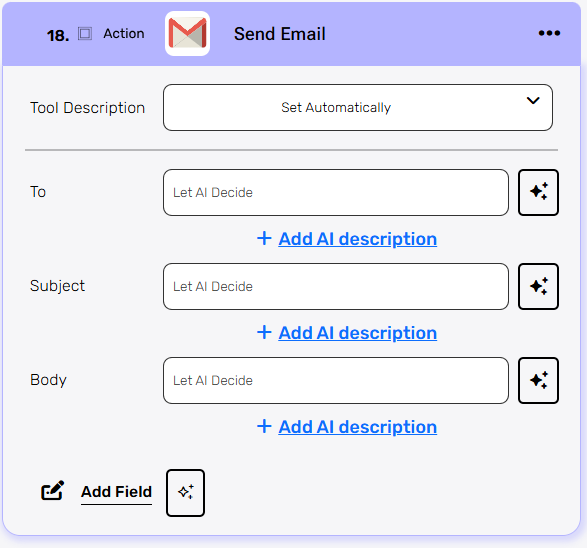
- Tool Description– For this tutorial, leave the Set Automatically option, what means without description for the agent.
- To– You have two options:
- Let the agent decide which mail address to assign to this field based on the item response from Monday.
- AI Description: “Insert the mail address from the get item of monday”.
- Accurate Prompt / System Message – A well written prompt or system message can replace the AI Description and guide the Agent’s decisions automatically.
- Let the agent decide which mail address to assign to this field based on the item response from Monday.
- Subject– You have two options:
- Let the agent decide the subject according to conclusion of the process.
- AI Description: “According to the prompt add the correct subject. Feel free to fill here.”
- Accurate Prompt / System Message– A clear and accurate prompt or system message can replace this description and guide the Agent to generate the correct subject automatically.
- Let the agent decide the subject according to conclusion of the process.
- Body– You have two options:
- Let the agent decide the body text according to conclusion of the process.
- AI Description: “After completing the Salesforce action, send an email via Gmail to the lead. If a record was created: Let the lead know their details were received successfully and that they’re officially on the radar. If a record was updated: Confirm that their information was refreshed and everything is up to date. Skip sending the email if no email address is available”.
- Accurate Prompt / System Message– When the prompt or system message precisely defines the behavior and messaging rules, there is no need to add an AI Description here—the Agent will generate the appropriate email content on its own.
- Let the agent decide the body text according to conclusion of the process.
- Add Field– For this tutorial you won’t need another field.
Output #
At the end of the run, the workflow completes successfully.
The AI Agent is triggered by a new item created in Monday, retrieves the lead details, checks Salesforce to see whether the lead already exists, and then either identifies an existing lead or creates a new one. Based on the result, an automatic email is sent to the lead with a message that matches the situation.
A new record was created in Salesforce.
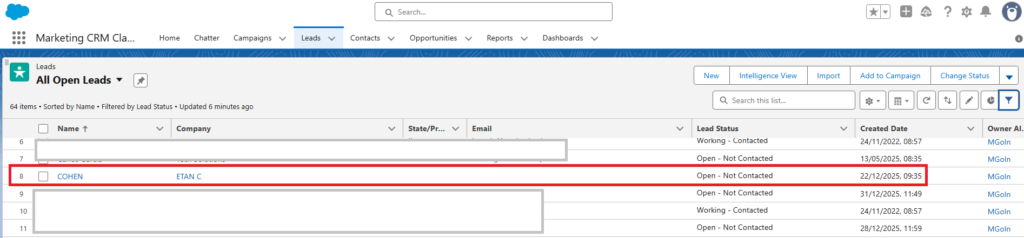
The mail was sent to the right addrerss:
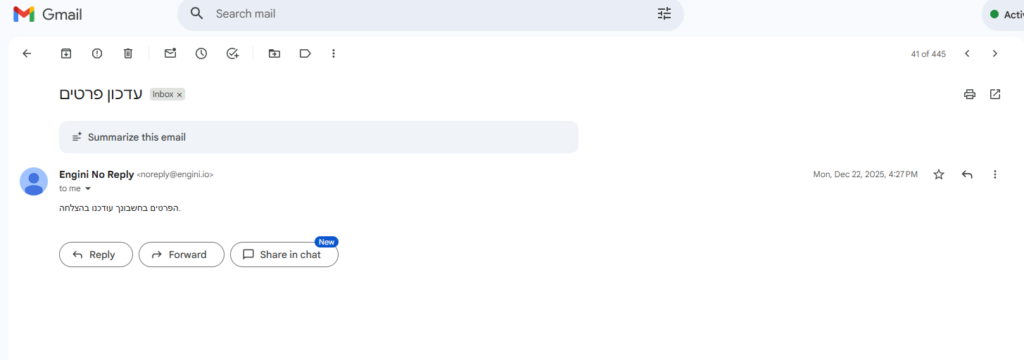


.png)