Perform a collection process using Engini by combining Priority and Monday. This guide will guide you through the smooth setup process, enabling efficient collection management.
Prerequisites #
- Connection between Engini and Priority.
Learn how to connect priority to Engini - Connection between Engini and Monday.
Learn how to connect monday.com to Engini
First Step – Trigger #
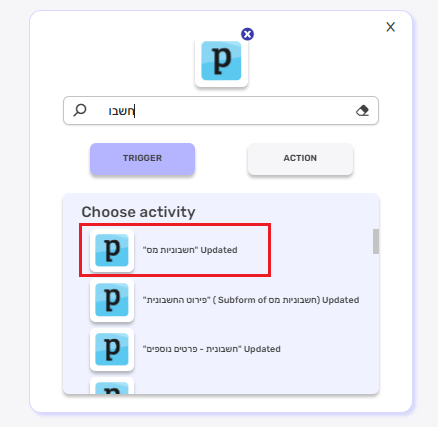
- Open a new activity and choose “updated “חשבונית מס”” trigger of priority.

- Copy the provided url and create a new webhook in Priority “Webhook Definitions” form in the following path – System Management > System Maintenance > Periodic Maintenance > BPM Maintenance > Webhook Definitions and paste the URL in the “URL” field.
- Add a new rule to send a webhook using the invoices BPM (defined only on statuses) / Business Rules (can be defined on any field in the invoices form).
- Name the business rule (only English characters are supported).
- Add the form fields that will be sent in the webhook body when triggered in the business rule body.
- Define the conditions in which the business rule will send the webhook.
- Define the user / user’s group and company/ies in which the business rule will send the webhook.
- Save the business rule.
- Back in Engini, click on the “next step” button.
Second Step – Get item #
- Choose the “get item”חשבונית מס”” activity of priority.

- Fill the empty fields due to next steps:

- חשבונית –
- Click on the empty field to choose the number of the invoices.
- Choose from the tooltip the invoice.

- חיוב/זיכוי –
- Click on the empty field and write: ‘D’
- סוג –
- Click on the empty field and write: ‘A
- חשבונית –
- The final display of the activity is:

Third Step – Create item #
- Create on monday.com the board of the invoices with all the fields you want to fill.
An example for invoices board on monday: - Choose the “Create item” activity of monday.

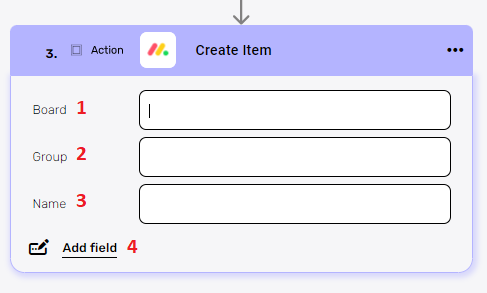
- Fill the empty fields due to next steps:

- Board –
- Click on the empty field to choose the board.
- Choose from the tooltip the board which related to the invoices.

- Group –
- Click on the empty field choose the group
- Choose from the tooltip the relevant group to create the invoice in.

- Name –
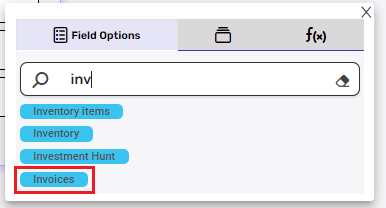
- Click on the empty field to select the name of the record that will be created on monday for the invoices.
- Choose the “Invoice” option in the tooltip to present the number of the invoice as an item on Monday.”

- Add field

By clicking the “Add field” button, you can choose how to fill in the various fields in the record of the invoice you are creating. You can add fields such as customer name, customer number, status, date and more…- Choose from the drop down the field you want to fill on invoices board.
- Click on the empty field to the right of the drop down to be shown the tooltip.
Note that the value you choose is from the Action and not from the Trigger.
- Choose the value that corresponds to the field you selected.
- Repeat steps (i-iii) for all the fields you want to populate.

- Board –
Fourth Step – Save the workflow #
- When you’re done editing your workflow, click the save icon on the top bar.

Final Step – Run the Process #
Create the invoice on priority to create the invoice on monday.
To see the workflow run history visit our guide.


.png)