In this section, we will delve into the homepage for a specific workflow, which serves as a hub for all the relevant information and tools associated with that workflow. From accessing essential details about the workflow to making edits using the Workflow Editor, this page offers a comprehensive overview and control center for managing your workflow.

Workflow Details Tile #
This block provides access to relevant data related to the selected workflow.

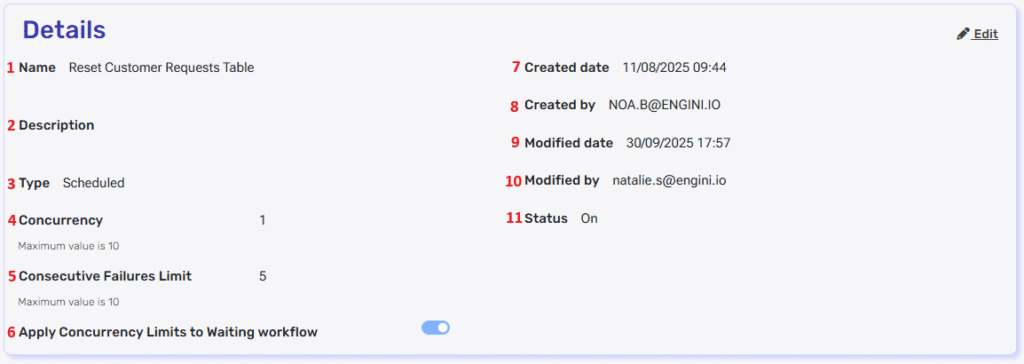
- Name
The name of the workflow.
By default, each new workflow is assigned the name “new workflow”. You can choose to edit the workflow name within the workflow details page itself or through the details tile. In order to edit the name of the workflow through the details tile, click on the edit button and edit the name. After editing the name don’t forget to click on the save button.
- Description
The description of the workflow.
By default, each new workflow has no description. You can add a description to the workflow by clicking on the edit button and edit the name. After you finish editing, don’t forget to click on the save button. - Type
There are 3 types of workflows:- Instant – A workflow that starts with the Engini “button” trigger. There is no external or scheduled trigger.
- Scheduled – Scheduled workflow. It’s a workflow that starts with the “Schedule” trigger of Engini. This trigger enables the user to define specific time intervals in which the workflow starts to run.
- Automated -A workflow that is triggered by external triggers.
- Concurrency
Defines how many runs of the workflow can execute at the same time.- Concurrency = 1
Only one run of the workflow can execute at any given time.
If another trigger event occurs while the workflow is running, it will wait until the current run is completed.
- Concurrency = 1
- Consecutive Failures Limit
The maximum number of consecutive failed runs allowed before the system takes action, such as blocking the workflow. - Apply Concurrency Limits to Waiting workflow
When this option is enabled, the concurrency limit also applies to workflows that are already in a waiting state. - Created date
The date and time of creation of the workflow - Created by
The email of the user who created the workflow. - Modified date
The date and time the workflow was last modified. - Modified by
The email of the user who last edited the workflow. - Status
There are two types of status:- On – workflow is active
- Off – workflow is inactive.
Workflow History Tile #
This tile shows everything related to workflow from the last 30 days including any editing done to the workflow. The tile includes the following:

You can sort the workflows by clicking on the filter icon located on the right side of the relevant column and entering the data in the next window that opens:

Workflow Selection Column #
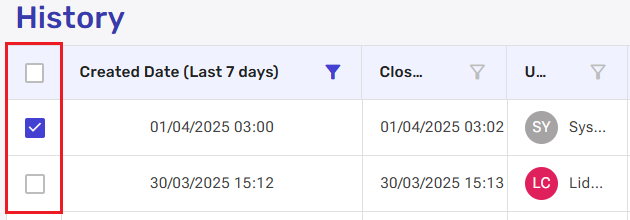
Using the selection column, you can choose multiple workflows by checking them individually or select all by checking the top box.

After making your selection, a small window will appear in the bottom right corner of the screen, indicating the number of selected workflows and a ‘re-run’ button that allows you to run them again.

Created Date #

Displays the date and time each workflow record was initially created, indicating when execution began. After clicking the filter button, you can filter workflow records based on their start time, using predefined time ranges, such as the last 1 hour, 24 hours, 7 days, or 30 days, or by defining a custom range.
Closed Date #

Displays the date and time each workflow record was completed, showing when execution finished. After clicking the filter button, you can filter workflow records based on their completion date, selecting from predefined time ranges, such as the last 1 hour, 24 hours, 7 days, 30 days, or define a custom range.
User
 #
#
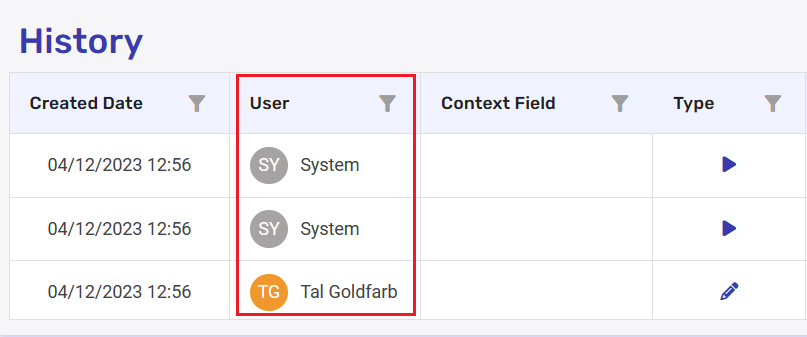
The email of the user who did the last action on the workflow. If system is listed as the user, this means that this is a run that is automatically done by the system following an automated / scheduled trigger.
Context field #
A field that can be populated at runtime. The value received in the field can be seen in the history table and thus allow the user to easily identify which run history to open. Click here to learn more about the context field.
- Only relevant to “run” type history records.
Type
 #
#
There are two types of history record: Run and Edit.
A history record of type “Run” will be recognized by the icon:![]()
In a “run” type record, it will be possible to view the run log by clicking on the “details” button.
A history record of type “Edit” will be recognized by the icon:![]()
Status
 #
#
The status of the workflow. There are six types of statuses:
- Worlflow Edited – A status that appears when the workflow has been modified.
- Fell By Condition – A status that appears when the workflow run failed due to specific conditions.
- Running – A status that appears when the workflow is running.
- Success – A status that appears when the workflow ran successfully.
- Turned on- A status that appears when the user has turned on the workflow.
- Turned off- A status that appears when the user has turned off the workflow.
- Stopped – A status that appears when the user has stopped the workflow run.
- Failure- A status that appears when the workflow run failed.
Duration
 #
#
The time it took for the workflow to run from start to finish.
- Only relevant to “Run” type history records.
Activities
 #
#
The number of activities performed until the run completed successfully or failed or fell by condition.
- Only relevant to “Run” type history records.
Data transferred
 #
#
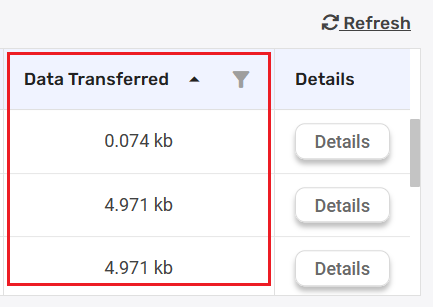
The size of data that has been transferred during the workflow run.
- Only relevant to “Run” type history records.
Details
 #
#
You can view the history run log, which activities has failed or succeeded. The “details” button navigates to the run log.
- Only relevant to “Run” type history records.
Export to CSV #
You can export the desired workflows to a CSV file.
The workflows can be exported to CSV according to the selected sort.
Pay attention! You can export up to 50 thousand workflows.
Refresh #
You can click refresh to view the current status.
Replace a Connection
 #
#
You have the flexibility to replace a connection within a workflow with another available connection. This simple process allows you to switch connections for all workflow’s activities associated with that particular system.
- Click on the three dots next to the specific connection you wish to change within the workflow.
- From the window that appears, press “Replace Connection”.

- A ‘Replace Connection’ window will open, displaying a dropdown list of available connections.

- Click on the small arrow to open the dropdown and select the desired connection you want to replace the current one with.
- Once the new connection is chosen, click ‘Save’ to implement the replacement.


.png)